1.How to Login into the Application:

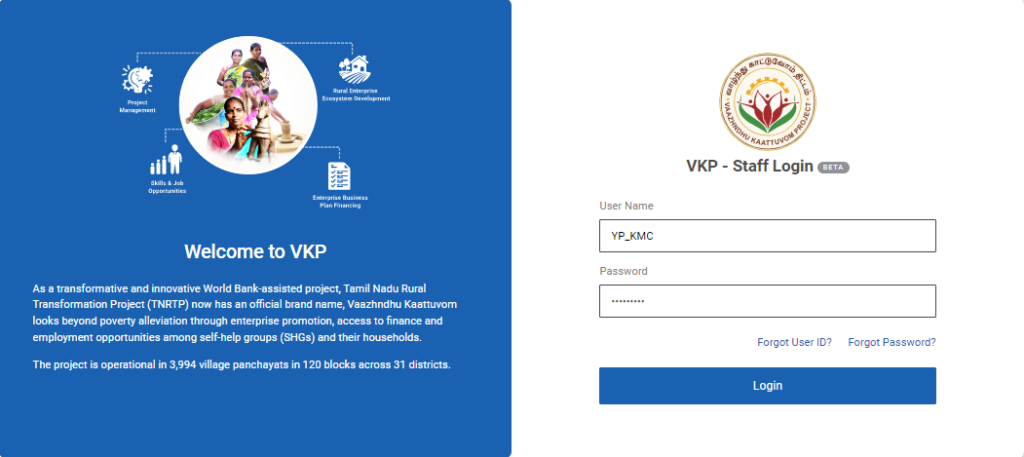
Step 1 : Log in with the YP KMR’s username and password and click ‘Login’

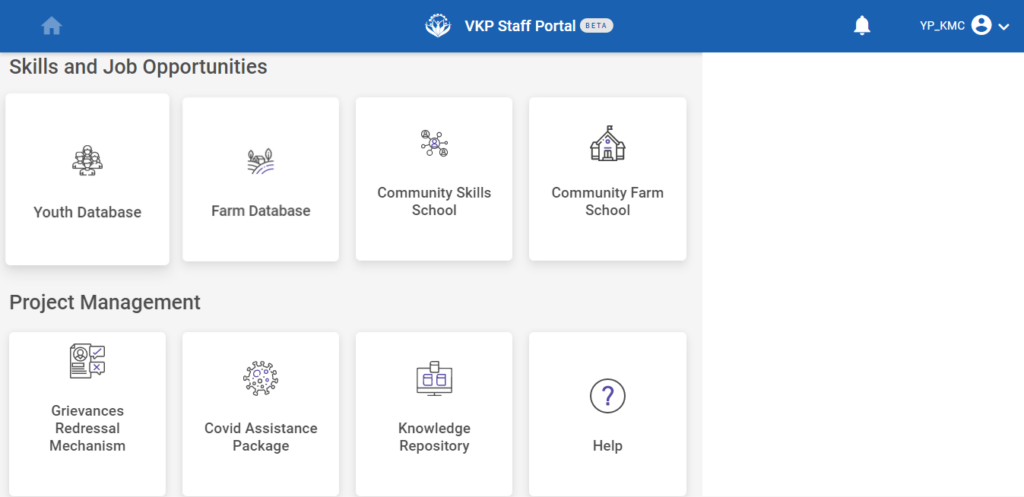
Step 2 : After logging in to the VKP staff portal, select the module name
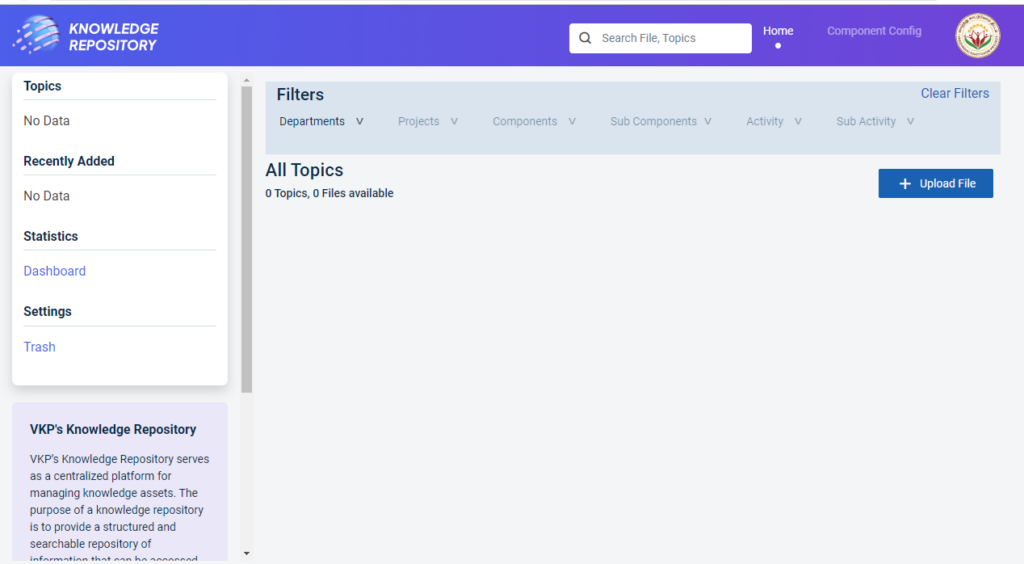
Step 3 : After selecting the Knowledge Management Repository, the user will be redirected to the respective home page

Step 4 : When logged in, it will be redirected to the respective KMR dashboard page
2.How to Add the Level1 Component Configuration (Department):

Step 1 :Log in with the YP KMR’s username and password and click ‘Login’

Step 2 : After logging in to the VKP staff portal, select the module name
Step 3 : After selecting the Knowledge Management Repository, the user will be redirected to the respective home page

Step 4 : When logged in, it will be redirected to the respective KMR dashboard page
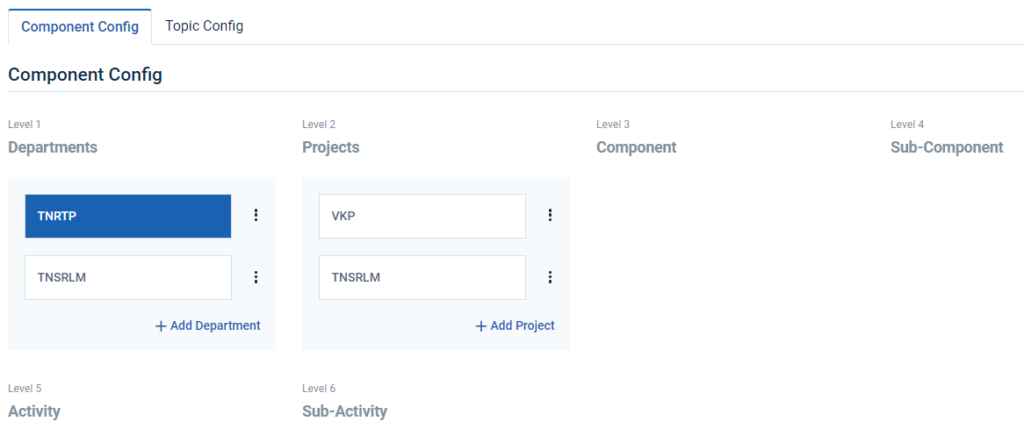
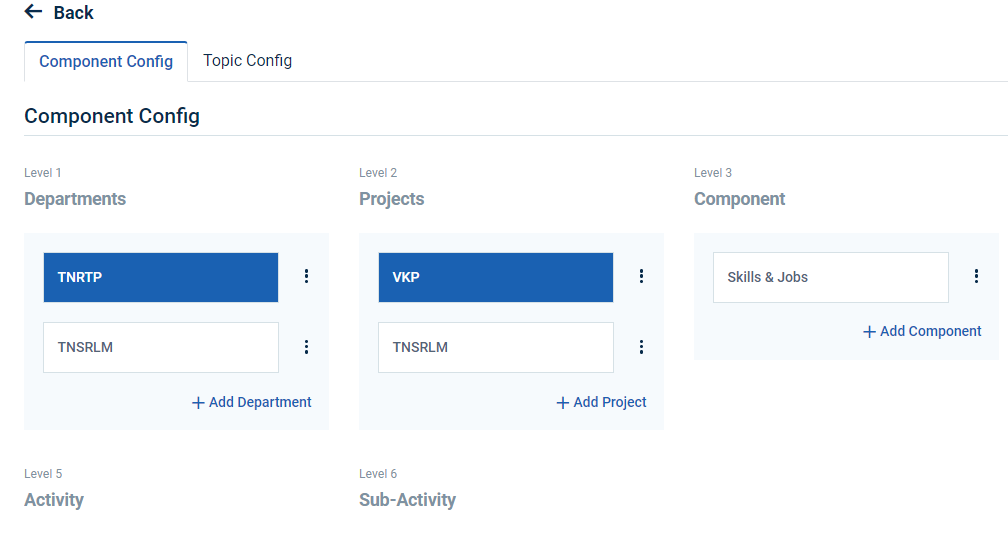
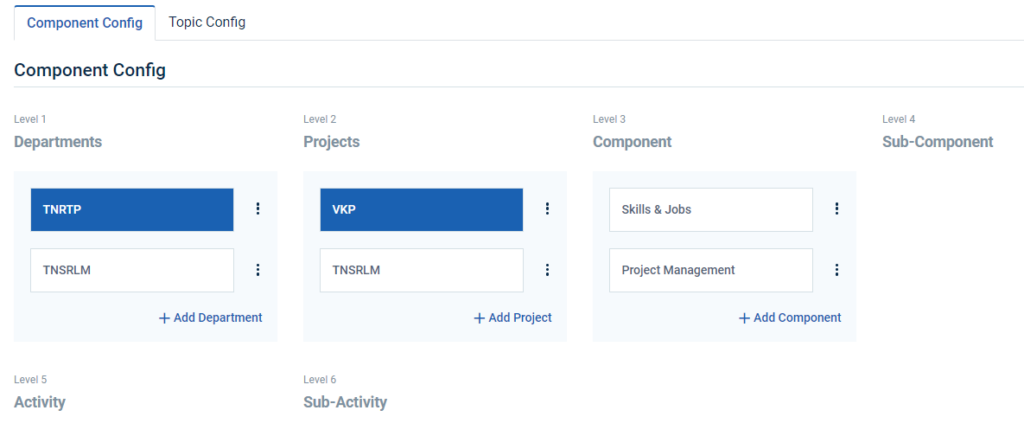
Step 5 : Click ‘Component Config’ to create the new components and it will get Component Config page
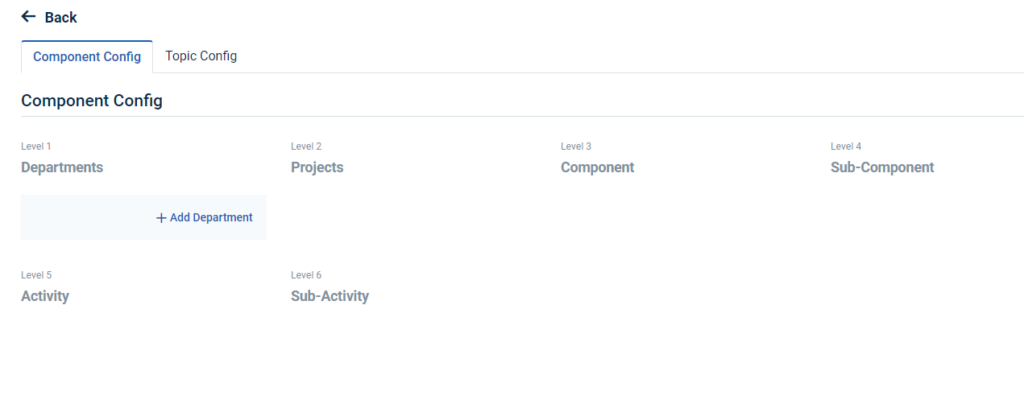
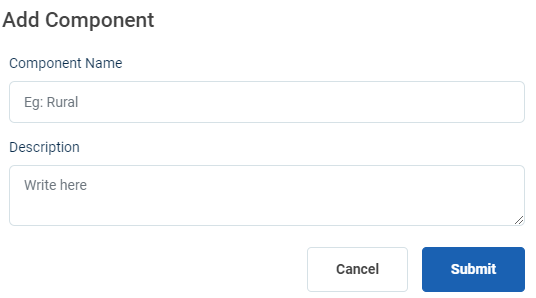
Step 6 : Click ‘Add Department’ to create the add new department
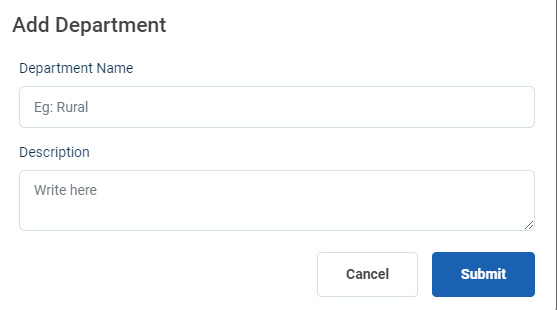
Step 7 : Department Name : Enter the department name under the department name section
Step 8 : Description : Enter the department description under the description section
Step 9 : Click ‘Submit’ to add the department in detail
Step 10 : Once the YP is submitted, the component name will get added successfully.
Step 11 : To add more departments click ‘Add Department’.
3.How to Edit & Delete the Level1 Component Configuration (Department):

Step 1 :Log in with the YP KMR’s username and password and click ‘Login’

Step 2 : After logging in to the VKP staff portal, select the module name
Step 3 : After selecting the Knowledge Management Repository, the user will be redirected to the respective home page

Step 4 : When logged in, it will be redirected to the respective KMR dashboard page
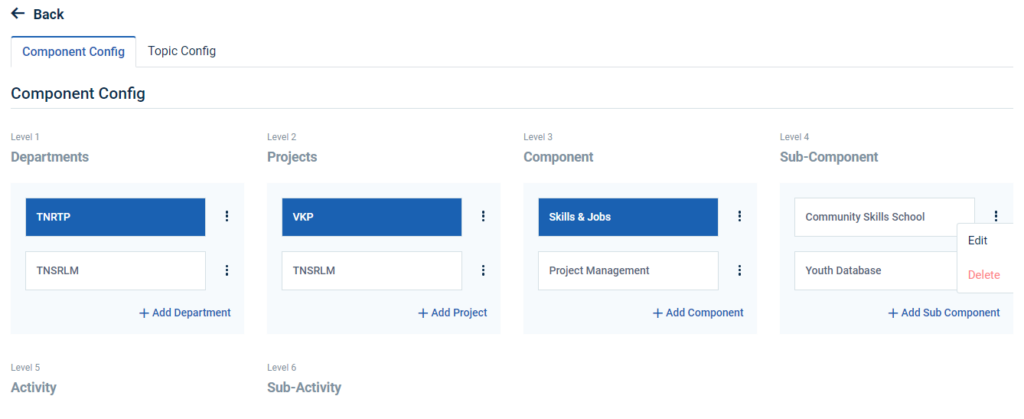
Step 5 : Click ‘Component Config’ to create the new department and it will get Component Config page

Step 5 : Click the dropdown to choose whether edit or delete the department
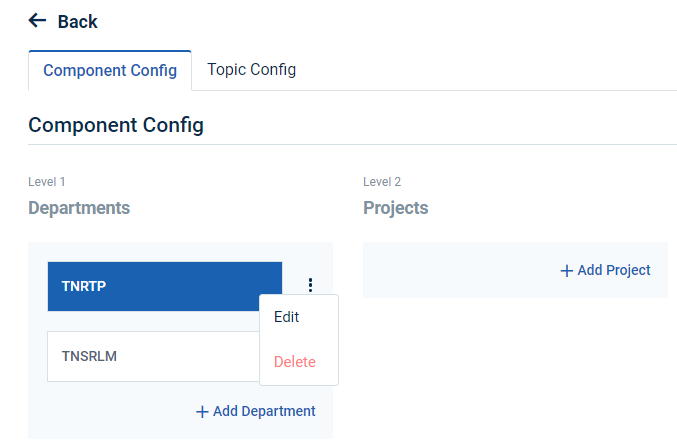
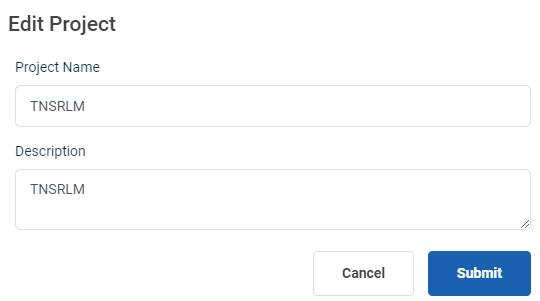
Step 6 : To edit the department details click ‘Edit’ and the edit department popup will appear
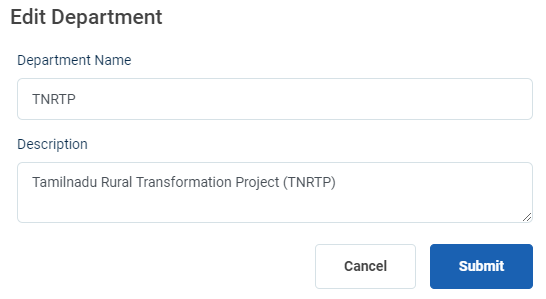
Step 7 : Update the changes and click ‘Submit’ the changes will be updated successfully
Step 8 : To delete the configuration click ‘Delete’ and the delete component popup will appear click ‘Yes Delete’ to delete the component

Step 9 : Once you click ‘Yes Delete’ the configuration and the toast message will be ‘Deleted Successfully’.

4.How to Add the Level2 Component Configuration (Projects):

Step 1 :Log in with the YP KMR’s username and password and click ‘Login’

Step 2 : After logging in to the VKP staff portal, select the module name
Step 3 : After selecting the Knowledge Management Repository, the user will be redirected to the respective home page
Step 4 : When logged in, it will be redirected to the respective KMR dashboard page
Step 5 : Click ‘Component Config’ to create the new components and it will get Component Config page
Step 6: The YP staff can view the list of department details that has been added in the department tab
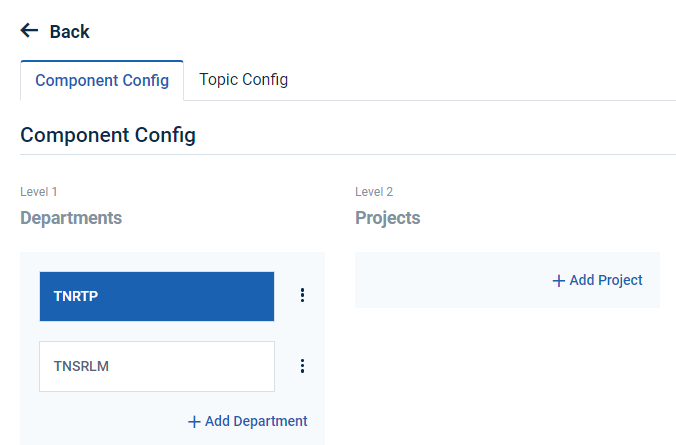
Step 7: To add the projects, Select the name of the project and click ‘Add Project’
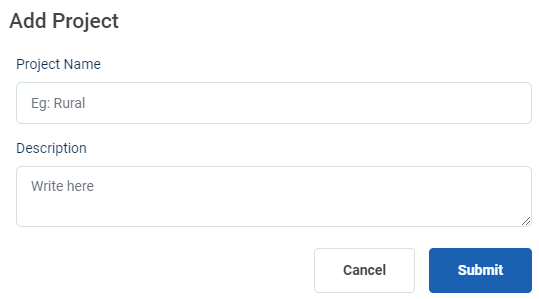
Step 8 : Project Name : Enter the project name under the project name section
Step 9 : Description : Enter the department description under the description section
Step 10 : Click ‘Submit’ to add the department in detail
Step 11 : Once the YP is submitted, the project’s name will get added successfully under the respective department.
Step 12 : To add more departments click ‘Add Project’.
5.How to Edit & Delete the Level2 Sub Component Configuration (Projects):

Step 1 : Log in with the YP KMR’s username and password and click ‘Login’

Step 2 : After logging in to the VKP staff portal, select the module name
Step 3 : After selecting the Knowledge Management Repository, the user will be redirected to the respective home page

Step 4 : When logged in, it will be redirected to the respective KMR dashboard page
Step 5 : Click ‘Component Config’ to view the components details and it will get Component Config page
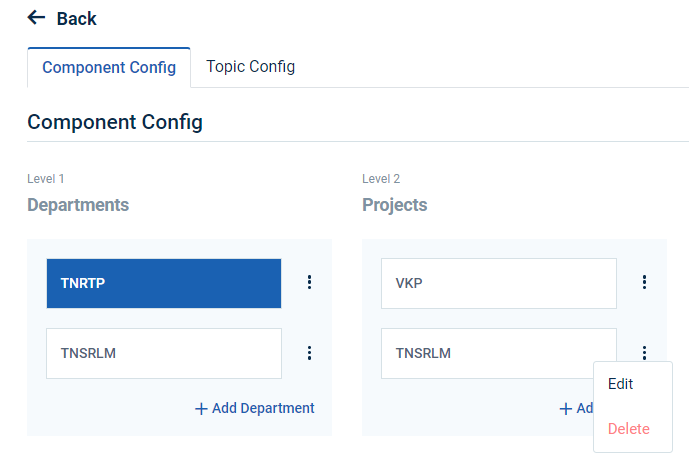
Step 5 : Click the dropdown to choose whether edit or delete the projects
Step 6 : To edit the project details click ‘Edit’ and the edit component popup will appear
Step 7 : Update the changes and click ‘Submit’ the changes will be updated successfully

Step 8 : To delete the project click ‘Delete’ and the delete project popup will appear click ‘Yes Delete’ to delete the project
Step 9 : Once you click ‘Yes Delete’ the project will be deleted successfully.
6.How to Add the Level3 Component Configuration (Component):

Step 1 :Log in with the YP KMR’s username and password and click ‘Login’
Step 2 : After logging in to the VKP staff portal, select the module name
Step 3 : After selecting the Knowledge Management Repository, the user will be redirected to the respective home page

Step 4 : When logged in, it will be redirected to the respective KMR dashboard page
Step 5 : Click ‘Component Config’ to create the new components and it will get Component Config page
Step 6: The YP staff can view the list of component details that has been added in the respective projects tab
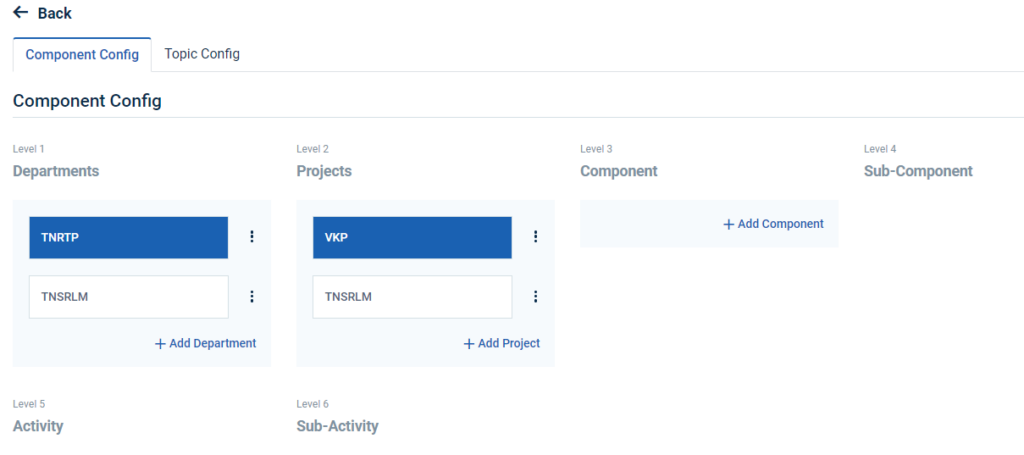
Step 7: To add the component, Select the name of the project and click ‘Add Component’
Step 8 : Component Name : Enter the component name under the component name section
Step 9 : Description : Enter the department description under the description section
Step 10 : Click ‘Submit’ to add the department in detail
Step 11 : Once the YP is submitted, the component name will get added successfully under the respective projects.
Step 12 : To add more components click ‘Add Component’.
7.How to Edit & Delete the Level3 Component Configuration (Component):

Step 1 : Log in with the YP KMR’s username and password and click ‘Login’

Step 2 : After logging in to the VKP staff portal, select the module name
Step 3 : After selecting the Knowledge Management Repository, the user will be redirected to the respective home page

Step 4 : When logged in, it will be redirected to the respective KMR dashboard page
Step 5 : Click ‘Component Config’ to view the components details and it will get Component Config page
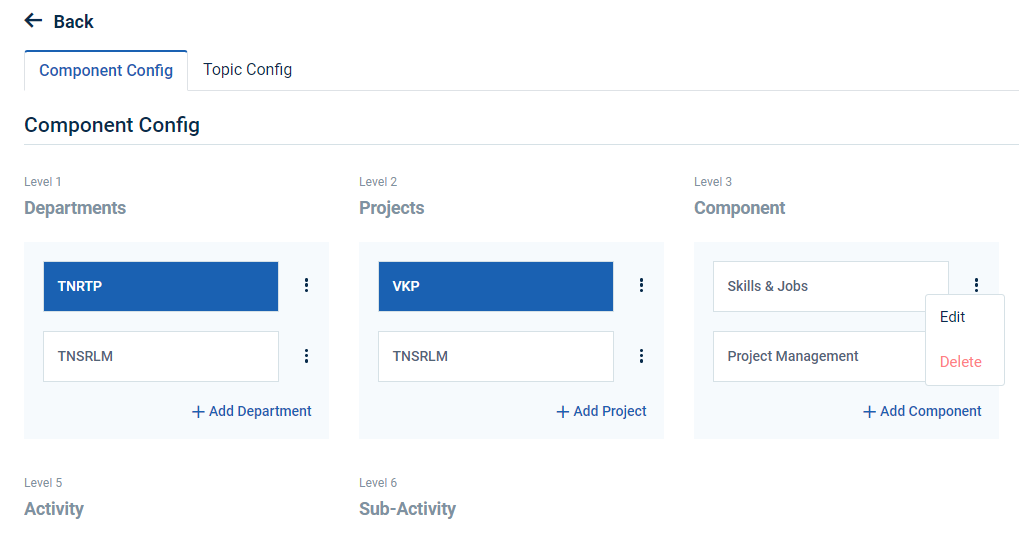
Step 5 : Click the dropdown to choose whether edit or delete the component
Step 6 : To edit the component details click ‘Edit’ and the edit component popup will appear
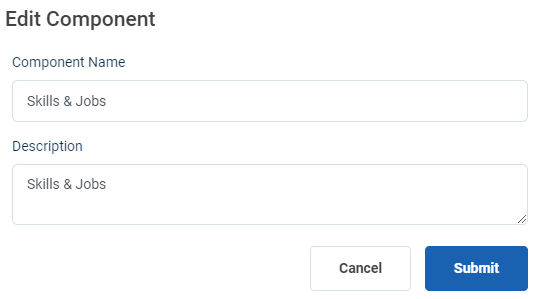
Step 7 : Update the changes and click ‘Submit’ the changes will be updated successfully

Step 8 : To delete the project click ‘Delete’ and the delete component popup will appear click ‘Yes Delete’ to delete the component
Step 9 : Once you click ‘Yes Delete’ the project will be deleted successfully.
8.How to Add the Level4 Component Configuration (Sub-Component):
Step 1 :Log in with the YP KMR’s username and password and click ‘Login’

Step 2 : After logging in to the VKP staff portal, select the module name
Step 3 : After selecting the Knowledge Management Repository, the user will be redirected to the respective home page

Step 4 : When logged in, it will be redirected to the respective KMR dashboard page
Step 5 : Click ‘Component Config’ to create the new sub components and it will get Component Config page
Step 6: The YP staff can view the list of component details that has been added in the respective sub-components tab

Step 7: To add the sub-component, Select the name of the component and click ‘Add Sub-Component’
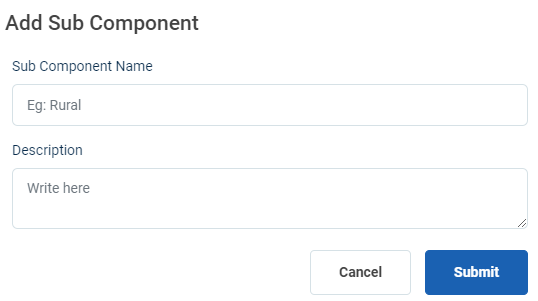
Step 8 : Sub-Component Name : Enter the sub component name under the sub component name section
Step 9 : Description : Enter the department description under the description section
Step 10 : Click ‘Submit’ to add the department in detail
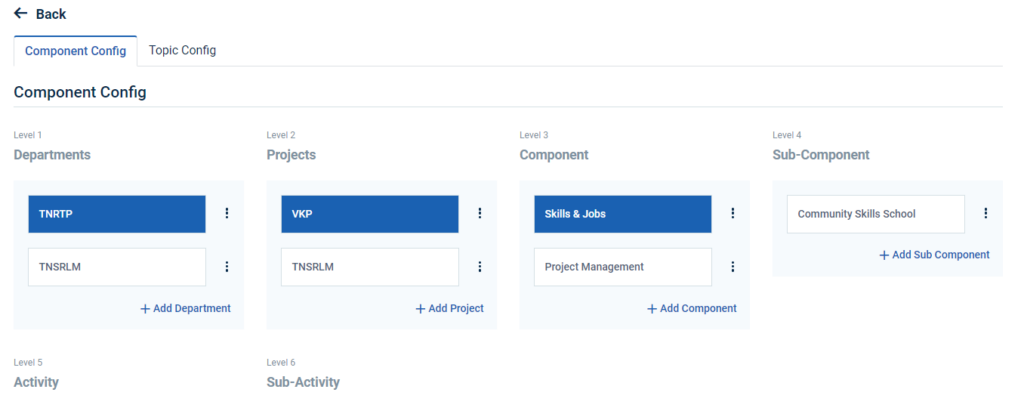
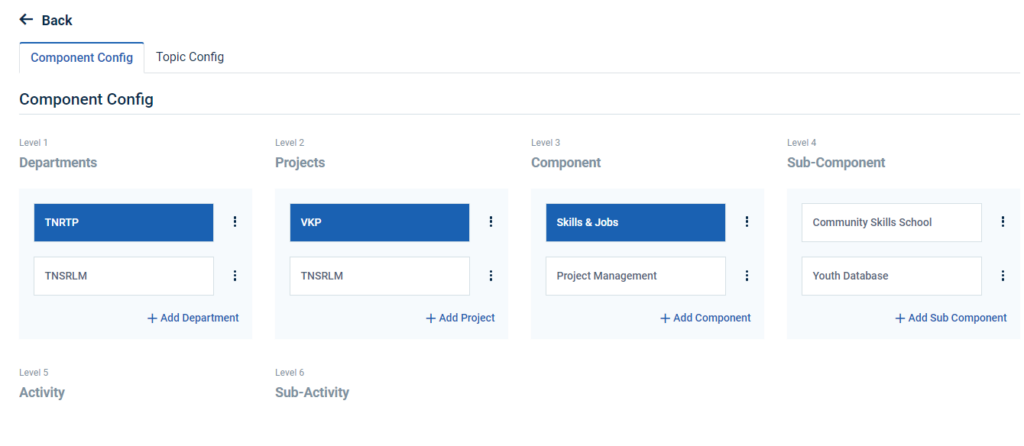
Step 11 : Once the YP is submitted, the sub-component name will get added successfully under the respective component.
Step 12 : To add more sub components click ‘Add Sub-Component’.
9.How to Edit & Delete the Level4 Component Configuration (Sub Component):

Step 1 : Log in with the YP KMR’s username and password and click ‘Login’

Step 2 : After logging in to the VKP staff portal, select the module name
Step 3 : After selecting the Knowledge Management Repository, the user will be redirected to the respective home page

Step 4 : When logged in, it will be redirected to the respective KMR dashboard page
Step 5 : Click ‘Component Config’ to view the components details and it will get Component Config page
Step 5 : Click the dropdown to choose whether edit or delete the sub component
Step 6 : To edit the sub-component details click ‘Edit’ and the edit component popup will appear
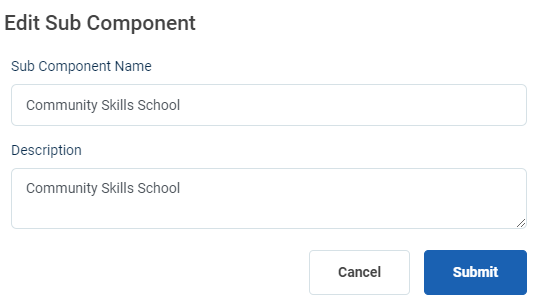
Step 7 : Update the changes and click ‘Submit’ the changes will be updated successfully
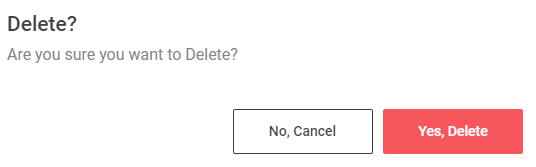
Step 8 : To delete the project click ‘Delete’ and the delete component popup will appear click ‘Yes Delete’ to delete the component
Step 9 : Once you click ‘Yes Delete’ the sub component will be deleted successfully.
10. How to Add the Level5 Component Configuration (Activity):

Step 1 :Log in with the YP KMR’s user name and password and click ‘Login’

Step 2 : After logging in to the VKP staff portal, select the module name
Step 3 : After selecting the Knowledge Management Repository, the user will be redirected to the respective home page

Step 4 : When logged in, it will be redirected to the respective KMR dashboard page
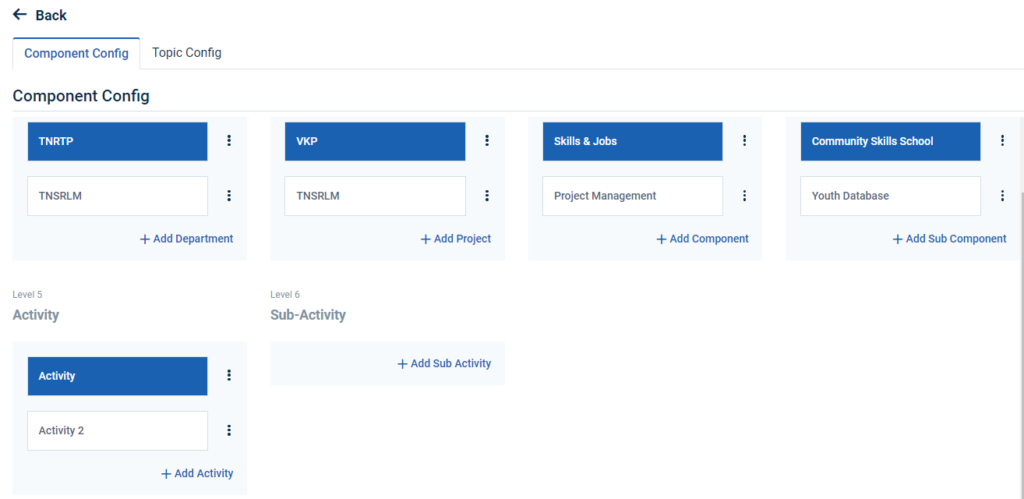
Step 5 : Click ‘Component Config’ to create the new components and it will get Component Config page
Step 6: The YP staff can view the list of component details that has been added in the respective activity tab
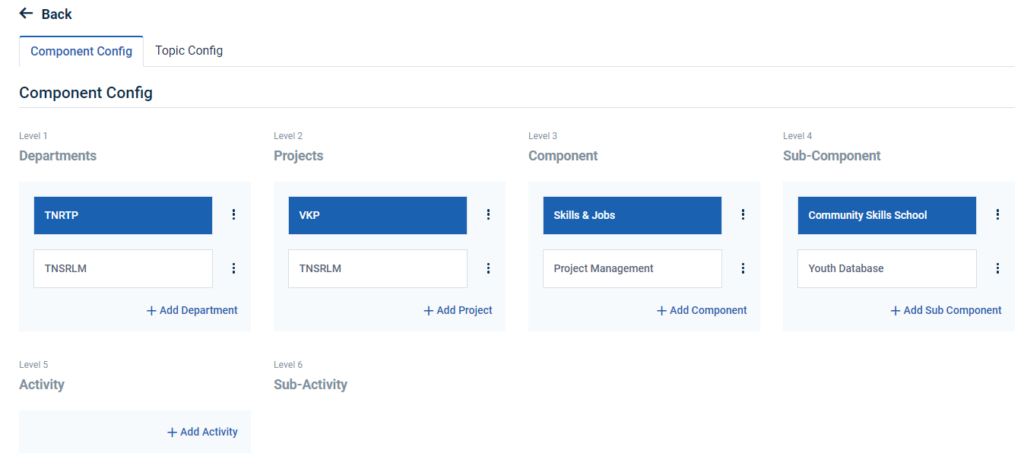
Step 7: To add the activity, Select the name of the component and click ‘Add Activity’
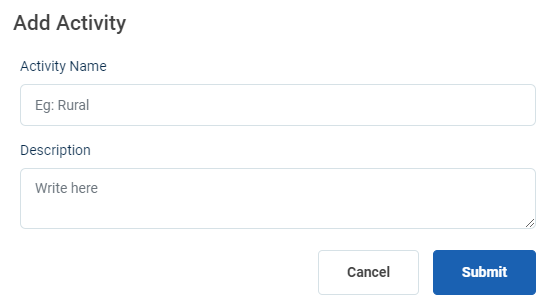
Step 8 : Activity Name : Enter the activity name under the activity name section
Step 9 : Description : Enter the activity description under the description section
Step 10 : Click ‘Submit’ to add the activity detail
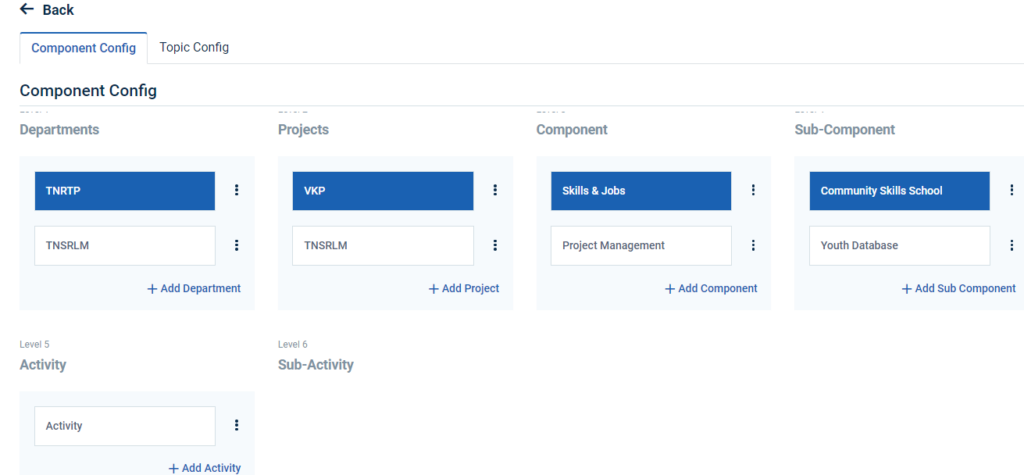
Step 11 : Once the YP is submitted, the component name will get added successfully.
Step 12 : To add more components click ‘Add Activity’.
11.How to Edit & Delete the Level5 Component Configuration (Activity):

Step 1 : Log in with the YP KMR’s username and password and click ‘Login’

Step 2 : After logging in to the VKP staff portal, select the module name
Step 3 : After selecting the Knowledge Management Repository, the user will be redirected to the respective home page

Step 4 : When logged in, it will be redirected to the respective KMR dashboard page
Step 5 : Click ‘Component Config’ to view the components details and it will get Component Config page
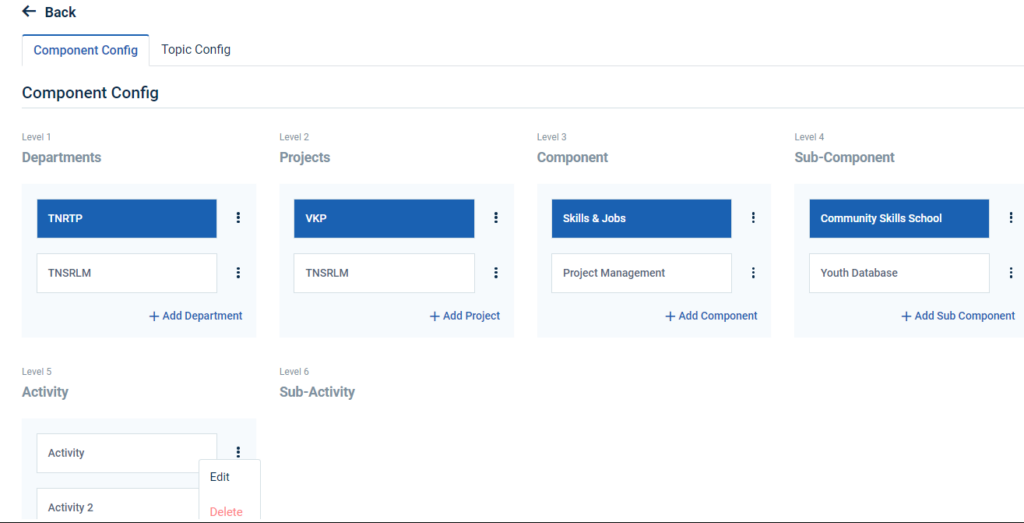
Step 5 : Click the dropdown to choose whether edit or delete the sub component
Step 6 : To edit the sub-component details click ‘Edit’ and the edit component popup will appear
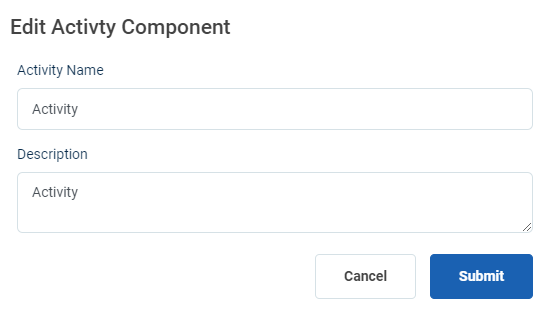
Step 7 : Update the changes and click ‘Submit’ the changes will be updated successfully
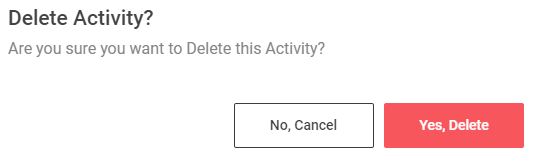
Step 8 : To delete the activity click ‘Delete’ and the delete activity popup will appear click ‘Yes Delete’ to delete the activity
Step 9 : Once you click ‘Yes Delete’ the activity will be deleted successfully.
12.How to Add the Level6 Component Configuration (Sub Activity):

Step 1 :Log in with the YP KMR’s user name and password and click ‘Login’

Step 2 : After logging in to the VKP staff portal, select the module name
Step 3 : After selecting the Knowledge Management Repository, the user will be redirected to the respective home page

Step 4 : When logged in, it will be redirected to the respective KMR dashboard page
Step 5 : Click ‘Component Config’ to create the new components and it will get Component Config page
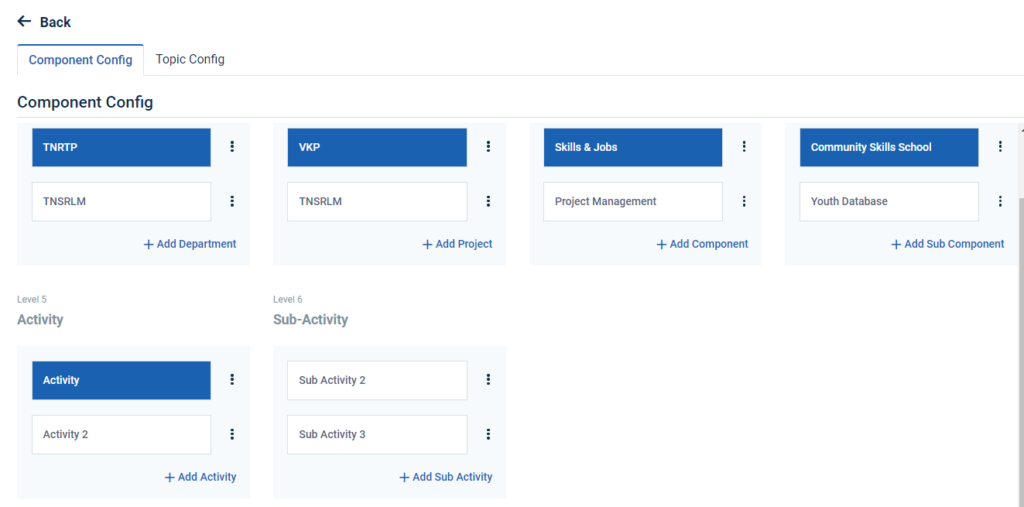
Step 6: The YP staff can view the list of component details that has been added in the respective sub activity tab
Step 7: To add the sub activity, Select the name of the component and click ‘Add Sub Activity’

Step 8 : Component Name : Enter the Sub Activity name under the sub activity name section
Step 9 : Description : Enter the sub activity description under the description section
Step 10 : Click ‘Submit’ to add the sub activity detail
Step 11 : Once the YP is submitted, the sub activity name will get added successfully.
Step 12 : To add more sub activity click ‘Add Sub Activity’.
13.How to Edit & Delete the Level6 Component Configuration (Sub Activity):

Step 1 :Log in with the YP KMR’s username and password and click ‘Login’

Step 2 : After logging in to the VKP staff portal, select the module name
Step 3 : After selecting the Knowledge Management Repository, the user will be redirected to the respective home page

Step 4 : When logged in, it will be redirected to the respective KMR dashboard page
Step 5 : Click ‘Component Config’ to view the new components and it will get Component Config page
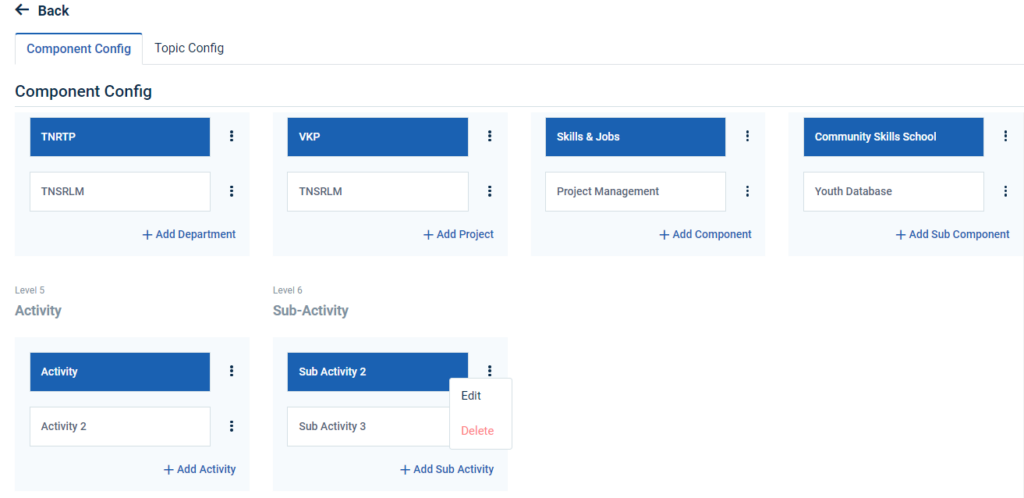
Step 5 : Click the dropdown to choose whether edit or delete the sub activity
Step 6 : To edit the sub activity details click ‘Edit’ and the edit component popup will appear
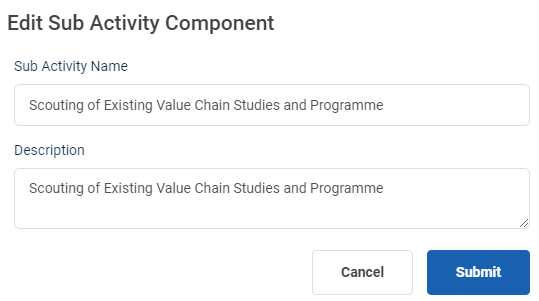
Step 7 : Update the changes and click ‘Submit’ the changes will be updated successfully
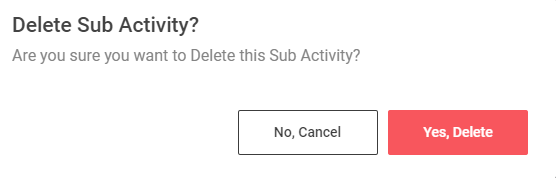
Step 8 : To delete the configuration click ‘Delete’ and the delete component popup will appear click ‘Yes Delete’ to delete the sub activity
Step 9 : Once you click ‘Yes Delete’ the configuration will be deleted successfully.
14.How to Add the Topic Configuration :

Step 1 :Log in with the YP KMR’s username and password and click ‘Login’

Step 2 : After logging in to the VKP staff portal, select the module name
Step 3 : After selecting the Knowledge Management Repository, the user will be redirected to the respective home page

Step 4 : When logged in, it will be redirected to the respective KMR dashboard page
Step 5 : Click ‘Component Config’ to create the new components and it will get Component Config page
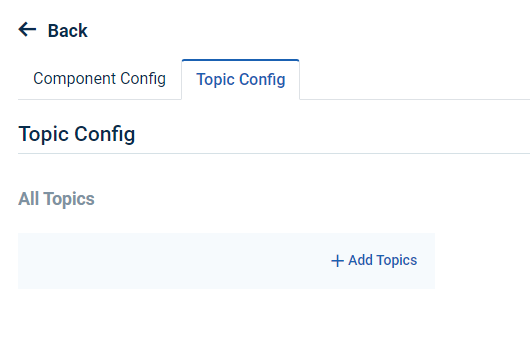
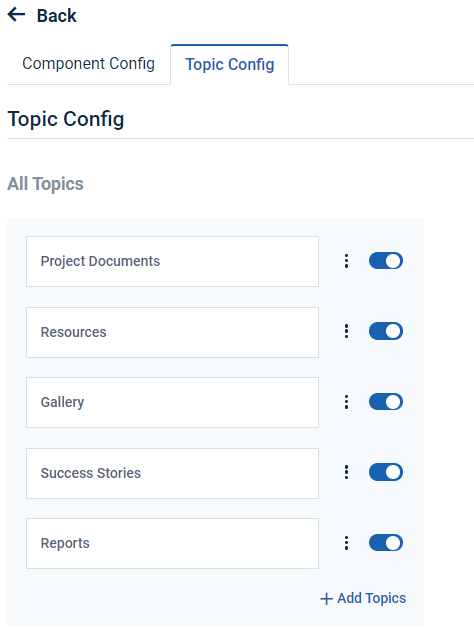
Step 6 : Click ‘Topic Config’ to create the new topics and it will get Component Config page
Step 7 : To add topics click ‘Add Topics’
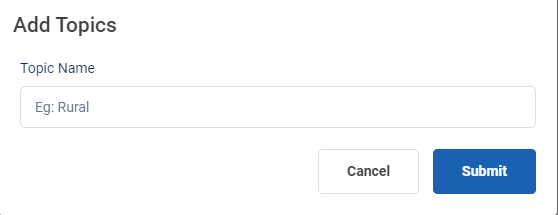
Step 8 : Enter the topic name under topic name section and click ‘Submit’
Step 8 : Once the YP submitted, the topic details will added automatically
Step 9 : To add more topics click ‘Add Topics’
15.How to Upload the File:

Step 1 :Log in with the YP KMR’s user name and password and click ‘Login’

Step 2 : After logging in to the VKP staff portal, select the module name
Step 3 : After selecting the Knowledge Management Repository, the user will be redirected to the respective home page

Step 4 : When logged in, it will be redirected to the respective KMR dashboard page
Step 5 : Click ‘Upload File’ to upload the file and it will redirect to the respective upload file page section.
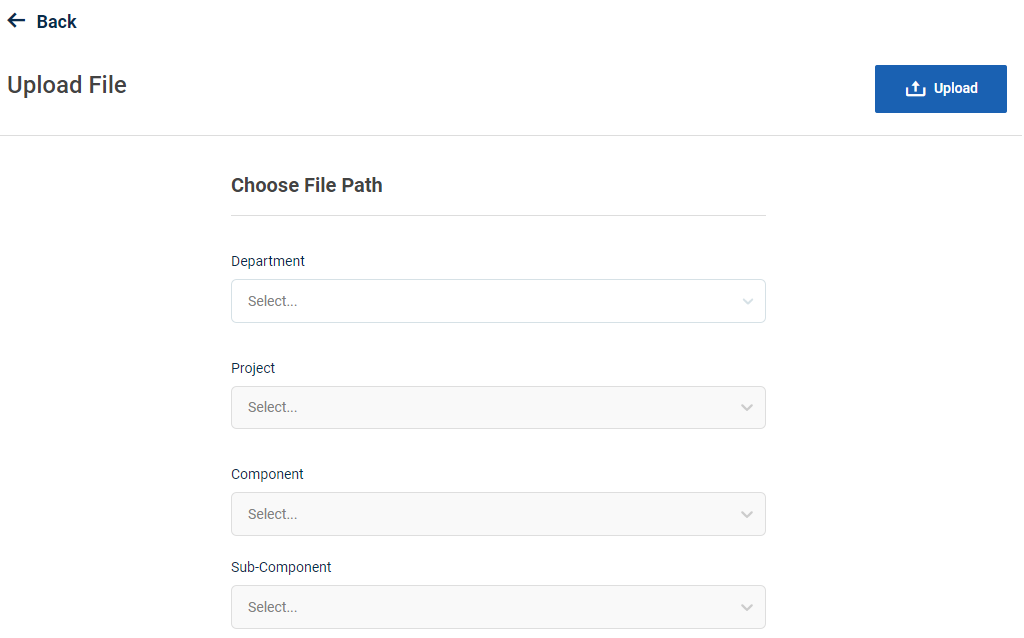
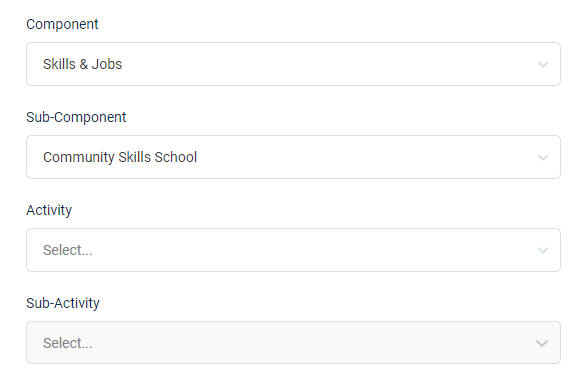
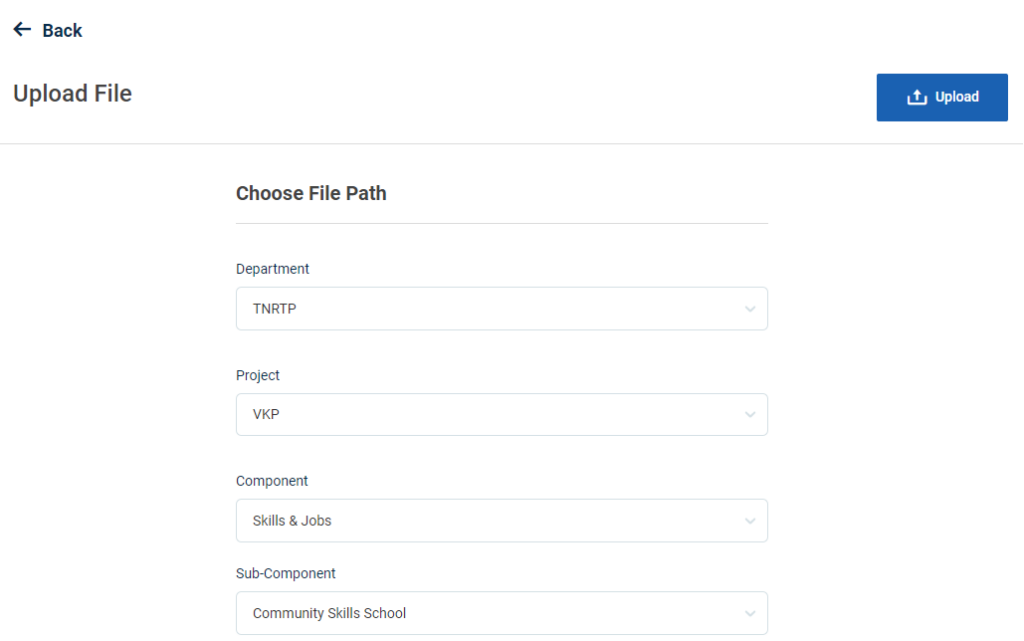
Step 6 : Choose File Path : Click the dropdown to choose the file path Department, Project, Component and subcomponent,activity & Subactivity details
Step 7 : File Info :
Step 7.1 File Name : Enter the file name
Step 7.2 Approved Date : By clicking the calendar to choose the approval date
Step 7.3 Approved By : By clicking the dropdown to choose the approved person role
Step 7.4 Uploaded By : Uploaded by details will get auto populated based on the user name
Step 7.5 Topics : By clicking the dropdown to choose the topics
Step 7.6 File Access : By clicking the dropdown to choose the file access
Step 7.7 Description : Enter the description
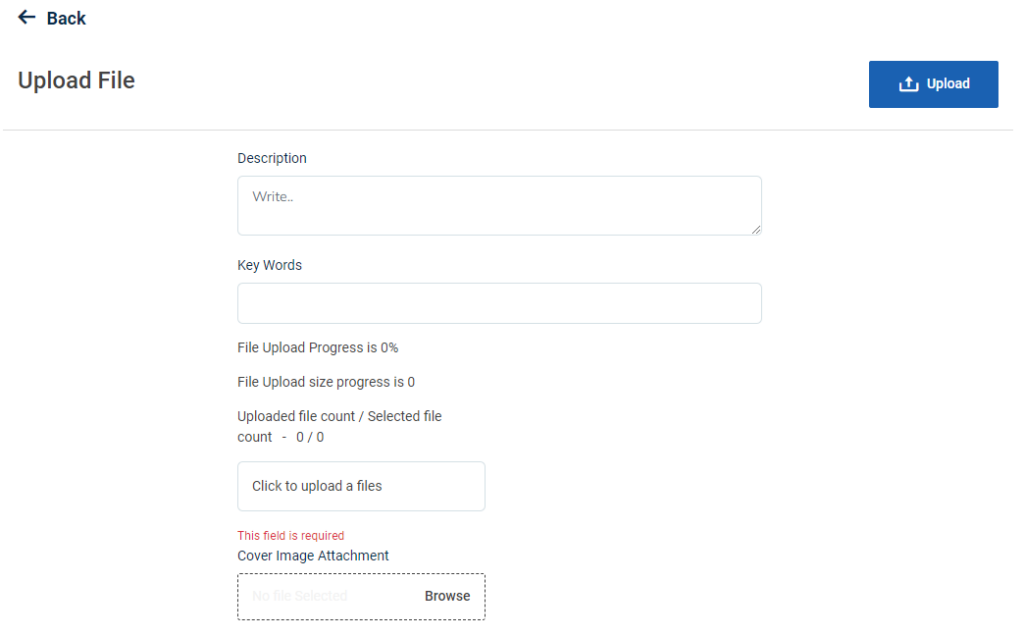
Step 7.8 Keywords : Enter the keywords
Step 7.9 Attachment : Click ‘Browse’ to upload the document
Step 7.10 Cover Image Attachment : Click ‘Browse’ to upload the cover image
Step 8 : Click ‘Upload’ to upload the file and the message like ‘Success’


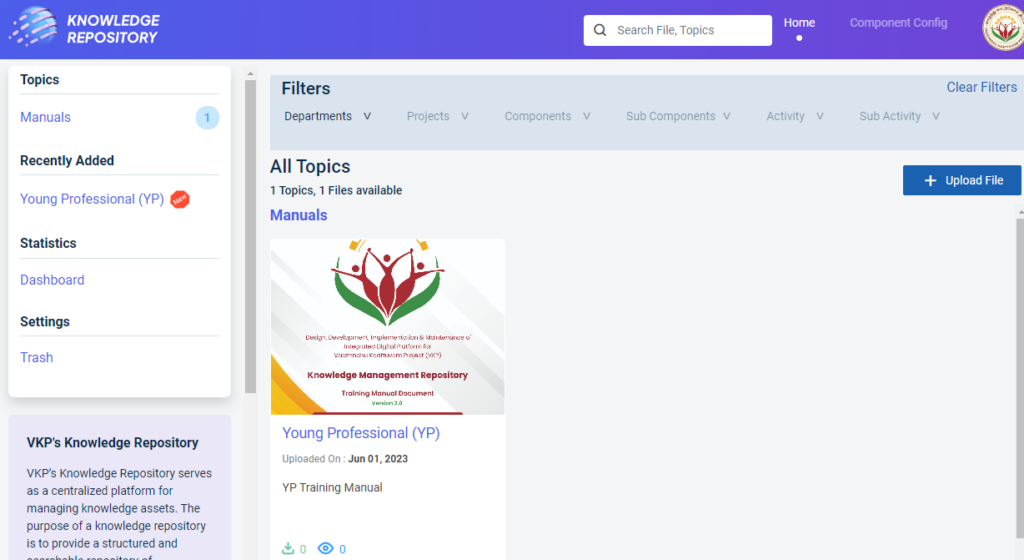
Step 9 : Once the document has been uploaded by YP, the list of documents will be displayed in the home page.
16.How to View, Edit & Delete the Uploaded File:

Step 1 :Log in with the YP KMR’s username and password and click ‘Login’

Step 2 : After logging in to the VKP staff portal, select the module name
Step 3 : After selecting the Knowledge Management Repository, the user will be redirected to the respective home page
Step 4 : When logged in, it will be redirected to the respective KMR dashboard page
Step 5 : The list of the documents that has been uploaded by YPs will be displayed in the home page
Step 6 : View : Select the uploaded document it will be redirected to the document detail page
Step 7 :Edit : Click ‘Edit’ to edit the document and it will get redirected to the Upload file page
Step 7: Update the changes and click ‘Upload’ the changes will be saved automatically and it message shows ‘Success’
Step 8: Delete : To delete the document click ‘Delete’
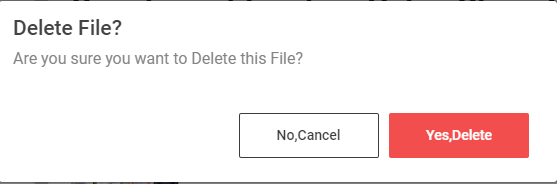
Step 9: A confirmation message will appear on the screen once the YP click ‘Yes Delete’ the file will be deleted successfully
17.How to View the Dashboard:

Step 1 :Log in with the YP KMR’s username and password and click ‘Login’

Step 2 : After logging in to the VKP staff portal, select the module name
Step 3 : After selecting the Knowledge Management Repository, the user will be redirected to the respective home page

Step 4 : When logged in, it will be redirected to the respective KMR dashboard page
Step 5 : The list of the documents that has been uploaded by YPs will be displayed in the home page
Step 6 : Under ‘Statistics’ menu click ‘Dashboard’
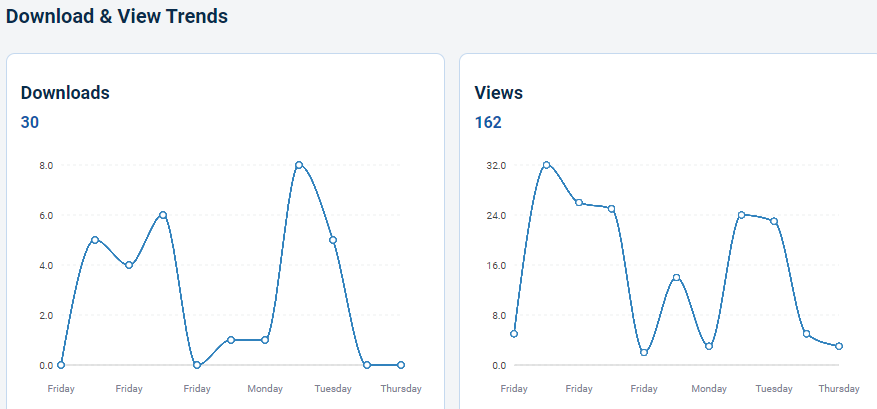

Step 7 : Under the dashboard to view the downloads
Step 8 : By choosing the districts and calendar to view the top 3 downloads and top 3 views.
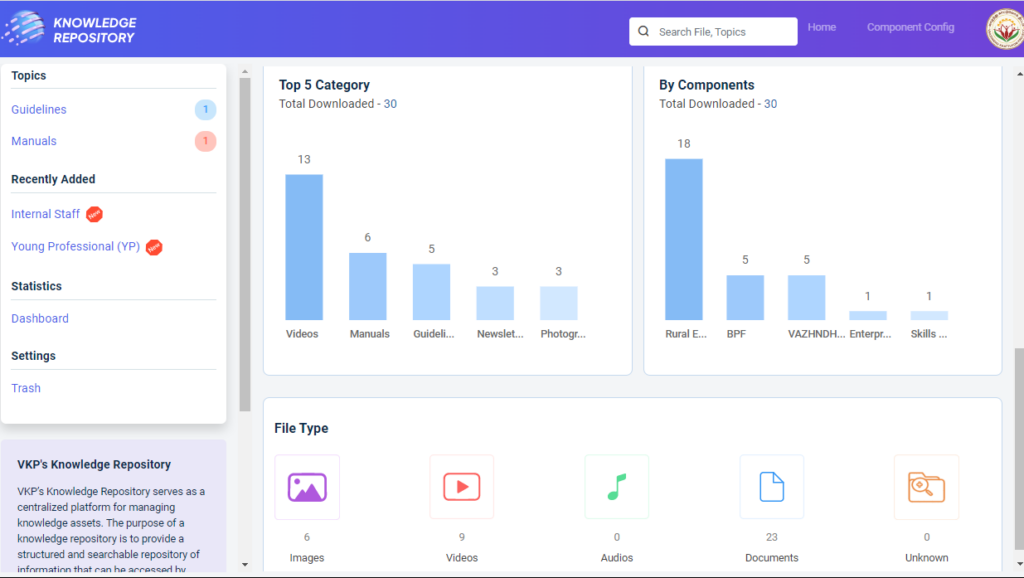
Step 9 : By choosing the districts and calendar to view the top 5 categories and by components and file type like images, videos, audios, documents and unknown.
18.How to Restore the Trash File:

Step 1 :Log in with the YP KMR’s username and password and click ‘Login’

Step 2 : After logging in to the VKP staff portal, select the module name
Step 3 : After selecting the Knowledge Management Repository, the user will be redirected to the respective home page

Step 4 : When logged in, it will be redirected to the respective KMR dashboard page
Step 5 : The list of the documents that has been uploaded by YPs will be displayed in the home page
Step 6 : Under ‘Settings’ menu click ‘Trash’ it will get redirect to the trash page
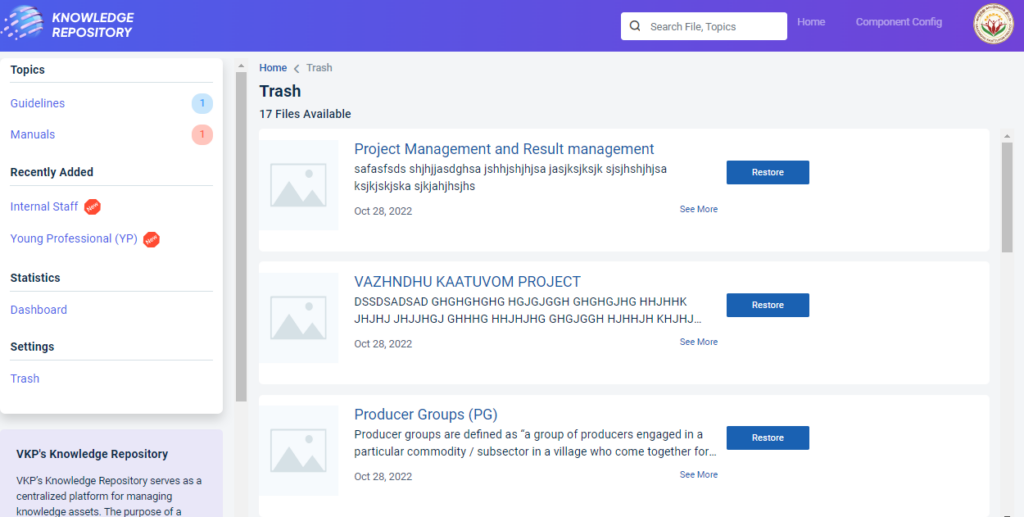
Step 7 : Click the ‘Restore’ option to restore the file from the trash and the restore file popup will appear.
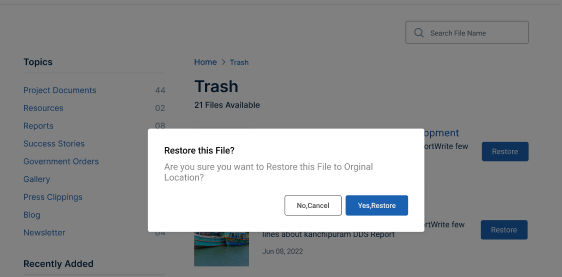
Step 8 : Click the ‘Yes Restore’ to restore the file or click ‘No Cancel’

Step 9: Once you click ‘Yes Restore’ and received the message like ‘Restored Successfully’