1. How to Login into the Application:

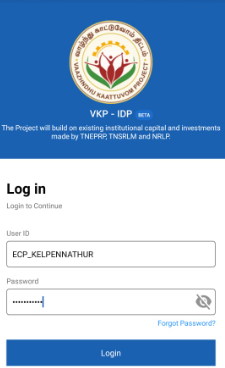
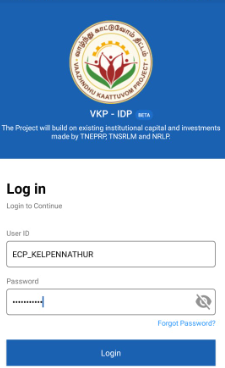
Step 1 : Launch the app, Enter your respective ECPs username and password

Step 2 : To view the password, click the show password icon and it will display
Step 3 : Click Login

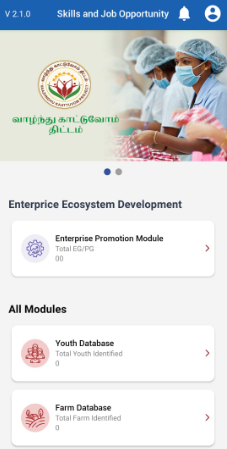
Step 4 : Following your login, a list of Enterprise Ecosystem Development modules will appear on the screen. When you select the Enterprise Promotion Module, you will be taken to the EPM home page.
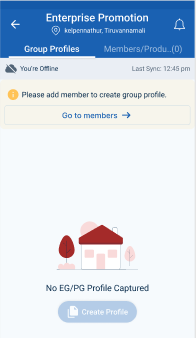
Step 5 : If the ECP has created any group profile under the group profile section it throws the message like No EG/PG Profile Captured
Step 6 : To create the member profile Go to Members
2. How to Add Producer/Member of EG:

Step 1 : Launch the app, Enter your respective ECPs username and password
Step 2 : To view the password, click the show password icon and it will display
Step 3 : Click Login

Step 4 : Following your login, a list of Enterprise Ecosystem Development modules will appear on the screen. When you select the Enterprise Promotion Module, you will be taken to the EPM home page.
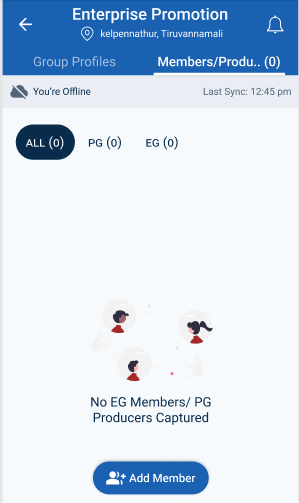
Step 5 : To create the member profile Go to Members
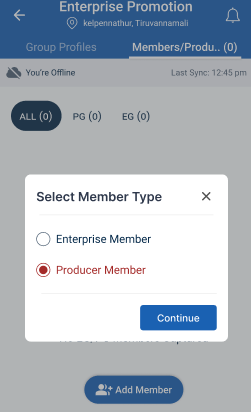
Step 6 : To add the member click Add Member icon, it will get redirected to the Select Member Type section

Step 7 : Choose the member type and click ‘Continue’ it will get redirected to the Add EG Member Details annexure page
3. How to Add Contact Details in EG Member:

Step 1 : Launch the app, Enter your respective ECPs username and password

Step 2 : To view the password, click the show password icon and it will display
Step 3 : Click Login
Step 4 : Following your login, a list of Enterprise Ecosystem Development modules will appear on the screen. When you select the Enterprise Promotion Module, you will be taken to the EPM home page.
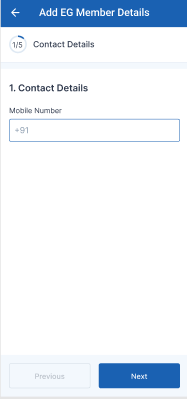
Step 5 : Once the ECP staff has selected the EG member type it will get redirected to the contact details annexure page
Step 6 : First Tab-> Contact Details : Mobile Number : Enter the mobile number under the contact details section
Step 7 : Once the details have been entered by the ECP, click ‘Next’. The information will be saved in the draft automatically
4. How to Add the Basic Details in EG Member:
Step 1 : Launch the app, Enter your respective ECPs username and password

Step 2 : To view the password, click the show password icon and it will display
Step 3 : Click Login

Step 4 : Following your login, a list of Enterprise Ecosystem Development modules will appear on the screen. When you select the Enterprise Promotion Module, you will be taken to the EPM home page.
Step 5 : Once the ECP staff has completed the contact details annexure it will get redirected to the contact details annexure page
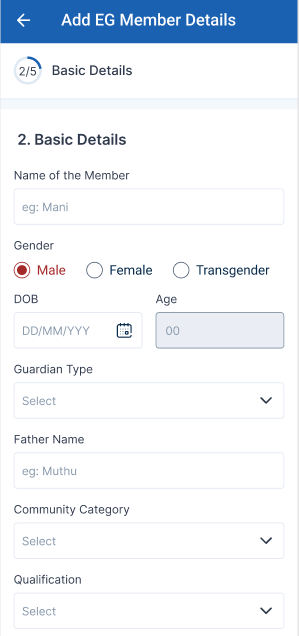
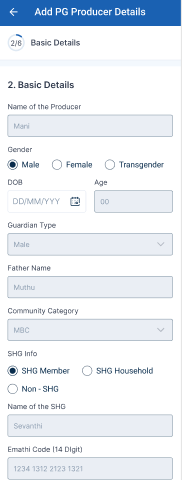
Step 6 : Second Tab -> Basic Details : Name of the Member : Enter the member name in the name of the member
Step 7 : Gender : Choose the gender type
Step 8 : Enter Date of Birth then Age will be auto populated based on DOB
Step 9 : Guardian Type : Choose the type of the guardian type in the drop down, Based on the guardian type and enter the name of the guardian name
Step 10 : Community Category : Choose the type of the community category type in the drop down.
Step 11 : Qualification : Choose the type of the qualification type in the drop down.
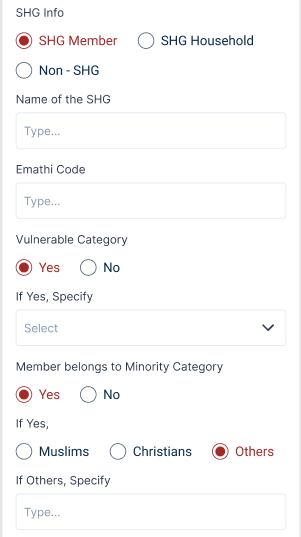
Step 12 : SHG Info : Choose the type of the SHG info, Based on the SHG info and enter the name of the SHG and eMathi code
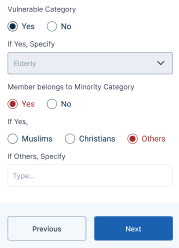
Step 13 : Vulnerable Category : Choose the vulnerable category and click ‘Yes’ to specify the category or choose ‘No’
Step 14 : Members Belongs to Minor Category : Choose if the applicant belongs to minor category and click ‘Yes’ to specify the category or choose ‘No’
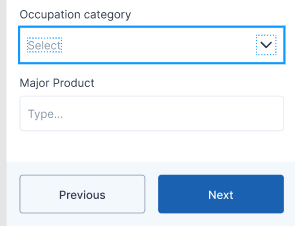
Step 15 : Occupation Category : Choose the type of the occupation category from the drop down.
Step 16 : Major Product : Enter the major product name
Step 17 : Once the details have been entered by the ECP, click ‘Next’. The information will be saved in the draft automatically
5. How to Add the Address Details in EG Member:

Step 1 : Launch the app, Enter your respective ECPs username and password

Step 2 : To view the password, click the show password icon and it will display
Step 3 : Click Login

Step 4 : Following your login, a list of Enterprise Ecosystem Development modules will appear on the screen. When you select the Enterprise Promotion Module, you will be taken to the EPM home page.
Step 5 : Once the ECP staff has completed the basic details annexure it will get redirected to the address details annexure page
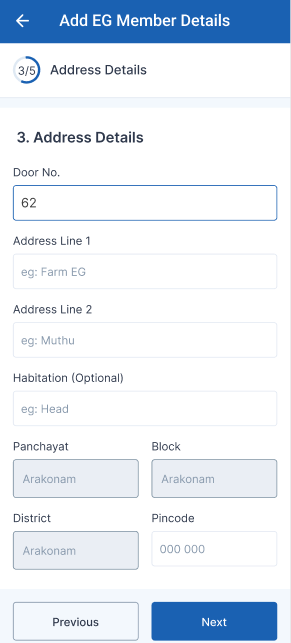
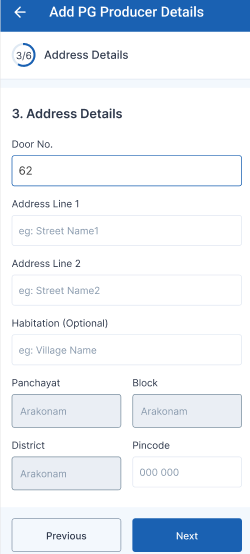
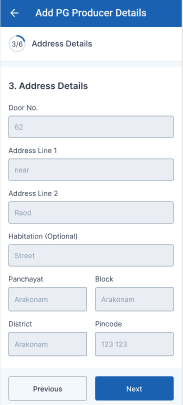
Step 6 : Third Tab-> Address Details
Step 6.1 : Door No : Enter the door no
Step 6.2 : Address Line 1 : Enter the address line 1
Step 6.3 : Address Line 2 : Enter the address line 2
Step 6.4 : Habitation : Enter the habitation details
Step 6.5 : Upon login information, District, Block, Panchayat name, and Pincode details will be displayed automatically
Step 6.6 : Pincode : Enter the pincode details
Step 7 : Once the information is entered, click on the ‘Next’ option. The information will be saved as a draft
6. How to Add the Collective Details in EG Member:

Step 1 : Launch the app, Enter your respective ECPs username and password

Step 2 : To view the password, click the show password icon and it will display
Step 3 : Click Login

Step 4 : Following your login, a list of Enterprise Ecosystem Development modules will appear on the screen. When you select the Enterprise Promotion Module, you will be taken to the EPM home page.
Step 5 : Once the ECP staff has completed the address details annexure it will get redirected to the collective details annexure page
Step 6 : Fourth Tab -> Collective Details : Capital Amount Contributed to the EG : Enter the capital amount contributed to the EG
Step 7 : Is this member already a member in any PG/EG/PC/Society other than VKP : If the member is already in EG/PG/PC or any other society other than VKP click ‘Yes’ or choose ‘No’
Step 8 : Already Producer in any : Click the dropdown to choose already producer
Step 9 : Name of the PG other than VKP : Enter the name of the Producer Group other than VKP
Step 10 : Block : Click the dropdown to choose the name of the block
Step 11 : Panchayat : Click the dropdown to choose the name of the panchayat
Step 12 : Name of the EG other than VKP : Enter the name of the Enterprise Group other than VKP
Step 13 : Block : Click the dropdown to choose the name of the block
Step 14 : Panchayat : Click the dropdown to choose the name of the panchayat
Step 15 : Once the information is entered, click on the ‘Next’ option. The information will be saved as a draft
7. How to Add the Document Details in EG Member:

Step 1 : Launch the app, Enter your respective ECPs username and password

Step 2 : To view the password, click the show password icon and it will display
Step 3 : Click Login

Step 4 : Following your login, a list of Enterprise Ecosystem Development modules will appear on the screen. When you select the Enterprise Promotion Module, you will be taken to the EPM home page.
Step 5 : Once the ECP staff has completed the collective details annexure it will get redirected to the document details annexure page
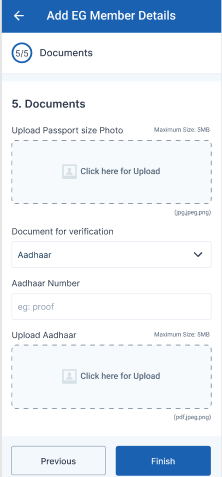
Step 6 : Fifth Tab-> Documents : Upload Passport Size Photo : Click the menu to upload the passport size photo and the maximum file size is 5 MB
Step 7 : Document for Verification : Click the dropdown to choose the type of the document for the verification, Once the ECP chosen the type of document enter the details in the dropdown
Step 8 : Upload Aadhar : Click the menu to upload the aadhar card photo and the maximum file size is 5 MB and the file type is pdf,jpeg or jpg
Step 9 : Once the information is entered, click on the ‘Finish’ option.
8. How to Review and Submit in EG Member Details:

Step 1 : Launch the app, Enter your respective ECPs username and password

Step 2 : To view the password, click the show password icon and it will display
Step 3 : Click Login

Step 4 : Following your login, a list of Enterprise Ecosystem Development modules will appear on the screen. When you select the Enterprise Promotion Module, you will be taken to the EPM home page.

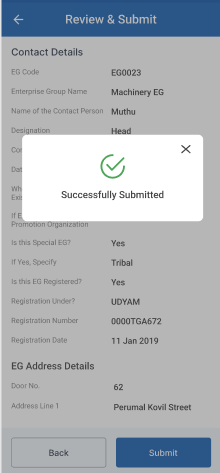
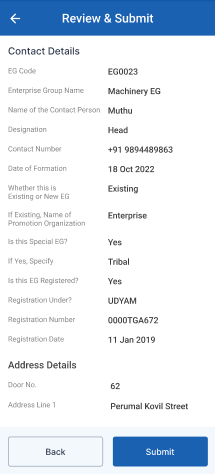
Step 5 : Sixth Tab-> Review and Submit
Step 6 : After reviewing the member details, select the Submit option.
Step 7 : If the ECPs staff needs to edit the data click Back

Step 8 : Once entered the Submit button, The EG member details will be successfully added when you submit.
Step 9 : Once the ECP submitted the member profile and the toast message like ‘Successfully Submitted’
9. How to Add Producer/Member of PG:

Step 1 : Launch the app, Enter your respective ECPs username and password

Step 2 : To view the password, click the show password icon and it will display
Step 3 : Click Login

Step 4 : Following your login, a list of Enterprise Ecosystem Development modules will appear on the screen. When you select the Enterprise Promotion Module, you will be taken to the EPM home page.

Step 5 : To create the member profile Go to Members
Step 6 : To add the member click Add Member icon, it will get redirected to the Select Member Type section
Step 7 : Choose the member type and click ‘Continue’ it will get redirected to the Add PG Member Details annexure page
10. How to Add Contact Details in PG Member (Farm):

Step 1 : Launch the app, Enter your respective ECPs username and password

Step 2 : To view the password, click the show password icon and it will display
Step 3 : Click Login

Step 4 : Following your login, a list of Enterprise Ecosystem Development modules will appear on the screen. When you select the Enterprise Promotion Module, you will be taken to the EPM home page.
Step 5 : Once the ECP staff has selected the PG member type it will get redirected to the contact details annexure page

Step 6 : First Tab-> Contact Details : Mobile Number : Enter the mobile number under the contact details section
Step 7 : Farm Type : Click the dropdown to choose the type of the farm
Step 8 : Once the details have been entered by the ECP, click ‘Next’. The information will be saved in the draft automatically
11. How to Add the Basic Details in PG Member (Farm):

Step 1 : Launch the app, Enter your respective ECPs username and password

Step 2 : To view the password, click the show password icon and it will display
Step 3 : Click Login

Step 4 : Following your login, a list of Enterprise Ecosystem Development modules will appear on the screen. When you select the Enterprise Promotion Module, you will be taken to the EPM home page.
Step 5 : Once the ECP staff has completed the contact details annexure it will get redirected to the contact details annexure page
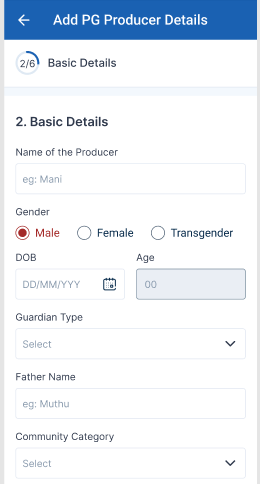
Step 6 : Second Tab -> Basic Details : Name of the Producer : Enter the producer name in the name of the producer
Step 7 : Gender : Choose the gender type
Step 8 : Enter Date of Birth then Age will be auto populated based on DOB
Step 9 : Guardian Type : Choose the type of the guardian type in the drop down, Based on the guardian type and enter the name of the guardian name
Step 10 : Community Category : Choose the type of the community category type in the drop down.

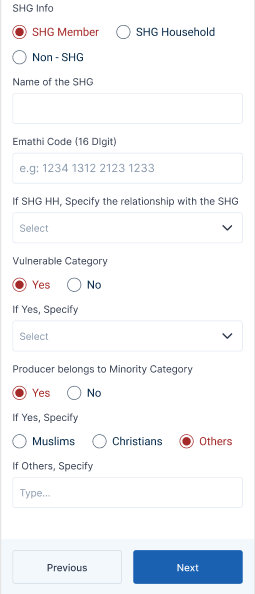
Step 11 : SHG Info : Choose the type of the SHG info, Based on the SHG info and enter the name of the SHG and eMathi code and the household relationship with the SHG
Step 12 : Vulnerable Category : Choose the vulnerable category and click ‘Yes’ to specify the category or choose ‘No’
Step 13 : Producer Belongs to Minor Category : Choose if the applicant belongs to minor category and click ‘Yes’ to specify the category or choose ‘No’
Step 14 : Once the details have been entered by the ECP, click ‘Next’. The information will be saved in the draft automatically
12. How to Add the Address Details in PG Member (Farm):
Step 1 : Launch the app, Enter your respective ECPs username and password

Step 2 : To view the password, click the show password icon and it will display
Step 3 : Click Login

Step 4 : Following your login, a list of Enterprise Ecosystem Development modules will appear on the screen. When you select the Enterprise Promotion Module, you will be taken to the EPM home page.
Step 5 : Once the ECP staff has completed the basic details annexure it will get redirected to the address details annexure page

Step 6 : Third Tab-> Address Details
Step 6.1 : Door No : Enter the door no
Step 6.2 : Address Line 1 : Enter the address line 1
Step 6.3 : Address Line 2 : Enter the address line 2
Step 6.4 : Habitation : Enter the habitation details
Step 6.5 : Upon login information, District, Block, Panchayat name, and Pincode details will be displayed automatically
Step 6.6 : Pincode : Enter the pincode details
Step 7 : Once the information is entered, click on the ‘Next’ option. The information will be saved as a draft
13. How to Add the Commodity/Livestock Details in PG Member (Farm):

Step 1 : Launch the app, Enter your respective ECPs username and password

Step 2 : To view the password, click the show password icon and it will display
Step 3 : Click Login

Step 4 : Following your login, a list of Enterprise Ecosystem Development modules will appear on the screen. When you select the Enterprise Promotion Module, you will be taken to the EPM home page.
Step 5 : Once the ECP staff has completed the address details annexure it will get redirected to the commodity/livestock details annexure page
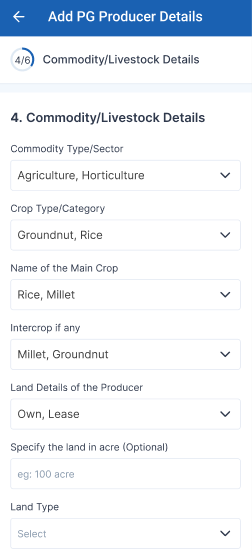
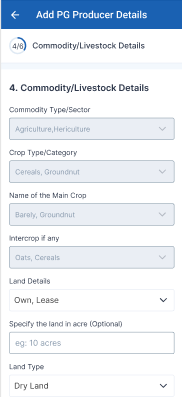
Step 6 : Fourth Tab -> Commodity/Livestock Details : Commodity Type/Sector : By clicking the dropdown to choose the commodity type and sector
Step 7 : Crop Type/Category : By clicking the dropdown to choose the crop type and category
Step 8 : Name of the Main Crop : By clicking the dropdown to choose the name of the main crop
Step 9 : Intercrop if any : By clicking the dropdown to choose the intercrop
Step 10 : Land Details of the Producer : By clicking the dropdown to choose the land details of the producer
Step 11 : Specify the land in acre (Optional) : Enter the land details in acre
Step 12 : Land Type : By clicking the dropdown to choose the type of the land
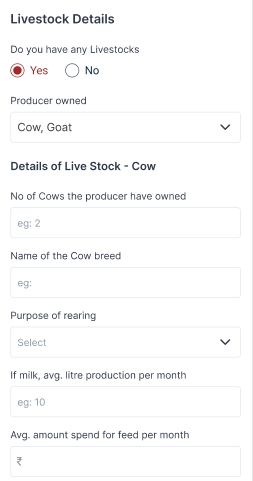
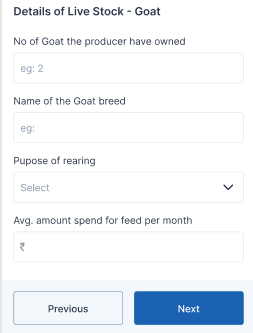
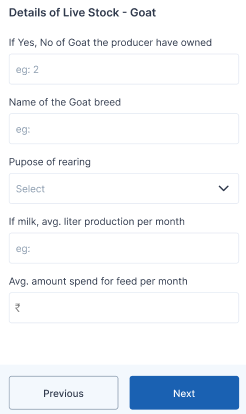
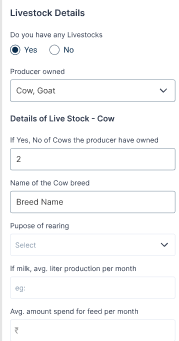
Step 13 : Live Stock Details : Do you have any livestock? : If the member has any livestock click ‘Yes’ or choose ‘No’
Step 14 : Producer Owned : Click the dropdown to choose the name of the producer owned
Step 16 : No of Cows the producer have owned: Enter the number of cows the producer have owned
Step 17 : Name of the Cow Breed: Enter the cow breed name
Step 18 : Purpose of rearing : Click the dropdown to choose the purpose of rearing and enter the average litre production and average amount spend for feed details per month
Step 19 : Once the information is entered, click on the ‘Next’ option. The information will be saved as a draft
14. How to Add the Collective Details in PG Member (Farm):

Step 1 : Launch the app, Enter your respective ECPs username and password

Step 2 : To view the password, click the show password icon and it will display
Step 3 : Click Login

Step 4 : Following your login, a list of Enterprise Ecosystem Development modules will appear on the screen. When you select the Enterprise Promotion Module, you will be taken to the EPM home page.
Step 5 : Once the ECP staff has completed the commodity livestock details annexure it will get redirected to the collective details annexure page

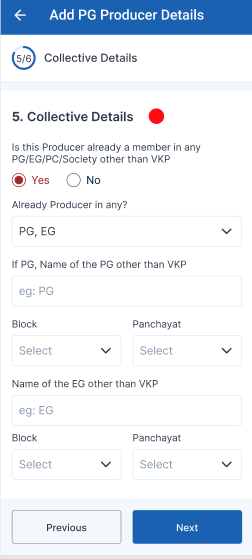
Step 6 : Fifth Tab -> Is this producer already a member in any PG/EG/PC/Society other than VKP : If the member is already in EG/PG/PC or any other society other than VKP click ‘Yes’ or choose ‘No’
Step 7 : Already Producer in any : Click the dropdown to choose already producer
Step 8 : Name of the PG other than VKP : Enter the name of the Producer Group other than VKP
Step 9 : Block : Click the dropdown to choose the name of the block
Step 10 : Panchayat : Click the dropdown to choose the name of the panchayat
Step 11 : Name of the EG other than VKP : Enter the name of the Enterprise Group other than VKP
Step 12 : Block : Click the dropdown to choose the name of the block
Step 13 : Panchayat : Click the dropdown to choose the name of the panchayat
Step 14 : Once the information is entered, click on the ‘Next’ option. The information will be saved as a draft
15. How to Add the Document Details in PG Member (Farm):

Step 1 : Launch the app, Enter your respective ECPs username and password

Step 2 : To view the password, click the show password icon and it will display
Step 3 : Click Login

Step 4 : Following your login, a list of Enterprise Ecosystem Development modules will appear on the screen. When you select the Enterprise Promotion Module, you will be taken to the EPM home page.
Step 5 : Once the ECP staff has completed the collective details annexure it will get redirected to the document details annexure page
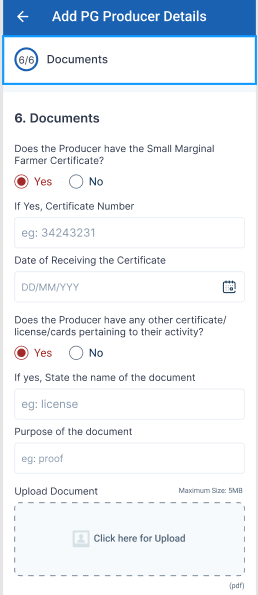
Step 6 : Sixth Tab-> Does the Producer have small Marginal Farmer Certificate : If the producer have small marginal farmer certificate click ‘Yes’ or choose ‘No’ If ‘Yes’ update the certificate number and date of receiving the certificate
Step 7 : Does the Producer have any other Certificate/licence/cards pertaining to their activity : If the producer have any other certificate license or cards pertaining to the activity click ‘Yes’ or choose ‘No’ If ‘Yes’ enter the purpose of the document and click ‘Browse’ to upload the document same

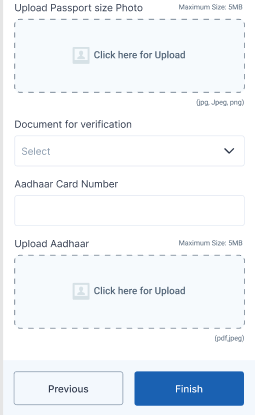
Step 8 : Upload Passport Size Photo : Click the menu to upload the passport size photo and the maximum file size is 5 MB
Step 7 : Document for Verification : Click the dropdown to choose the type of the document for the verification, Once the ECP chosen the type of document enter the details in the dropdown
Step 8 : Upload Aadhar : Click the menu to upload the aadhar card photo and the maximum file size is 5 MB and the file type is pdf,jpeg or jpg
Step 9 : Once the information is entered, click on the ‘Finish’ option.
16. How to Review and Submit in PG Member Details (Farm):

Step 1 : Launch the app, Enter your respective ECPs username and password

Step 2 : To view the password, click the show password icon and it will display
Step 3 : Click Login

Step 4 : Following your login, a list of Enterprise Ecosystem Development modules will appear on the screen. When you select the Enterprise Promotion Module, you will be taken to the EPM home page.

Step 5 : Sixth Tab-> Review and Submit
Step 6 : After reviewing the member details, select the Submit option.
Step 7 : If the ECPs staff needs to edit the data click Back
Step 8 : Once entered the Submit button, The EG member details will be successfully added when you submit.
Step 9 : Once the ECP submitted the member profile and the toast message like ‘Successfully Submitted’
17. How to Add Contact Details in PG Member (Off Farm):

Step 1 : Launch the app, Enter your respective ECPs username and password

Step 2 : To view the password, click the show password icon and it will display
Step 3 : Click Login

Step 4 : Following your login, a list of Enterprise Ecosystem Development modules will appear on the screen. When you select the Enterprise Promotion Module, you will be taken to the EPM home page.
Step 5 : Once the ECP staff has selected the PG member type it will get redirected to the contact details annexure page
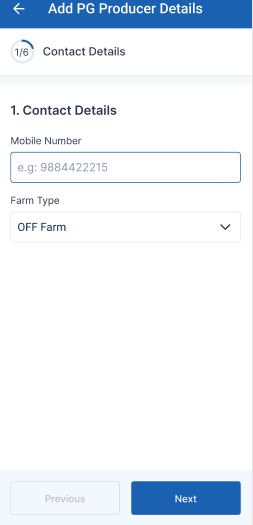
Step 6 : First Tab-> Contact Details : Mobile Number : Enter the mobile number under the contact details section
Step 7 : Farm Type : Click the dropdown to choose the type of the Off farm
Step 8 : Once the details have been entered by the ECP, click ‘Next’. The information will be saved in the draft automatically
18. How to Add the Basic Details in PG Member (Off Farm):

Step 1 : Launch the app, Enter your respective ECPs username and password

Step 2 : To view the password, click the show password icon and it will display
Step 3 : Click Login

Step 4 : Following your login, a list of Enterprise Ecosystem Development modules will appear on the screen. When you select the Enterprise Promotion Module, you will be taken to the EPM home page.
Step 5 : Once the ECP staff has completed the contact details annexure it will get redirected to the contact details annexure page

Step 6 : Second Tab -> Basic Details : Name of the Producer : Enter the producer name in the name of the producer
Step 7 : Gender : Choose the gender type
Step 8 : Enter Date of Birth then Age will be auto populated based on DOB
Step 9 : Guardian Type : Choose the type of the guardian type in the drop down, Based on the guardian type and enter the name of the guardian name
Step 10 : Community Category : Choose the type of the community category type in the drop down.
Step 11 : SHG Info : Choose the type of the SHG info, Based on the SHG info and enter the name of the SHG and eMathi code and the household relationship with the SHG
Step 12 : Vulnerable Category : Choose the vulnerable category and click ‘Yes’ to specify the category or choose ‘No’
Step 13 : Producer Belongs to Minor Category : Choose if the applicant belongs to minor category and click ‘Yes’ to specify the category or choose ‘No’
Step 14 : Once the details have been entered by the ECP, click ‘Next’. The information will be saved in the draft automatically
19. How to Add the Address Details in PG Member (Off Farm):

Step 1 : Launch the app, Enter your respective ECPs username and password

Step 2 : To view the password, click the show password icon and it will display
Step 3 : Click Login

Step 4 : Following your login, a list of Enterprise Ecosystem Development modules will appear on the screen. When you select the Enterprise Promotion Module, you will be taken to the EPM home page.
Step 5 : Once the ECP staff has completed the basic details annexure it will get redirected to the address details annexure page
Step 6 : Third Tab-> Address Details
Step 6.1 : Door No : Enter the door no
Step 6.2 : Address Line 1 : Enter the address line 1
Step 6.3 : Address Line 2 : Enter the address line 2
Step 6.4 : Habitation : Enter the habitation details
Step 6.5 : Upon login information, District, Block, Panchayat name, and Pincode details will be displayed automatically
Step 6.6 : Pincode : Enter the pincode details
Step 7 : Once the information is entered, click on the ‘Next’ option. The information will be saved as a draft
20. How to Add the Commodity/Livestock Details in PG Member (Off Farm):

Step 1 : Launch the app, Enter your respective ECPs username and password

Step 2 : To view the password, click the show password icon and it will display
Step 3 : Click Login

Step 4 : Following your login, a list of Enterprise Ecosystem Development modules will appear on the screen. When you select the Enterprise Promotion Module, you will be taken to the EPM home page.
Step 5 : Once the ECP staff has completed the address details annexure it will get redirected to the commodity/livestock details annexure page
Step 6 : Fourth Tab -> Commodity/Livestock Details
Step 7 : Producer Owned : Click the dropdown to choose the name of the producer owned
Step 8 : No of Cows the producer have owned: Enter the number of cows the producer have owned
Step 9 : Name of the Cow Breed: Enter the cow breed name
Step 10 : Purpose of rearing : Click the dropdown to choose the purpose of rearing and enter the average litre production and average amount spend for feed details per month
Step 11 : Once the information is entered, click on the ‘Next’ option. The information will be saved as a draft
21. How to Add the Collective Details in PG Member (Off Farm):

Step 1 : Launch the app, Enter your respective ECPs username and password

Step 2 : To view the password, click the show password icon and it will display
Step 3 : Click Login

Step 4 : Following your login, a list of Enterprise Ecosystem Development modules will appear on the screen. When you select the Enterprise Promotion Module, you will be taken to the EPM home page.
Step 5 : Once the ECP staff has completed the commodity livestock details annexure it will get redirected to the collective details annexure page
Step 6 : Fifth Tab -> Is this producer already a member in any PG/EG/PC/Society other than VKP : If the member is already in EG/PG/PC or any other society other than VKP click ‘Yes’ or choose ‘No’
Step 7 : Already Producer in any : Click the dropdown to choose already producer
Step 8 : Name of the PG other than VKP : Enter the name of the Producer Group other than VKP
Step 9 : Block : Click the dropdown to choose the name of the block
Step 10 : Panchayat : Click the dropdown to choose the name of the panchayat
Step 11 : Name of the EG other than VKP : Enter the name of the Enterprise Group other than VKP
Step 12 : Block : Click the dropdown to choose the name of the block
Step 13 : Panchayat : Click the dropdown to choose the name of the panchayat
Step 14 : Once the information is entered, click on the ‘Next’ option. The information will be saved as a draft
22. How to Add the Document Details in PG Member (Off Farm):

Step 1 : Launch the app, Enter your respective ECPs username and password

Step 2 : To view the password, click the show password icon and it will display
Step 3 : Click Login

Step 4 : Following your login, a list of Enterprise Ecosystem Development modules will appear on the screen. When you select the Enterprise Promotion Module, you will be taken to the EPM home page.
Step 5 : Once the ECP staff has completed the collective details annexure it will get redirected to the document details annexure page

Step 6 : Sixth Tab-> Does the Producer have small Marginal Farmer Certificate : If the producer have small marginal farmer certificate click ‘Yes’ or choose ‘No’ If ‘Yes’ update the certificate number and date of receiving the certificate
Step 7 : Does the Producer have any other Certificate/licence/cards pertaining to their activity : If the producer have any other certificate license or cards pertaining to the activity click ‘Yes’ or choose ‘No’ If ‘Yes’ enter the purpose of the document and click ‘Browse’ to upload the document same

Step 8 : Upload Passport Size Photo : Click the menu to upload the passport size photo and the maximum file size is 5 MB
Step 7 : Document for Verification : Click the dropdown to choose the type of the document for the verification, Once the ECP chosen the type of document enter the details in the dropdown
Step 8 : Upload Aadhar : Click the menu to upload the aadhar card photo and the maximum file size is 5 MB and the file type is pdf,jpeg or jpg
Step 9 : Once the information is entered, click on the ‘Finish’ option.
23. How to Review and Submit in PG Member Details (Off Farm):
Step 1 : Launch the app, Enter your respective ECPs username and password

Step 2 : To view the password, click the show password icon and it will display
Step 3 : Click Login

Step 4 : Following your login, a list of Enterprise Ecosystem Development modules will appear on the screen. When you select the Enterprise Promotion Module, you will be taken to the EPM home page.

Step 5 : Sixth Tab-> Review and Submit
Step 6 : After reviewing the member details, select the Submit option.
Step 7 : If the ECPs staff needs to edit the data click Back
Step 8 : Once entered the Submit button, The EG member details will be successfully added when you submit.
Step 9 : Once the ECP submitted the member profile and the toast message like ‘Successfully Submitted’
24. How to Add the PG Member Flow from FDB:
Step 1 : Launch the app, Enter your respective ECPs username and password

Step 2 : To view the password, click the show password icon and it will display
Step 3 : Click Login

Step 4 : Following your login, a list of Enterprise Ecosystem Development modules will appear on the screen. When you select the Enterprise Promotion Module, you will be taken to the EPM home page.
Step 5 : Once the ECP staff has selected the PG member type it will get redirected to the contact details annexure page
Annexure 1 : Contact Details

Step 6 : First Tab-> Contact Details : Mobile Number : Enter the mobile number under the contact details section
Step 7 : Farm Type : Click the dropdown to choose the type of the farm
Annexure 2 : Basic Details
Step 8 : Once the mobile number has been entered, the Name of the Producer, Gender, DOB, Guardian Type, Father Name, Community Category, SHG info and Vulnerable Category should be auto populated from the FDB database.
Step 9 : Producer Belongs to Minor Category : Choose if the applicant belongs to minor category and click ‘Yes’ to specify the category or choose ‘No’
Annexure 3 : Address Details
Step 8 : Once the mobile number has been entered, Door No, Address Line 1, Address Line 2, District, Block, Panchayat and Pincode details should be auto populated from the FDB database.
Annexure 4 : Commodity/Live Stock Details

Step 8 : Once the mobile number has been entered, Commodity, Crop Type, Main Crop Name, Intercrop details should be auto populated from the FDB database.
Step 9 : Land Details of the Producer : By clicking the dropdown to choose the land details of the producer
Step 10 : Specify the land in acre (Optional) : Enter the land details in acre
Step 11 : Land Type : By clicking the dropdown to choose the type of the land
Step 12 : Live Stock Details : Do you have any livestock? : If the member has any livestock click ‘Yes’ or choose ‘No’
Step 13 : Producer Owned : Click the dropdown to choose the name of the producer owned
Step 14 : No of Cows the producer have owned: Enter the number of cows the producer have owned
Step 15 : Name of the Cow Breed: Enter the cow breed name
Step 16 : Purpose of rearing : Click the dropdown to choose the purpose of rearing and enter the average litre production and average amount spend for feed details per month
Annexure 5 : Collective Details

Step 17 : Is this producer already a member in any PG/EG/PC/Society other than VKP : If the member is already in EG/PG/PC or any other society other than VKP click ‘Yes’ or choose ‘No’
Step 18 : Already Producer in any : Click the dropdown to choose already producer
Step 19 : Name of the PG other than VKP : Enter the name of the Producer Group other than VKP
Step 20 : Block : Click the dropdown to choose the name of the block
Step 21 : Panchayat : Click the dropdown to choose the name of the panchayat
Step 22 : Name of the EG other than VKP : Enter the name of the Enterprise Group other than VKP
Step 23 : Block : Click the dropdown to choose the name of the block
Step 24 : Panchayat : Click the dropdown to choose the name of the panchayat
Annexure 6 : Upload Document
Step 25 : Does the Producer have small Marginal Farmer Certificate : If the producer have small marginal farmer certificate click ‘Yes’ or choose ‘No’ If ‘Yes’ update the certificate number and date of receiving the certificate
Step 26 : Does the Producer have any other Certificate/licence/cards pertaining to their activity : If the producer have any other certificate license or cards pertaining to the activity click ‘Yes’ or choose ‘No’ If ‘Yes’ enter the purpose of the document and click ‘Browse’ to upload the document same
Step 27 : Upload Passport Size Photo : Click the menu to upload the passport size photo and the maximum file size is 5 MB
Step 28 : Document for Verification : Click the dropdown to choose the type of the document for the verification, Once the ECP chosen the type of document enter the details in the dropdown
Step 29 : Upload Aadhar : Click the menu to upload the aadhar card photo and the maximum file size is 5 MB and the file type is pdf,jpeg or jpg
Annexure 7 : Review & Submit
Step 30 : After reviewing the member details, select the Submit option.
Step 31 : If the ECPs staff needs to edit the data click Back
Step 32 : Once entered the Submit button, The EG member details will be successfully added when you submit.
Step 33 : Once the ECP submitted the member profile and the toast message like ‘Successfully Submitted’
25. How to Create Group Profile of EG:

Step 1 : Launch the app, Enter your respective ECPs username and password

Step 2 : To view the password, click the show password icon and it will display
Step 3 : Click Login

Step 4 : Following your login, a list of Enterprise Ecosystem Development modules will appear on the screen. When you select the Enterprise Promotion Module, you will be taken to the EPM home page.
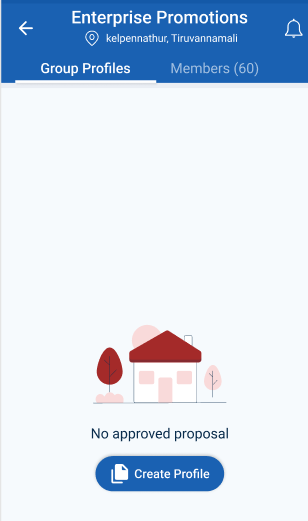
Step 5 : To create the Group profile Go to Group Profile
Step 6 : If none of the proposal has approved it shows ‘No Approved Proposal’ To add the group profile click Create Profile icon,
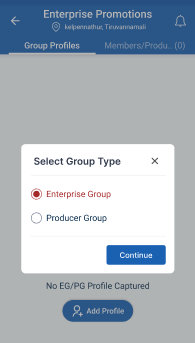
Step 7 : Choose the group type and click ‘Continue’ it will get redirected to the Add Enterprise Group annexure page
26. How to Add EG Basic Details in EG Member Profile:

Step 1 : Launch the app, Enter your respective ECPs username and password

Step 2 : To view the password, click the show password icon and it will display
Step 3 : Click Login
Step 4 : Following your login, a list of Enterprise Ecosystem Development modules will appear on the screen. When you select the Enterprise Promotion Module, you will be taken to the EPM home page.
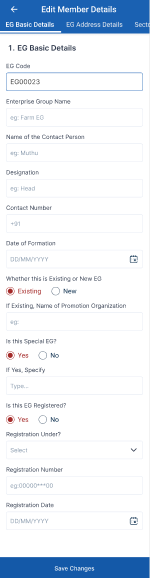
Step 5 : Once the ECP staff has selected the EG group type it will get redirected to the EG basic details annexure page
Step 6 : EG Code : Enter the EG Code
Step 7 : Application Received Date : By clicking the calendar to choose the application received date
Step 8 : Enterprise Group Name : Enter the group name of the enterprise
Step 9 : Date of Formation : By clicking the calendar to choose the formation date
Step 10 : Whether this is Existing or New EG : If it is a existing organisation click ‘Existing’ and enter the name of the promotion organisation or choose ‘New’
Step 11 : Is this Special EG? : If this EG is belongs to special EG click ‘Yes’ and enter the name of the EG or choose ‘No’
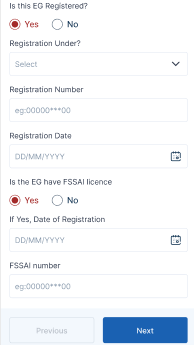
Step 12 : Is this EG Registered? : If this EG is registered click ‘Yes’ and enter the name of the EG or choose ‘No’ If ‘Yes’ click the dropdown to register under and enter the registration number. By clicking the registration number.
Step 13 : Is this EG have FSSAI licence? : Is this EG having FSSAI Insurance, click ‘Yes’ by clicking the calendar, enter the registration date and FSSAI number
Step 14 : Once the details have been entered by the ECP, click ‘Next’. The information will be saved in the draft automatically
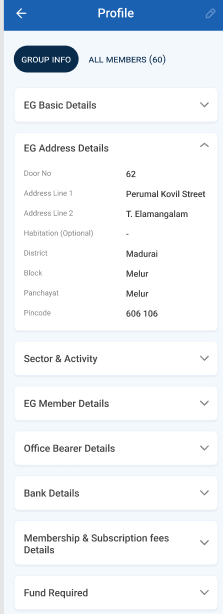
27. How to Add EG Address Details in EG Member Profile:

Step 1 : Launch the app, Enter your respective ECPs username and password

Step 2 : To view the password, click the show password icon and it will display
Step 3 : Click Login

Step 4 : Following your login, a list of Enterprise Ecosystem Development modules will appear on the screen. When you select the Enterprise Promotion Module, you will be taken to the EPM home page.
Step 5 : Once the ECP staff has completed the EG basic details annexure it will get redirected to the address details annexure page
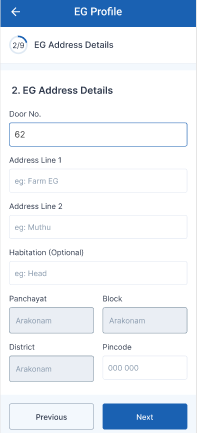
Step 6 : Third Tab-> EG Address Details
Step 6.1 : Door No : Enter the door no
Step 6.2 : Address Line 1 : Enter the address line 1
Step 6.3 : Address Line 2 : Enter the address line 2
Step 6.4 : Habitation : Enter the habitation details
Step 6.5 : Upon login information, District, Block, Panchayat name, and Pincode details will be displayed automatically
Step 6.6 : Pincode : Enter the pincode details
Step 7 : Once the information is entered, click on the ‘Next’ option. The information will be saved as a draft
28. How to Add Sector & Activity in EG Member Profile:

Step 1 : Launch the app, Enter your respective ECPs username and password

Step 2 : To view the password, click the show password icon and it will display
Step 3 : Click Login

Step 4 : Following your login, a list of Enterprise Ecosystem Development modules will appear on the screen. When you select the Enterprise Promotion Module, you will be taken to the EPM home page.
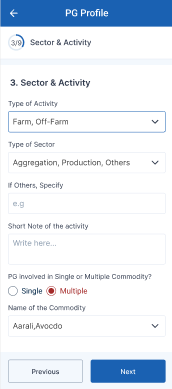
Step 5 : Once the ECP staff has completed the EG address details annexure it will get redirected to the sector/activity annexure page
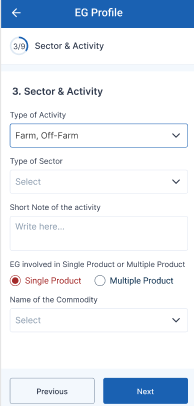
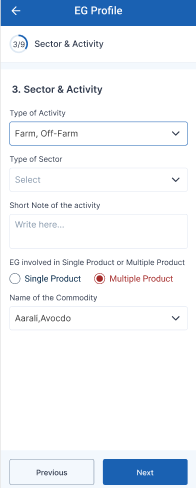
Step 5 : Type of Activity : Click the dropdown to choose the type of the activity
Step 6 : Type of Sector : Click the dropdown to choose the type of the sector
Step 7 : Short Note of the Activity : Enter the short note of the activity
Step 8 : EG involved in single product or multiple product : If the EG member profile has involved in the single product choose ‘Single Product’ or choose ‘Multiple Product’
Step 9 : Name of the Commodity : If the EG member has involved in the single product choose the dropdown to choose the single name of the commodity, If the EG member has involved more than single product click the drop down to choose the multiple name of the commodity
Step 10 : Once the information is entered, click on the ‘Next’ option. The information will be saved as a draft
29. How to Add Members in EG Member Profile:

Step 1 : Launch the app, Enter your respective ECPs username and password

Step 2 : To view the password, click the show password icon and it will display
Step 3 : Click Login

Step 4 : Following your login, a list of Enterprise Ecosystem Development modules will appear on the screen. When you select the Enterprise Promotion Module, you will be taken to the EPM home page.
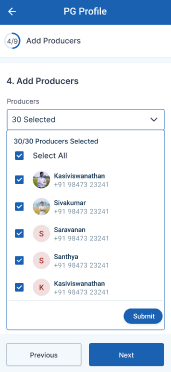
Step 5 : Once the ECP staff has completed the sector/activity annexure it will get redirected to the add members annexure page
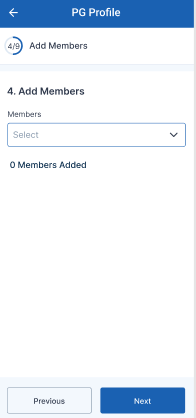
Step 6 : Add Members : Click the dropdown to choose the total number of members involved in the EG profile
Step 7 : Once the information is entered, click on the ‘Next’ option. The information will be saved as a draft
30. How to Add EG Members Details in EG Member Profile:

Step 1 : Launch the app, Enter your respective ECPs username and password

Step 2 : To view the password, click the show password icon and it will display
Step 3 : Click Login

Step 4 : Following your login, a list of Enterprise Ecosystem Development modules will appear on the screen. When you select the Enterprise Promotion Module, you will be taken to the EPM home page.
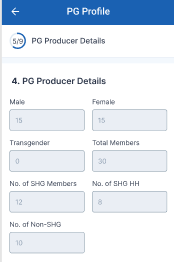
Step 5 : Once the ECP staff has completed the add members annexure it will get redirected to the EG member details annexure page
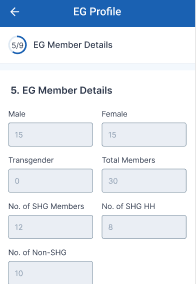
Step 6 : Based on choosing the member details, the male, female, transgender, total members, No. of SHG members, No.of SHG HH and No.of Non-SHG details will be auto populated based on the member choosing in the previous member details
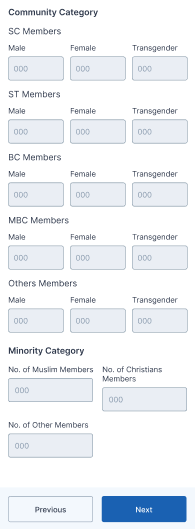
Step 7 : The community member (SC Member, ST Member, BC Member, MBC Member, Other Member) Male, Female and Transgender and Minor Category (No of Muslims, No.of Christian Members and No of Other Members) count will be auto populated based on the member choosing in the previous member details
Step 8 : Once the information is entered, click on the ‘Next’ option. The information will be saved as a draft
31. How to Add Office Bearer Details in EG Member Profile:

Step 1 : Launch the app, Enter your respective ECPs username and password

Step 2 : To view the password, click the show password icon and it will display
Step 3 : Click Login

Step 4 : Following your login, a list of Enterprise Ecosystem Development modules will appear on the screen. When you select the Enterprise Promotion Module, you will be taken to the EPM home page.
Step 5 : Once the ECP staff has completed the add EG member details annexure it will get redirected to the Office Bearer details annexure page
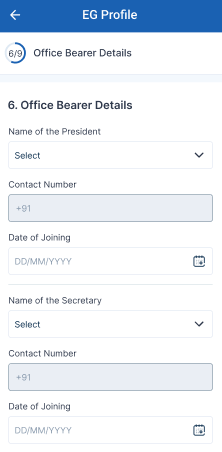

Step 6 : Name of the President : Click the dropdown to choose the name of the president.
Step 7 : Contact Number : Based on choosing the president the contact number will get auto populated
Step 8 : Date of Joining: By clicking the calendar to choose the joining date of the president
Step 9 : Name of the Secretary : Click the dropdown to choose the name of the secretary.
Step 10 : Contact Number : Based on choosing the secretary the contact number will get auto populated
Step 11 : Date of Joining: By clicking the calendar to choose the joining date of the secretary
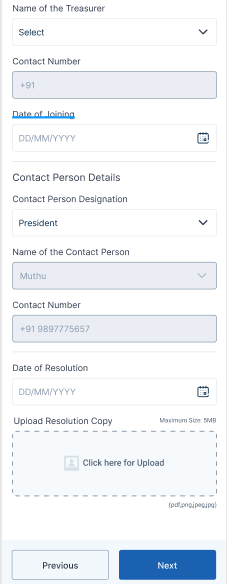
Step 12 : Name of the Treasurer : Click the dropdown to choose the name of the treasurer.
Step 13 : Contact Number : Based on choosing the treasurer the contact number will get auto populated
Step 14 : Date of Joining: By clicking the calendar to choose the joining date of the treasurer
Step 15 : Contact Person Designation: By clicking the dropdown to choose the contact person designation
Step 16 : Based on choosing the designation,the contact person name and contact number will get auto populated
Step 17 : Date of Resolution: By clicking the calendar to choose the resolution date
Step 18 : Click “Browse” to upload the resolution copy
Step 19 : Once the information is entered, click on the ‘Next’ option. The information will be saved as a draft
32. How to Add Bank Details in EG Member Profile:

Step 1 : Launch the app, Enter your respective ECPs username and password

Step 2 : To view the password, click the show password icon and it will display
Step 3 : Click Login

Step 4 : Following your login, a list of Enterprise Ecosystem Development modules will appear on the screen. When you select the Enterprise Promotion Module, you will be taken to the EPM home page.
Step 5 : Once the ECP staff has completed the add Office Bearer details annexure it will get redirected to the bank details annexure page
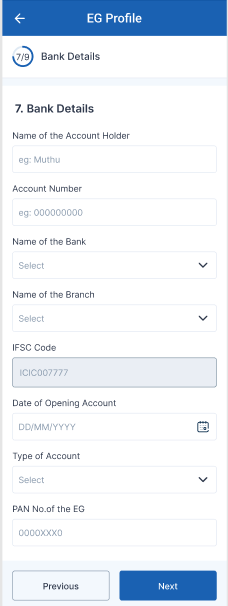
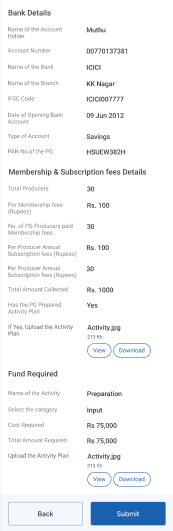
Step 6 : Name of the Account Holder : Enter the name of the account holder
Step 7 : Account Number : Enter the account number
Step 8 : Name of the Bank : Click the dropdown to choose the name of the bank
Step 9 : Name of the Branch : Click the dropdown to choose the name of the branch
Step 10 : IFSC Code : Based on choosing the bank and branch name and the IFSC code will get auto populated
Step 11 : Date of Account Opening : By clicking the calendar to choose the account opening date
Step 12 : Type of Account : Click the dropdown to choose the name of the type of account
Step 13 : PAN Name of the EG : Enter the Pan card number of PAN
Step 14 : Once the information is entered, click on the ‘Next’ option. The information will be saved as a draft
33. How to Add Membership & Subscription Fees Details in EG Member Profile:

Step 1 : Launch the app, Enter your respective ECPs username and password

Step 2 : To view the password, click the show password icon and it will display
Step 3 : Click Login

Step 4 : Following your login, a list of Enterprise Ecosystem Development modules will appear on the screen. When you select the Enterprise Promotion Module, you will be taken to the EPM home page.
Step 5 : Once the ECP staff has completed the add banker details annexure it will get redirected to the membership and subscription fee details annexure page
Step 6 : Total Members : The total members details will get auto populated based on the previous member selection
Step 7 : Per Membership Fees : Enter the membership fee cost for the per person
Step 8 : No of EG members Paid Membership Fees : Enter the total number of EG members paid membership fees
Step 9 : Per Member Annual Subscription Fees : Enter the per member annual subscription fee
Step 10 : No of EG members Paid Annual Subscription Fees : Enter the total number of EG members paid annual subscription fees
Step 11 : Total Amount Collected : The collected amount will get auto populated based on the previous data
Step 12 : Has the EG prepared business plan: If the EG has prepared the business plan click ‘Yes’, If Yes upload the business plan or choose ‘No’
Step 13 : Once the information is entered, click on the ‘Next’ option. The information will be saved as a draft
34. How to Add Fund Required Details in EG Member Profile:

Step 1 : Launch the app, Enter your respective ECPs username and password

Step 2 : To view the password, click the show password icon and it will display
Step 3 : Click Login

Step 4 : Following your login, a list of Enterprise Ecosystem Development modules will appear on the screen. When you select the Enterprise Promotion Module, you will be taken to the EPM home page.
Step 5 : Once the ECP staff has completed the membership and subscription fee details annexure it will get redirected to the fund required details annexure page
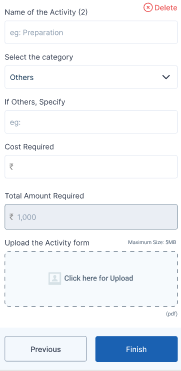
Step 6 : Name of the Activity : Enter the name of the activity
Step 7 : Select the Category : Click the dropdown to select the name of the category, If Others specify the name of the category
Step 8 : Cost Required : Enter the required cost
Step 9 : Total Amount Required : The total amount will get auto populated
Step 10 : Upload Activity Form : Click ‘Browse’ to upload the activity form
Step 11 : Once the information is entered, click on the ‘Finish’ option. The information will be saved as a draft
35. How to Review and Submit in EG Member Profile:

Step 1 : Launch the app, Enter your respective ECPs username and password

Step 2 : To view the password, click the show password icon and it will display
Step 3 : Click Login

Step 4 : Following your login, a list of Enterprise Ecosystem Development modules will appear on the screen. When you select the Enterprise Promotion Module, you will be taken to the EPM home page.
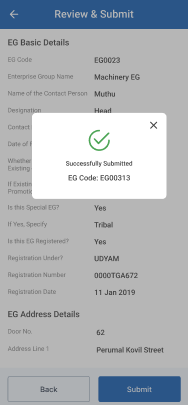
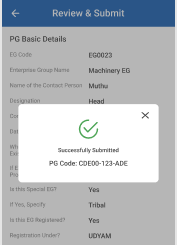
Step 5 : After completed all the annexure, all the details will be reflected in the ‘Review and Submit’ page
Step 6 : After reviewing the member details, select the Submit option.
Step 7 : If the ECPs staff needs to edit the data click Back, Once the screen went to the annexure update the changes the details will be saved automatically
Step 8 : Once entered the Submit button, The EG member details will be successfully added when you submit.
Step 9 : Once the ECP submitted the member profile and the toast message like ‘Successfully Submitted’
36. How to Create Group Profile of PG:

Step 1 : Launch the app, Enter your respective ECPs username and password

Step 2 : To view the password, click the show password icon and it will display
Step 3 : Click Login

Step 4 : Following your login, a list of Enterprise Ecosystem Development modules will appear on the screen. When you select the Enterprise Promotion Module, you will be taken to the EPM home page.
Step 5 : To create the Group profile Go to Group Profile
Step 6 : If none of the proposal has approved it shows ‘No Approved Proposal’ To add the group profile click Create Profile icon,

Step 7 : Choose the group type and click ‘Continue’ it will get redirected to the Add Producer Group annexure page
37. How to Add PG Basic Details in PG Member Profile:
Step 1 : Launch the app, Enter your respective ECPs username and password

Step 2 : To view the password, click the show password icon and it will display
Step 3 : Click Login
Step 4 : Following your login, a list of Enterprise Ecosystem Development modules will appear on the screen. When you select the Enterprise Promotion Module, you will be taken to the EPM home page.
Step 5 : Once the ECP staff has selected the PG group type it will get redirected to the PG basic details annexure page
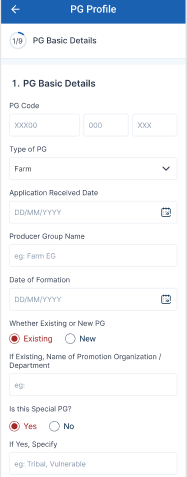
Step 6 : PG Code : Enter the PG Code
Step 7 : Type of PG : Click the dropdown to choose the PG type
Step 8 : Application Received Date : By clicking the calendar to choose the application received date
Step 9 : Producer Group Name : Enter the group name of the producer
Step 10 : Date of Formation : By clicking the calendar to choose the formation date
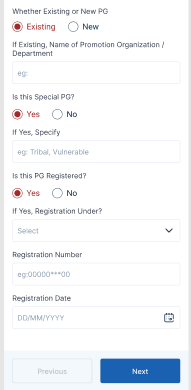
Step 11 : Whether this is Existing or New PG : If it is a existing organisation click ‘Existing’ and enter the name of the promotion organisation or choose ‘New’
Step 12 : Is this Special PG? : If this PG is belongs to special PG click ‘Yes’ and enter the name of the PG or choose ‘No’
Step 13 : Is this PG Registered? : If this PG is registered click ‘Yes’ and enter the name of the EG or choose ‘No’ If ‘Yes’ click the dropdown to register under and enter the registration number. By clicking the calendar to choose the registration date.
Step 14 : Once the details have been entered by the ECP, click ‘Next’. The information will be saved in the draft automatically
38. How to Add PG Address Details in PG Member Profile:

Step 1 : Launch the app, Enter your respective ECPs username and password

Step 2 : To view the password, click the show password icon and it will display
Step 3 : Click Login

Step 4 : Following your login, a list of Enterprise Ecosystem Development modules will appear on the screen. When you select the Enterprise Promotion Module, you will be taken to the EPM home page.
Step 5 : Once the ECP staff has completed the PG basic details annexure it will get redirected to the address details annexure page
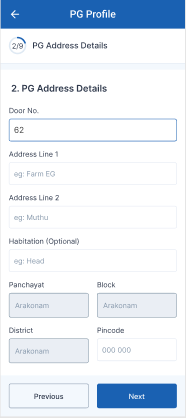
Step 6 : PG Address Details
Step 6.1 : Door No : Enter the door no
Step 6.2 : Address Line 1 : Enter the address line 1
Step 6.3 : Address Line 2 : Enter the address line 2
Step 6.4 : Habitation : Enter the habitation details
Step 6.5 : Upon login information, District, Block, Panchayat name, and Pincode details will be displayed automatically
Step 6.6 : Pincode : Enter the pincode details
Step 7 : Once the information is entered, click on the ‘Next’ option. The information will be saved as a draft
39. How to Add Sector & Activity in PG Member Profile:

Step 1 : Launch the app, Enter your respective ECPs username and password

Step 2 : To view the password, click the show password icon and it will display
Step 3 : Click Login
Step 4 : Following your login, a list of Enterprise Ecosystem Development modules will appear on the screen. When you select the Enterprise Promotion Module, you will be taken to the EPM home page.
Step 5 : Once the ECP staff has completed the PG address details annexure it will get redirected to the sector/activity annexure page
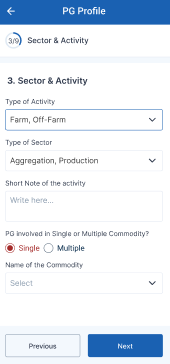
Step 5 : Type of Activity : Click the dropdown to choose the type of the activity
Step 6 : Type of Sector : Click the dropdown to choose the type of the sector
Step 7 : Short Note of the Activity : Enter the short note of the activity
Step 8 : EG involved in single product or multiple product : If the EG member profile has involved in the single product choose ‘Single Product’ or choose ‘Multiple Product’
Step 9 : Name of the Commodity : If the EG member has involved in the single product choose the dropdown to choose the single name of the commodity, If the EG member has involved more than single product click the drop down to choose the multiple name of the commodity
Step 10 : Once the information is entered, click on the ‘Next’ option. The information will be saved as a draft
40. How to Add Members in PG Member Profile:

Step 1 : Launch the app, Enter your respective ECPs username and password

Step 2 : To view the password, click the show password icon and it will display
Step 3 : Click Login

Step 4 : Following your login, a list of Enterprise Ecosystem Development modules will appear on the screen. When you select the Enterprise Promotion Module, you will be taken to the EPM home page.
Step 5 : Once the ECP staff has completed the sector/activity annexure it will get redirected to the add members annexure page
Step 6 : Add Members : Click the dropdown to choose the total number of members involved in the PG profile
Step 7 : Once the information is entered, click on the ‘Next’ option. The information will be saved as a draft
41. How to Add PG Members Details in PG Member Profile:

Step 1 : Launch the app, Enter your respective ECPs username and password

Step 2 : To view the password, click the show password icon and it will display
Step 3 : Click Login

Step 4 : Following your login, a list of Enterprise Ecosystem Development modules will appear on the screen. When you select the Enterprise Promotion Module, you will be taken to the EPM home page.
Step 5 : Once the ECP staff has completed the add members annexure it will get redirected to the PG member details annexure page
Step 6 : Based on choosing the member details, the male, female, transgender, total members, No. of SHG members, No.of SHG HH and No.of Non-SHG details will be auto populated based on the member choosing in the previous member details
Step 7 : The community member (SC Member, ST Member, BC Member, MBC Member, Other Member) Male, Female and Transgender and Minor Category (No of Muslims, No.of Christian Members and No of Other Members) count will be auto populated based on the member choosing in the previous member details
Step 8 : Once the information is entered, click on the ‘Next’ option. The information will be saved as a draft
42. How to Add Office Bearer Details in PG Member Profile:

Step 1 : Launch the app, Enter your respective ECPs username and password

Step 2 : To view the password, click the show password icon and it will display
Step 3 : Click Login

Step 4 : Following your login, a list of Enterprise Ecosystem Development modules will appear on the screen. When you select the Enterprise Promotion Module, you will be taken to the EPM home page.
Step 5 : Once the ECP staff has completed the add PG member details annexure it will get redirected to the Office Bearer details annexure page
Step 6 : Name of the President : Click the dropdown to choose the name of the president.
Step 7 : Contact Number : Based on choosing the president the contact number will get auto populated
Step 8 : Date of Joining: By clicking the calendar to choose the joining date of the president
Step 9 : Name of the Secretary : Click the dropdown to choose the name of the secretary.
Step 10 : Contact Number : Based on choosing the secretary the contact number will get auto populated
Step 11 : Date of Joining: By clicking the calendar to choose the joining date of the secretary
Step 12 : Name of the Treasurer : Click the dropdown to choose the name of the treasurer.
Step 13 : Contact Number : Based on choosing the treasurer the contact number will get auto populated
Step 14 : Date of Joining: By clicking the calendar to choose the joining date of the treasurer
Step 15 : Contact Person Designation: By clicking the dropdown to choose the contact person designation
Step 16 : Based on choosing the designation,the contact person name and contact number will get auto populated
Step 17 : Date of Resolution: By clicking the calendar to choose the resolution date
Step 18 : Click “Browse” to upload the resolution copy
Step 19 : Once the information is entered, click on the ‘Next’ option. The information will be saved as a draft
43. How to Add Bank Details in PG Member Profile:

Step 1 : Launch the app, Enter your respective ECPs username and password

Step 2 : To view the password, click the show password icon and it will display
Step 3 : Click Login

Step 4 : Following your login, a list of Enterprise Ecosystem Development modules will appear on the screen. When you select the Enterprise Promotion Module, you will be taken to the EPM home page.
Step 5 : Once the ECP staff has completed the add Office Bearer details annexure it will get redirected to the bank details annexure page
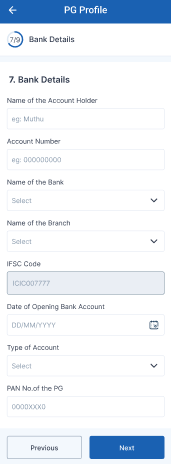
Step 6 : Name of the Account Holder : Enter the name of the account holder
Step 7 : Account Number : Enter the account number
Step 8 : Name of the Bank : Click the dropdown to choose the name of the bank
Step 9 : IFSC Code : Based on choosing the bank and branch name and the IFSC code will get auto populated
Step 10 : Date of Account Opening : By clicking the calendar to choose the account opening date
Step 11 : Type of Account : Click the dropdown to choose the name of the type of account
Step 12 : PAN Name of the PG : Enter the Pan card number of PAN
Step 13 : Once the information is entered, click on the ‘Next’ option. The information will be saved as a draft
44. How to Add Membership & Subscription Fees Details in PG Member Profile:

Step 1 : Launch the app, Enter your respective ECPs username and password

Step 2 : To view the password, click the show password icon and it will display
Step 3 : Click Login

Step 4 : Following your login, a list of Enterprise Ecosystem Development modules will appear on the screen. When you select the Enterprise Promotion Module, you will be taken to the EPM home page.
Step 5 : Once the ECP staff has completed the add banker details annexure it will get redirected to the membership and subscription fee details annexure page
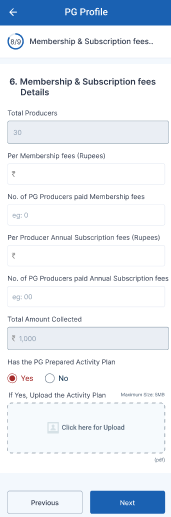
Step 6 : Total Producers : The total producers details will get auto populated based on the previous member selection
Step 7 : Per Membership Fees : Enter the membership fee cost for the per person
Step 8 : No of PG members Paid Membership Fees : Enter the total number of PG members paid membership fees
Step 9 : Per Member Annual Subscription Fees : Enter the per member annual subscription fee
Step 10 : No of PG members Paid Annual Subscription Fees : Enter the total number of PG members paid annual subscription fees
Step 11 : Total Amount Collected : The collected amount will get auto populated based on the previous data
Step 12 : Has the PG prepared business plan: If the PG has prepared the business plan click ‘Yes’, If Yes upload the business plan or choose ‘No’
Step 13 : Once the information is entered, click on the ‘Next’ option. The information will be saved as a draft
45. How to Add Fund Required Details in PG Member Profile:

Step 1 : Launch the app, Enter your respective ECPs username and password

Step 2 : To view the password, click the show password icon and it will display
Step 3 : Click Login

Step 4 : Following your login, a list of Enterprise Ecosystem Development modules will appear on the screen. When you select the Enterprise Promotion Module, you will be taken to the EPM home page.
Step 5 : Once the ECP staff has completed the membership and subscription fee details annexure it will get redirected to the fund required details annexure page


Step 6 : Name of the Activity : Enter the name of the activity
Step 7 : Select the Category : Click the dropdown to select the name of the category, If Others specify the name of the category
Step 8 : Cost Required : Enter the required cost
Step 9 : Total Amount Required : The total amount will get auto populated
Step 10 : Upload Activity Form : Click ‘Browse’ to upload the activity form
Step 11 : Once the information is entered, click on the ‘Finish’ option. The information will be saved as a draft
46. How to Review and Submit in PG Member Profile:
Step 1 : Launch the app, Enter your respective ECPs username and password

Step 2 : To view the password, click the show password icon and it will display
Step 3 : Click Login

Step 4 : Following your login, a list of Enterprise Ecosystem Development modules will appear on the screen. When you select the Enterprise Promotion Module, you will be taken to the EPM home page.
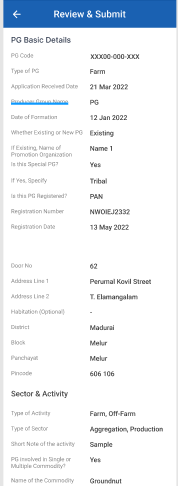
Step 5 : After completed all the annexure, all the details will be reflected in the ‘Review and Submit’ page
Step 6 : After reviewing the member details, select the Submit option.
Step 7 : If the ECPs staff needs to edit the data click Back, Once the screen went to the annexure update the changes the details will be saved automatically
Step 8 : Once entered the Submit button, The EG member details will be successfully added when you submit.
Step 9 : Once the ECP submitted the member profile and the toast message like ‘Successfully Submitted’ and the code generated automatically.
47. How to Update the Enterprise/Member Details:

Step 1 : Launch the app, Enter your respective ECPs username and password

Step 2 : To view the password, click the show password icon and it will display
Step 3 : Click Login

Step 4 : Following your login, a list of Enterprise Ecosystem Development modules will appear on the screen. When you select the Enterprise Promotion Module, you will be taken to the EPM home page.
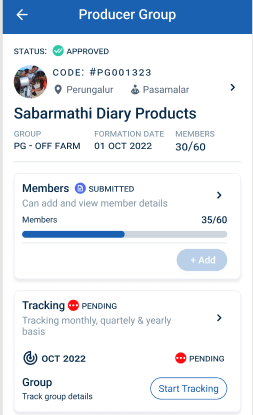
Step 5 : Once the Member profile has approved from DCOO, Select the profile and view the profile details more
Step 6 : To update the member details click ‘Add’
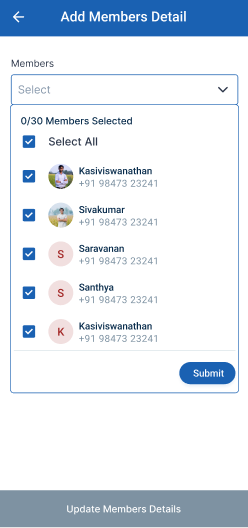
Step 7 : To update the member details select the dropdown to choose the member details and click ‘Submit’
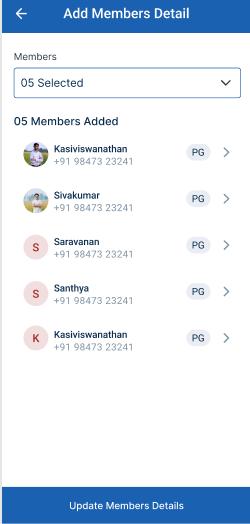
Step 8 : Once the member has selected click ‘Update Member Details’ Once you update the member details the status of the profile has changed from ‘Pending’ to ‘Submitted’
48. How to View the Verified Enterprise/Member Details:

Step 1 : Launch the app, Enter your respective ECPs username and password

Step 2 : To view the password, click the show password icon and it will display
Step 3 : Click Login

Step 4 : Following your login, a list of Enterprise Ecosystem Development modules will appear on the screen. When you select the Enterprise Promotion Module, you will be taken to the EPM home page.
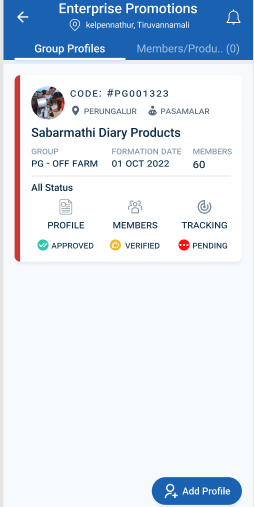
Step 5 : Once the Member profile has been verified from BTL, the status of the profile changes from ‘Submitted’ to ‘Verified’. Select the profile and view the profile details more
49. How to View the Member/Enterprise Details:

Step 1 : Launch the app, Enter your respective ECPs username and password

Step 2 : To view the password, click the show password icon and it will display
Step 3 : Click Login
Step 4 : Following your login, a list of Enterprise Ecosystem Development modules will appear on the screen. When you select the Enterprise Promotion Module, you will be taken to the EPM home page.
Step 6 : Select the member profile and view the member details more.Once the member has been verified BTL the ECP has view the member details
50. How to View the Member Profile:

Step 1 : Launch the app, Enter your respective ECPs username and password

Step 2 : To view the password, click the show password icon and it will display
Step 3 : Click Login

Step 4 : Following your login, a list of Enterprise Ecosystem Development modules will appear on the screen. When you select the Enterprise Promotion Module, you will be taken to the EPM home page.
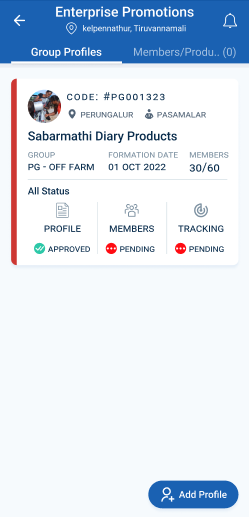
Step 5 : Once the member profile has been approved by the DCOO,the ECP can view the profile details in the home page
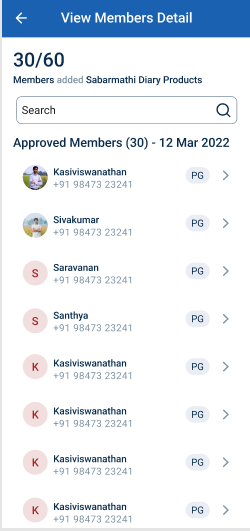
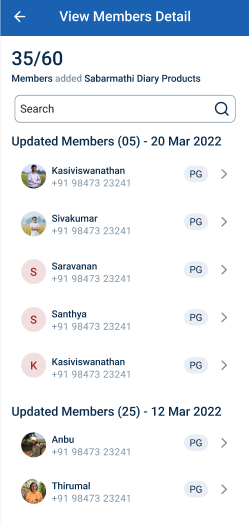
Step 6 : Select the member profile to view the member details more
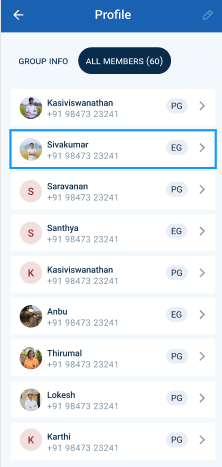
Step 7 : Click the ‘Group info’ to view the group member info annexure details more
Step 8 : Click the ‘All Members’ to view the group member profile annexure details more
51. How to Rework the Member Profile:
Step 1 : Launch the app, Enter your respective ECPs username and password

Step 2 : To view the password, click the show password icon and it will display
Step 3 : Click Login

Step 4 : Following your login, a list of Enterprise Ecosystem Development modules will appear on the screen. When you select the Enterprise Promotion Module, you will be taken to the EPM home page.
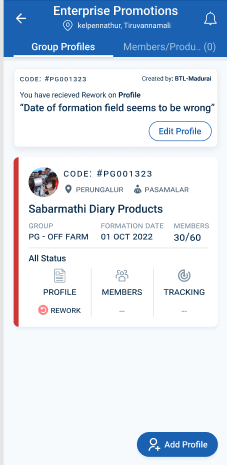
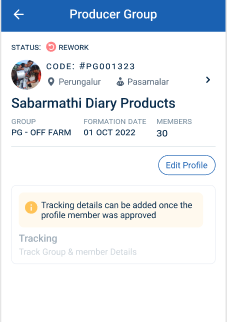
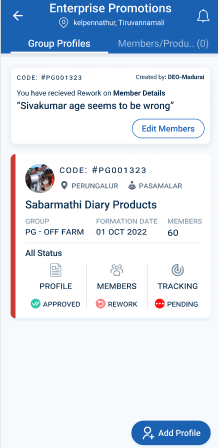
Step 5 : Once the profile has given by the rework by either BTL, EO-ED, DEO and DYCOO the rework profile will sent to the respective ECP login along with the status ‘Rework’
Step 6 : To rework the profile, Select the name of the profile once you selected the profile it will get redirected to the profile detail page. Click the ‘Edit Profile’ icon so that the profile will be redirected to the respective page.
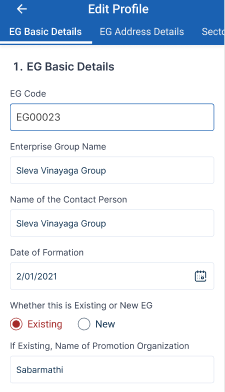
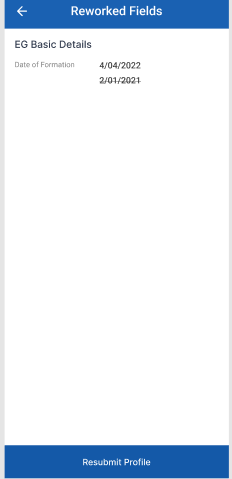
Step 7 : Update the changes in the member profile and click ‘Resubmit profile’
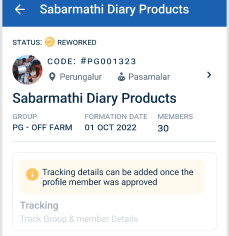
Step 8 : Once you resubmit the profile the reworked profile will send for the BTL verification and status of the profile has changed from ‘Rework’ to ‘Reworked’
52. How to Rework the Updated Enterprise/Member Details:

Step 1 : Launch the app, Enter your respective ECPs username and password

Step 2 : To view the password, click the show password icon and it will display
Step 3 : Click Login

Step 4 : Following your login, a list of Enterprise Ecosystem Development modules will appear on the screen. When you select the Enterprise Promotion Module, you will be taken to the EPM home page.
Step 5 : Once the profile has given by the rework by the BTL, the rework profile will sent to the respective ECP login along with the status ‘Rework’
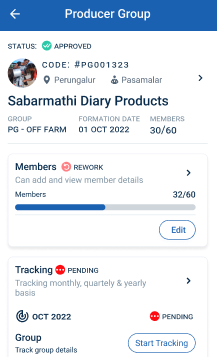
Step 6 : To rework the profile, Select the name of the profile once you selected the profile it will get redirected to the profile detail page. Click the ‘Edit’ icon so that the profile will be redirected to the respective page.

Step 7 : Update the member details and click ‘Save Changes’
Step 8 : Once you click ‘Save Changes’ the updated member details of the profile will be displayed in the next tab. Click ‘Continue’ to proceed further
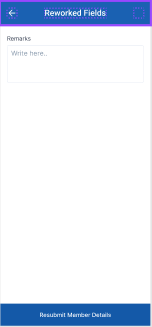
Step 9 : Remarks : Enter the remarks in the remarks section and click ‘Resubmit Member Details’
Step 9 : Once the member details has updated the status of the profile changed from ‘Rework’ to ‘Reworked’ and the profile will sent to the BTL for verify the Member/Enterprise details
53. How to Capture the PG Monthly Tracking Farm (New & Existing):

Step 1 : Launch the app, Enter your respective ECPs username and password

Step 2 : To view the password, click the show password icon and it will display
Step 3 : Click Login

Step 4 : Following your login, a list of Enterprise Ecosystem Development modules will appear on the screen. When you select the Enterprise Promotion Module, you will be taken to the EPM home page.
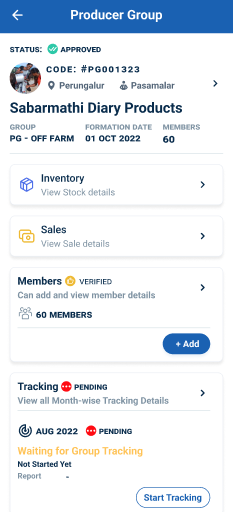
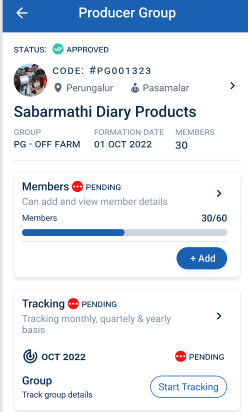
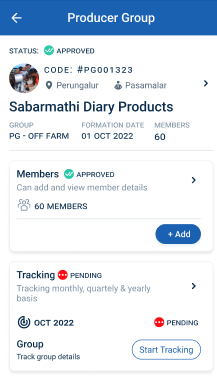
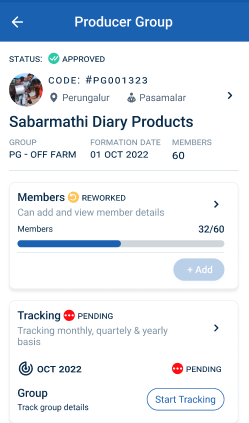
Step 5 : Once the profile has approved from the DYCOO, the ECP can start the monthly tracking for the PG group
Step 6 : Click ‘Tracking’ menu it will get redirect to the profile detail page
Step 7 : Click ‘Start Tracking’ to track the month wise tracking details
Step 8 : Once the ECP click start tracking it will redirected to the respective annexure page
53.1 How to Capture the Membership and Subscription Fees Details in the PG Monthly Tracking (New & Existing):
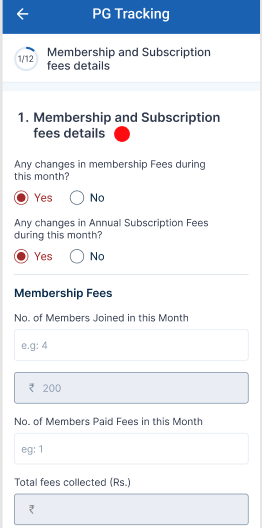
Step 1 : Membership & Subscription Fees Details
Step 1.1 : Any changes in membership fees during this month : If there are any changes in the membership fees during this month click ‘Yes’ or choose ‘No’. If ‘Yes’ , update the membership and annual subscription fees.
Step 2 : Membership Fees :
Step 2.1 : No of Member joined in this month : Enter the number of members has joined in this month and enter the membership amount
Step 2.2 : No of Member Paid Fees in this month : Enter the number of members has paid the fees in this month
Step 2.3 : Total Fees Collected : The total fees collected will auto populated
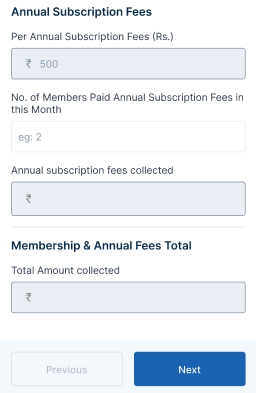
Step 3 : Annual Subscription Fees :
Step 3.1 : Per Annual Subscription Fees : Enter the per annual subscription fee amount
Step 3.2 : No of Member Paid Annual Subscription Fees in this month : Enter the number of members has paid the annual subscription fees in this month
Step 3.3 : Annual Subscription Fees Collected : The total annual subscription fees collected will auto populated
Step 4 : Membership & Annual Fees Total :
Step 4.1 : Total Amount Collected : The total amount collected will auto populated based on the previous data
Step 5 : Once the details have been entered by the ECP, click ‘Next’. The information will be saved in the draft automatically
53.2 How to Capture the Office Bearer Details in the PG Monthly Tracking (New & Existing) :


Step 1 : Office Bearer Details
Step 1.1 : Any changes in office bearer during this month : If there are any changes in the office bearer during this month click ‘Yes’ or choose ‘No’. If ‘Yes’ , the list of president,secretary and treasurer details.
Step 1.2 : The name of the president, contact number, date of joining and choose the status if the status is click ‘Continuing’ the president details will not change and if the status is ‘Changed’
Step 1.3 : If Changed, Date of Relieving : If the status is ‘Changed’ By clicking the calendar to choose the relieving date and clicking the dropdown to choose the new president and the contact number will get auto populated based on the name and by clicking the calendar to choose the joining date
Step 1.4 : The name of the secretary, contact number, date of joining and choose the status if the status is click ‘Continuing’ the president details will not change and if the status is ‘Changed’
Step 1.5 : If Changed, Date of Relieving : If the status is ‘Changed’ By clicking the calendar to choose the relieving date and clicking the dropdown to choose the new president and the contact number will get auto populated based on the name and by clicking the calendar to choose the joining date
Step 1.6 : The name of the treasurer, contact number, date of joining and choose the status if the status is click ‘Continuing’ the president details will not change and if the status is ‘Changed’
Step 1.7 : If Changed, Date of Relieving : If the status is ‘Changed’ By clicking the calendar to choose the relieving date and clicking the dropdown to choose the new president and the contact number will get auto populated based on the name and by clicking the calendar to choose the joining date
Step 1.8 : Date of Resolution : By clicking the calendar to choose the resolution date
Step 1.9 : Resolution Copy : Click Browse to upload the resolution copy
Step 2 : Once the details have been entered by the ECP, click ‘Next’. The information will be saved in the draft automatically
53.3 How to Capture the Affiliation With Producer Collectives in the PG Monthly Tracking (New & Existing):
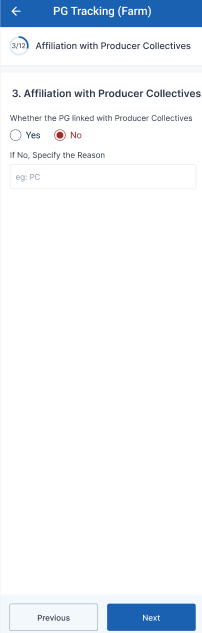
Step 1 : Affiliation With Producer Collectives
Step 1.1 : Whether the PG linked with Producer Collectives : Whether the PG linked with producer collectives click ‘Yes’ or choose ‘No’. If ‘Yes’ , update the PC details or If ‘No’ enter the reason.
Step 1.2 : Name of the PC : If ‘Yes’ enter the name of the producer collectives, choose the dropdown to select the name of the block and panchayat of the PC
Step 1.3 : Affiliation Date : By clicking the calendar to choose the affiliation date
Step 1.4 : Amount of share capital paid to the PC : Enter the PC share capital amount in rupees
Step 1.5 : No of PG members federated with the PC : Enter the number of PG members federated with the PC
Step 1.6 : Category of the PC : By clicking the dropdown to choose the category of the PC
Step 1.7 : Date of Resolution : By clicking the calendar to choose the resolution date
Step 1.8 : Upload Resolution Copy PG & PC : Click Browse to upload the resolution copy of PG & PC
Step 2 : Once the details have been entered by the ECP, click ‘Next’. The information will be saved in the draft automatically
53.4 How to Capture the Existing Fund in the PG Monthly Tracking (For Existing PG Only) :
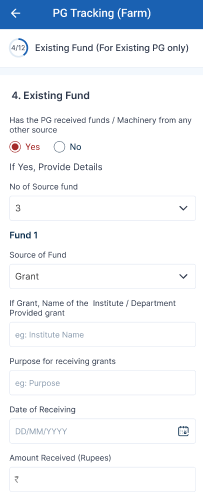
Step 1 : Existing Fund
Step 1.1 : Has the PG received funds/machinery from any other resource : If the PG PG received funds/machinery from any other resource click ‘Yes’ or choose ‘No’. If ‘Yes’ enter the no of source fund
Step 2 : Fund 1
Step 2.1 : Source of Fund : By clicking the calendar to choose the source of fund
Step 2.2 : If Grant, Name of the institute/ department provided grant : Enter the name of institute or department providing grant name
Step 2.3 : Purpose of receiving grants : Enter the purpose of receiving grants
Step 2.4 : Date of Receiving : By clicking the calendar to choose the receiving date
Step 2.5 : Amount Received : Enter the received amount
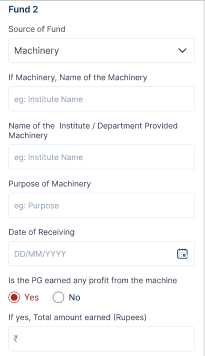
Step 3 : Fund 2
Step 3.1 : Source of Fund : By clicking the calendar to choose the source of fund
Step 3.2 : If Machinery, Name of the institute/ department provided Machinery : Enter the name of institute or department providing machinery name
Step 3.3 : Purpose of Machinery : Enter the purpose of machinery
Step 3.4 : Date of Receiving : By clicking the calendar to choose the receiving date
Step 2.5 : Is PG earned any profit from the machine : If the PG has earned any profit any profit from the machine click ‘Yes’ and enter the total earned amount or choose ‘No’
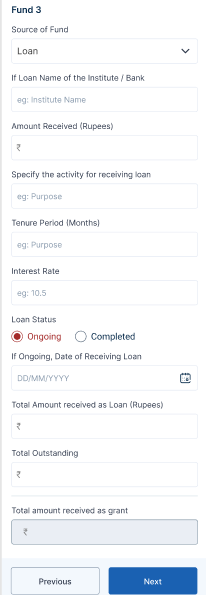
Step 4 : Fund 3
Step 4.1 : Source of Fund : By clicking the calendar to choose the source of fund
Step 4.2 : If Loan, Name of the institute/ bank : Enter the name of institute or bank name
Step 4.3 : Amount Received : Enter the received amount
Step 4.4 : Specify the activity for receiving loan : Enter the specify the activity for receiving loan
Step 4.5 : Tenure Period : Enter the loan tenure period
Step 4.6 : Interest Rate : Enter the rate of interest
Step 4.7 : Loan Status : Choose the status of the loan
Step 4.8 : If ongoing loan, By clicking the calendar to choose the loan receiving date, total amount received as loan and enter the total outstanding
Step 4.9 : Total Amount Received as Grant : The grant amount will get auto populated based on the previous data
Step 5 : Once the details have been entered by the ECP, click ‘Next’. The information will be saved in the draft automatically
53.5 How to Capture the Meeting Details in the PG Monthly Tracking (New & Existing) :
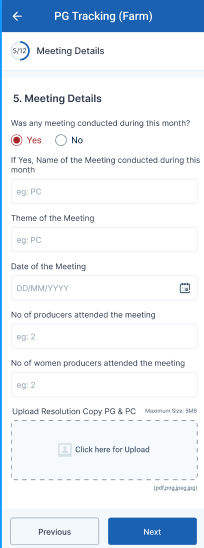
Step 1 : Meeting Details
Step 1.1 : Was any meeting conducted during this month : Whether any meeting conducted during this month click ‘Yes’ or choose ‘No’. If ‘Yes’ , update the meeting details.
Step 1.2 : If ‘Yes’ Enter the name of the meeting conducted during this month : Enter the name of the meeting conducted during this month
Step 1.3 : Theme of the Meeting : Enter the theme of the meeting
Step 1.4 : Date of the Meeting : By clicking the calendar to choose the date of the meeting
Step 1.5 : No of Producers attended the Meeting : Enter the number of producers attended the meeting
Step 1.6 : No of Women Producers attended the Meeting : Enter the number of women producers attended the meeting
Step 1.7 : Upload Resolution Copy PG & PC : Click Browse to upload the resolution copy of PG & PC
Step 2 : Once the details have been entered by the ECP, click ‘Next’. The information will be saved in the draft automatically
53.6 How to Capture the Input Procurement Details in the PG Monthly Tracking (New & Existing) :
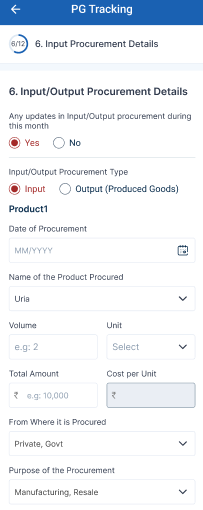
Step 1 : Input/Output Procurement Type
Step 1.1 : Any update in input/output procurement during this month : Whether any update in the input and output procurement during this month click ‘Yes’ or choose ‘No’. If ‘Yes’ , update the input output procurement details.
Step 2 : Input/output Procurement Type
Step 2.1 : By choose the procurement type click ‘INPUT’
Step 2.2 : Date of Procurement : By clicking the calendar to choose the procurement date
Step 2.3 : Name of the product produced : Enter the name of the product produced
Step 2.4 : Volume : Enter the number of volume and click the dropdown to choose the units
Step 2.5 : From Where it is Procured : By clicking the dropdown to choose the where the product is procured
Step 2.6 : Purpose of the Procurement : By clicking the dropdown to choose the purpose of the procurement
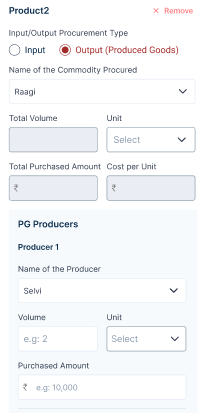
Step 2.7 : By choose the procurement type click ‘OUTPUT’
Step 2.8 : Name of the commodity procured : Enter the name of the procured commodity
Step 2.9 : Total Volume : Enter the number of volume and click the dropdown to choose the units
Step 2.10 : The total purchased amount and the cost per unit will get auto populated based on the previous data
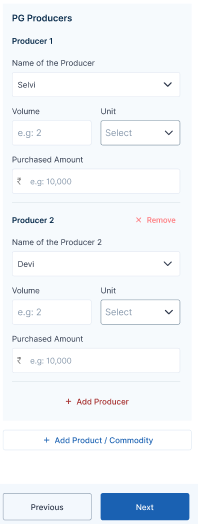
Step 3 : PG Producer
Step 3.1 : Name of the Producer : By clicking the dropdown to choose the name of the producer.
Step 3.2 : Total Volume : Enter the number of volume and click the dropdown to choose the units
Step 3.3 : Purchased Amount : Enter the Purchased amount
Step 3.4 : To add more producer click ‘Add Producer’
Step 3.5 : To add more product/commodity click ‘Add Product/Commodity’
Step 4 : Once the details have been entered by the ECP, click ‘Next’. The information will be saved in the draft automatically
53.7 How to Capture the Sales Management in the PG Monthly Tracking (New & Existing):
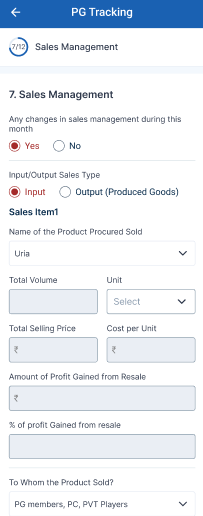
Step 1 : Sales Management
Step 1.1 : Any changes in sales management during this month : Whether any changes in sales management during this month click ‘Yes’ or choose ‘No’. If ‘Yes’ , update the input output sales type.
Step 2 : Input/Output Sales Type
Step 2.1 : Choose the sales type as ‘Input’
Step 2.2 : Name of the Product Procured Sold : By clicking the dropdown to choose the name of the product procured sold
Step 2.3 : The total volume, total selling price, Amount of profit gained from the resale and % of profit gained from resale will get auto populated based on the previous data.
Step 2.4 : To Whom the Product Sold? By clicking the dropdown to choose the to whom the product sold
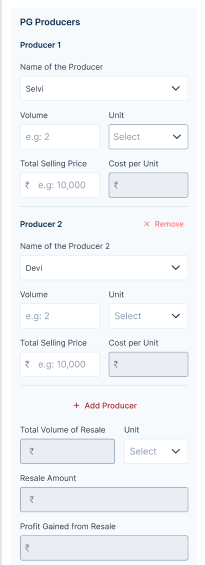
Step 3 : PG Producer
Step 3.1 : Name of the Producer : By clicking the dropdown to choose the name of the producer
Step 3.2 : Volume : Enter the volume and click the dropdown to choose the dropdown to choose the unit
Step 3.3 : Total Selling Price : Enter the total selling price and the cost per unit will auto populated based on the previous data
Step 3.4 : To add more producer click ‘Add Producer’
Step 4 : The total volume of resale,resale amount and profit gained from the resale will get auto populated based on the previous data.
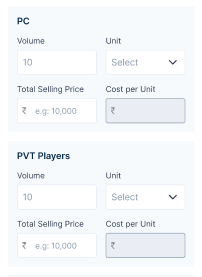
Step 5 : PC
Step 5.1 : Volume : Enter the volume and click the dropdown to choose the dropdown to choose the unit
Step 5.2 : Total Selling Price : Enter the total selling price
Step 5.3 Cost Per Unit : The cost per unit will auto populated based on the previous data
Step 6 : PVT Players
Step 6.1 : Volume : Enter the volume and click the dropdown to choose the dropdown to choose the unit
Step 6.2 : Total Selling Price : Enter the total selling price
Step 6.3 Cost Per Unit : The cost per unit will auto populated based on the previous data
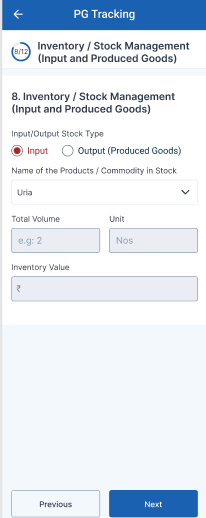
Step 7.1 : Choose the sales type as ‘Output’
Step 7.2 : Name of the Commodity Procured Sold : By clicking the dropdown to choose the name of the commodity procured sold
Step 7.3 : Volume : Enter the volume and click the dropdown to choose the dropdown to choose the unit
Step 7.4 : Total Selling Price : Enter the total selling price
Step 7.5 : The amount of profit gained from the resale and % of profit gained from resale will get auto populated based on the previous data.
Step 8 : If the PG doing any value added service: By clicking the dropdown to choose the PG doing any value added service.
Step 9 : To add more producer/commodity click ‘Add Product/Commodity’
Step 10 : Once the details have been entered by the ECP, click ‘Next’. The information will be saved in the draft automatically
53.8 How to Capture the Inventory/ Stock Management Details in the PG Monthly Tracking (New & Existing):
Step 2 : Input/Output Sales Type
Step 2.1 : Choose the sales type as ‘Input’
Step 2.2 : Name of the Products/Commodity in Stock : By clicking the dropdown to choose the name of the product/commodity in stock
Step 2.3 : The total volume,units,Inventory Value will get auto populated based on the previous data.
Step 3 : Once the details have been entered by the ECP, click ‘Next’. The information will be saved in the draft automatically
53.9 How to Capture the Input Procurement Details in the PG Monthly Tracking (New & Existing):
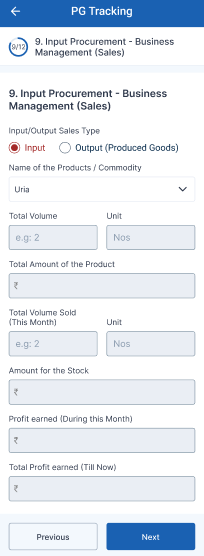
Step 2 : Input/Output Sales Type
Step 2.1 : Choose the sales type as ‘Input’
Step 2.2 : Name of the Products/Commodity in Stock : By clicking the dropdown to choose the name of the product/commodity
Step 2.3 : The total volume,units,total amount of the product,total volume sold this month, Amount for the stock, Profit earned during this month and total profit earned till now will get auto populated based on the previous data.
Step 3 : Once the details have been entered by the ECP, click ‘Next’. The information will be saved in the draft automatically
53.10 How to Capture the Direct Input or Out Selling Shop in the PG Monthly Tracking (New & Existing) :
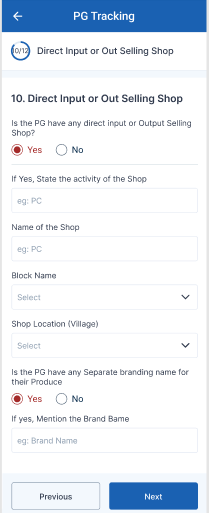
Step 1 : Direct Input or Out Selling Shop
Step 1.1 : If the PG has any direct input or output selling shop : Whether the PG has any direct input or output selling shop click ‘Yes’ or choose ‘No’. If ‘Yes’ , update the direct input output selling shop details.
Step 1.2 : If Yes State of the activity of the shop : Enter the state the activity of the shop
Step 1.3 : Name of the Shop : Enter the name of the shop
Step 1.4 : Block Name : By Clicking the dropdown to choose the block name
Step 1.5 : Shop Location (Village) : By Clicking the dropdown to choose the shop location village
Step 1.6 : Is the PG have any separate branding name for their produce : If the PG have any separate branding name for their produce click ‘Yes’ or choose ‘No’
Step 2 : Once the details have been entered by the ECP, click ‘Next’. The information will be saved in the draft automatically
53.11 How to Capture the Training Details in the PG Monthly Tracking (New & Existing) :
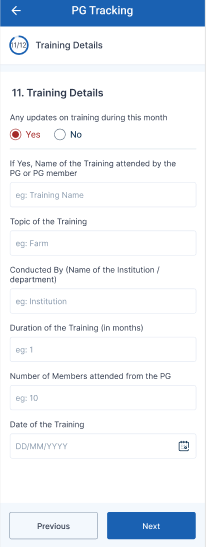
Step 1 : Training Details
Step 1.1 : Any Update on training during this month : Whether the PG has any update on training during this month click ‘Yes’ or choose ‘No’. If ‘Yes’ , update the training details.
Step 1.2 : Name of the Training attended by the PG or PG Member : Enter the number of training attended by the PG or PG member
Step 1.3 : Topic of the Training : Enter the topic of the training
Step 1.4 : Conducted by : Enter the conducted name of the institution or department
Step 1.5 : Duration of the training : Enter the duration of the training in months
Step 1.6 : Number of the members attended from the PG : Enter the number of members attended from the PG
Step 1.7 : Date of the training : By clicking the calendar to choose the date of the training
Step 2 : Once the details have been entered by the ECP, click ‘Next’. The information will be saved in the draft automatically
53.12 How to Capture the Details on Machinery in the PG Monthly Tracking (New & Existing) :
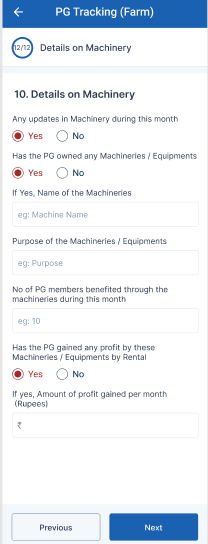
Step 1 : Details on Machinery
Step 1.1 : Any Update on machinery during this month : Whether the PG has any update on machinery during this month click ‘Yes’ or choose ‘No’. If ‘Yes’ , update the training details.
Step 1.2 : Has the PG Owned any Machineries/Equipment : If the PG has owned any machines or equipment click ‘Yes’ or choose ‘No’. If ‘Yes’ enter the name of the machineries
Step 1.3 : Purpose of the Machineries/ Equipments : Enter the purpose of the machines or Equipments
Step 1.4 : No of PG members benefited through the machineries during this month : Enter the number of PG members benefited through the machineries during this month
Step 1.5 : Has the PG gained any profit by these machineries/ equipments by rental: If the PG gained any profit by these machineries/ equipments by rental click ‘Yes’ or choose ‘No’
Step 2 : Once the details have been entered by the ECP, click ‘Next’. The information will be saved in the draft automatically
53.13 How to Review and Submit in Monthly Tracking Details (New & Existing):

Step 1 : Launch the app, Enter your respective ECPs username and password
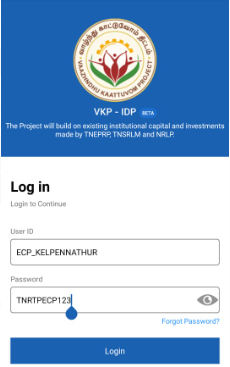
Step 2 : To view the password, click the show password icon and it will display
Step 3 : Click Login

Step 4 : Following your login, a list of Enterprise Ecosystem Development modules will appear on the screen. When you select the Enterprise Promotion Module, you will be taken to the EPM home page.

Step 5 : After completed all the annexure, all the details will be reflected in the ‘Review and Submit’ page
Step 6 : After reviewing the member details, select the Submit option.
Step 7 : If the ECPs staff needs to edit the data click Back, Once the screen went to the annexure update the changes the details will be saved automatically
Step 8 : Once entered the Submit button, Once the ECP submitted the member profile and the toast message like ‘Successfully Submitted’.
54. How to Capture the EG Monthly Tracking (New & Existing):

Step 1 : Launch the app, Enter your respective ECPs username and password

Step 2 : To view the password, click the show password icon and it will display
Step 3 : Click Login

Step 4 : Following your login, a list of Enterprise Ecosystem Development modules will appear on the screen. When you select the Enterprise Promotion Module, you will be taken to the EPM home page.


Step 5 : Once the profile has approved from the DYCOO, the ECP can start the monthly tracking for the EG group
Step 6 : Click ‘Tracking’ menu it will get redirect to the profile detail page
Step 7 : Click ‘Start Tracking’ to track the month wise tracking details
Step 8 : Once the ECP click start tracking it will redirected to the respective annexure page
54.1 How to Capture the Membership and Subscription Fees Details in the EG Monthly Tracking (New & Existing):
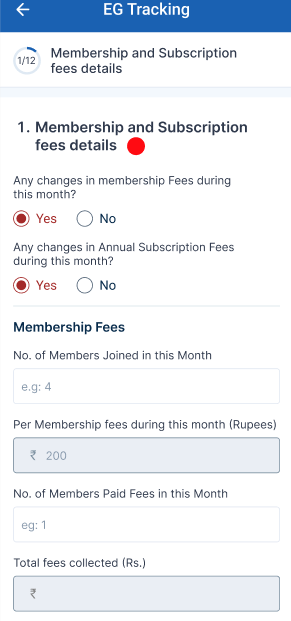
Step 1 : Membership & Subscription Fees Details
Step 1.1 : Any changes in membership fees during this month : If there are any changes in the membership fees during this month click ‘Yes’ or choose ‘No’. If ‘Yes’ , update the membership and annual subscription fees.
Step 2 : Membership Fees :
Step 2.1 : No of Member joined in this month : Enter the number of members has joined in this month and enter the membership amount
Step 2.2 : Per Membership fees in this month : Enter the number of per membership fees has paid the fees in this month
Step 2.3 : No of Member Paid Fees in this month : Enter the number of members has paid the fees in this month
Step 2.4 : Total Fees Collected : The total fees collected will auto populated

Step 3 : Annual Subscription Fees :
Step 3.1 : Per Annual Subscription Fees : Enter the per annual subscription fee amount
Step 3.2 : No of Member Paid Annual Subscription Fees in this month : Enter the number of members has paid the annual subscription fees in this month
Step 3.3 : Annual Subscription Fees Collected : The total annual subscription fees collected will auto populated
Step 4 : Membership & Annual Fees Total :
Step 4.1 : Total Amount Collected : The total amount collected will auto populated based on the previous data
Step 5 : Once the details have been entered by the ECP, click ‘Next’. The information will be saved in the draft automatically
54.2 How to Capture the Office Bearer Details in the EG Monthly Tracking (New & Existing) :
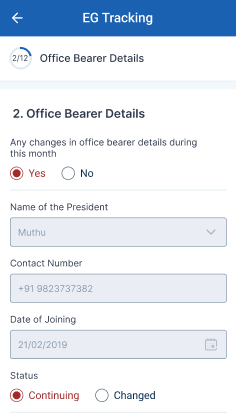
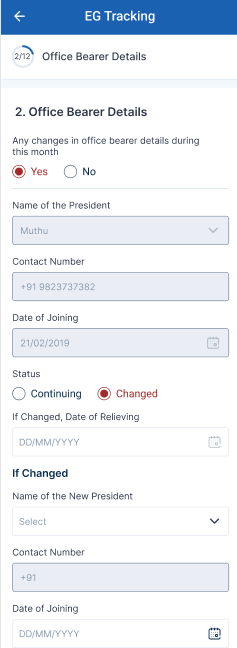
Step 1 : Office Bearer Details
Step 1.1 : Any changes in office bearer during this month : If there are any changes in the office bearer during this month click ‘Yes’ or choose ‘No’. If ‘Yes’ , the list of president,secretary and treasurer details.
Step 1.2 : The name of the president, contact number, date of joining and choose the status if the status is click ‘Continuing’ the president details will not change and if the status is ‘Changed’
Step 1.3 : If Changed, Date of Relieving : If the status is ‘Changed’ By clicking the calendar to choose the relieving date and clicking the dropdown to choose the new president and the contact number will get auto populated based on the name and by clicking the calendar to choose the joining date
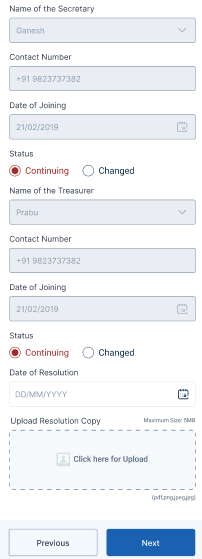
Step 1.4 : The name of the secretary, contact number, date of joining and choose the status if the status is click ‘Continuing’ the president details will not change and if the status is ‘Changed’
Step 1.5 : If Changed, Date of Relieving : If the status is ‘Changed’ By clicking the calendar to choose the relieving date and clicking the dropdown to choose the new president and the contact number will get auto populated based on the name and by clicking the calendar to choose the joining date
Step 1.6 : The name of the treasurer, contact number, date of joining and choose the status if the status is click ‘Continuing’ the president details will not change and if the status is ‘Changed’
Step 1.7 : If Changed, Date of Relieving : If the status is ‘Changed’ By clicking the calendar to choose the relieving date and clicking the dropdown to choose the new president and the contact number will get auto populated based on the name and by clicking the calendar to choose the joining date
Step 1.8 : Date of Resolution : By clicking the calendar to choose the resolution date
Step 1.9 : Resolution Copy : Click Browse to upload the resolution copy
Step 2 : Once the details have been entered by the ECP, click ‘Next’. The information will be saved in the draft automatically
54.3 How to Capture the Existing Fund in the EG Monthly Tracking (For Existing EG Only) :
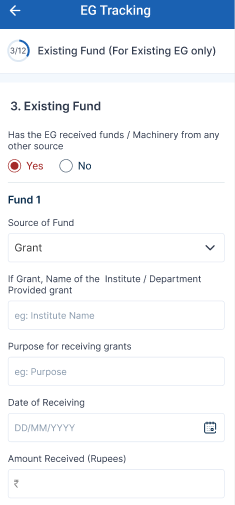
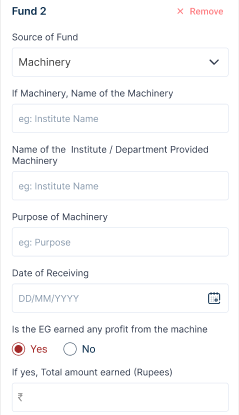
Step 1 : Existing Fund
Step 1.1 : Has the EG received funds/machinery from any other resource : If the EG, EG received funds/machinery from any other resource click ‘Yes’ or choose ‘No’. If ‘Yes’ enter the no of source fund
Step 2 : Fund 1
Step 2.1 : Source of Fund : By clicking the calendar to choose the source of fund
Step 2.2 : If Grant, Name of the institute/ department provided grant : Enter the name of institute or department providing grant name
Step 2.3 : Purpose of receiving grants : Enter the purpose of receiving grants
Step 2.4 : Date of Receiving : By clicking the calendar to choose the receiving date
Step 2.5 : Amount Received : Enter the received amount
Step 3 : Fund 2
Step 3.1 : Source of Fund : By clicking the calendar to choose the source of fund
Step 3.2 : If Machinery, Name of the institute/ department provided Machinery : Enter the name of institute or department providing machinery name
Step 3.3 : Purpose of Machinery : Enter the purpose of machinery
Step 3.4 : Date of Receiving : By clicking the calendar to choose the receiving date
Step 2.5 : Is EG earned any profit from the machine : If the EG has earned any profit any profit from the machine click ‘Yes’ and enter the total earned amount or choose ‘No’
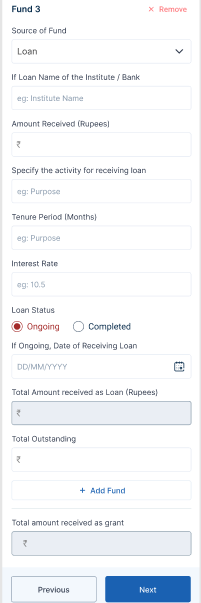
Step 4 : Fund 3
Step 4.1 : Source of Fund : By clicking the calendar to choose the source of fund
Step 4.2 : If Loan, Name of the institute/ bank : Enter the name of institute or bank name
Step 4.3 : Amount Received : Enter the received amount
Step 4.4 : Specify the activity for receiving loan : Enter the specify the activity for receiving loan
Step 4.5 : Tenure Period : Enter the loan tenure period
Step 4.6 : Interest Rate : Enter the rate of interest
Step 4.7 : Loan Status : Choose the status of the loan
Step 4.8 : If ongoing loan, By clicking the calendar to choose the loan receiving date, total amount received as loan and enter the total outstanding
Step 4.9 : Total Amount Received as Grant : The grant amount will get auto populated based on the previous data
Step 5 : Once the details have been entered by the ECP, click ‘Next’. The information will be saved in the draft automatically
54.4 How to Capture the Meeting Details in the EG Monthly Tracking (New & Existing) :

Step 1 : Meeting Details
Step 1.1 : Was any meeting conducted during this month : Whether any meeting conducted during this month click ‘Yes’ or choose ‘No’. If ‘Yes’ , update the meeting details.
Step 1.2 : If ‘Yes’ Enter the name of the meeting conducted during this month : Enter the name of the meeting conducted during this month
Step 1.3 : Theme of the Meeting : Enter the theme of the meeting
Step 1.4 : Date of the Meeting : By clicking the calendar to choose the date of the meeting
Step 1.5 : No of EG Members attended the Meeting : Enter the number of EG members attended the meeting
Step 1.6 : No of Women Producers attended the Meeting : Enter the number of women producers attended the meeting
Step 1.7 : Upload Resolution Copy PG & PC : Click Browse to upload the resolution copy of PG & PC
Step 2 : Once the details have been entered by the ECP, click ‘Next’. The information will be saved in the draft automatically
54.5 How to Capture the Raw Material Procurement in the EG Monthly Tracking (New & Existing):
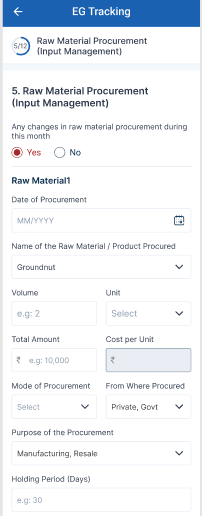
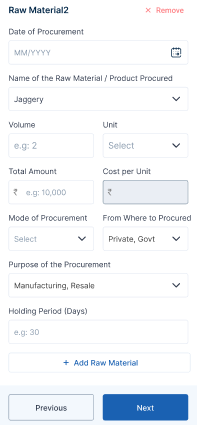
Step 1 : Raw Material Procurement (Input Management)
Step 1.1 : Any Changes in raw material procurement during this month : Whether any changes in raw material procurement during this month click ‘Yes’ or choose ‘No’. If ‘Yes’ , update the meeting details.
Step 1.2 : Date of Procurement : By clicking the calendar to choose date of procurement
Step 1.3 : Name of the Raw Material/Product Procured : Enter the name of raw material product procured
Step 1.4 : Volume : Enter the volume amount and click the dropdown to choose the units
Step 1.5 : Total Amount : Enter the total amount and the cost per unit will get auto populated based on the previous data
Step 1.6 : Mode of Procurement : By clicking the dropdown to choose the mode of procurement
Step 1.7 : From Where to Procured : By clicking the dropdown to choose where the product procured
Step 1.8 : Purpose of Procurement : By clicking the dropdown to choose purpose of the procurement
Step 1.9 : Holding Period (Days) : Enter the number of holding periods in days
Step 1.10 : To add more raw material click ‘Add Raw Material’
Step 2 : Once the details have been entered by the ECP, click ‘Next’. The information will be saved in the draft automatically
54.6 How to Capture the Production Management in the EG Monthly Tracking (New & Existing):
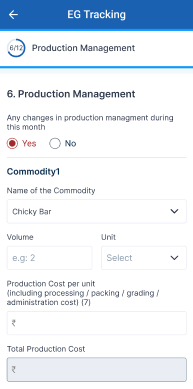
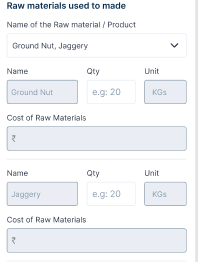
Step 1 : Production Management
Step 1.1 : Any Changes in Production Management during this month : Whether any changes in production management during this month click ‘Yes’ or choose ‘No’. If ‘Yes’ , update the meeting details.
Step 1.2 : Name of the Commodity : By clicking the dropdown to choose the name of the commodity
Step 1.3 : Volume : Enter the volume amount and click the dropdown to choose the units
Step 1.4 : Production Cost Per Unit : Enter the production cost per unit
Step 1.5 : Total Production Cost : The total production cost will get auto populated based on the previous data
Step 1.6 : Name of the Raw Material/Product : By clicking the dropdown to choose the name of the raw material and product
Step 1.7 : The name of the product, unit and cost of the raw materials will get auto populated based on the data
Step 1.8 : Quantity : Enter the quantity of the amount
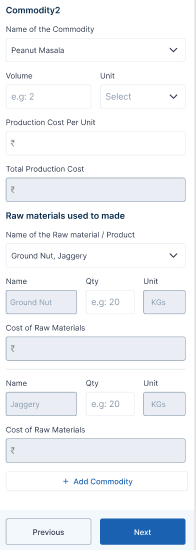
Step 1.9 : To add more commodity click ‘Add Commodity’
Step 2 : Once the details have been entered by the ECP, click ‘Next’. The information will be saved in the draft automatically
54.7 How to Capture the Sales Management in the EG Monthly Tracking (New & Existing):
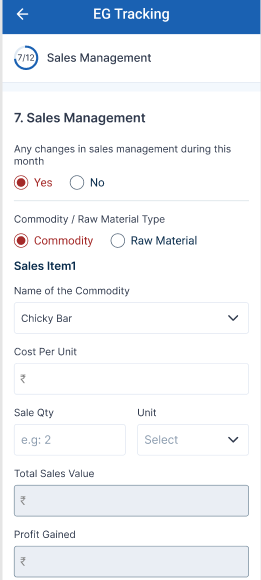
Step 1 : Sales Management
Step 1.1 : Any changes in sales management during this month : Whether any changes in sales management during this month click ‘Yes’ or choose ‘No’. If ‘Yes’ , update the input output sales type.
Step 2 : Commodity/Raw Material Type
Step 2.1 : Choose the sales type as ‘Commodity’
Step 2.2 : Name of the Commodity : By clicking the dropdown to choose the name of the commodity
Step 2.3 : Cost Per Unit : Enter the cost per unit amount
Step 2.4 : Sales Qty : Enter the sales quantity amount and click the dropdown to choose the units
Step 2.5 : Total Sales Value : Enter the total sales value will auto populated based on the previous data
Step 2.5 : Profit Gained : Enter the profit gained value will auto populated based on the previous data
Step 3 : Commodity/Raw Material Type
Step 3.1 : Choose the sales type as ‘Raw Material’
Step 3.2 : Name of the Product/ Commodity/ Raw Material Sold : By clicking the dropdown to choose the name of the commodity product and raw material sold
Step 3.3 : Cost Per Unit : Enter the cost per unit amount
Step 3.4 : Sales Qty : Enter the sales quantity amount and click the dropdown to choose the units
Step 3.5 : Total Sales Value : Enter the total sales value will auto populated based on the previous data
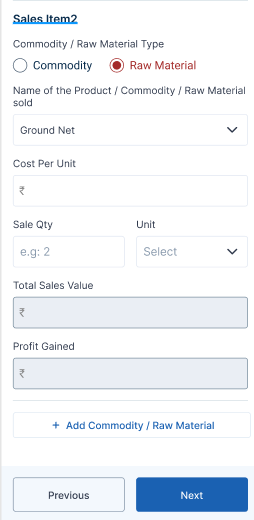
Step 3.6 : Profit Gained : Enter the profit gained value will auto populated based on the previous data
Step 3.7 : To add more commodity/raw material click ‘Add Commodity/Raw Material’
Step 4 : Once the details have been entered by the ECP, click ‘Next’. The information will be saved in the draft automatically
54.8 How to Capture the Inventory/ Stock Management Details in the EG Monthly Tracking (New & Existing):
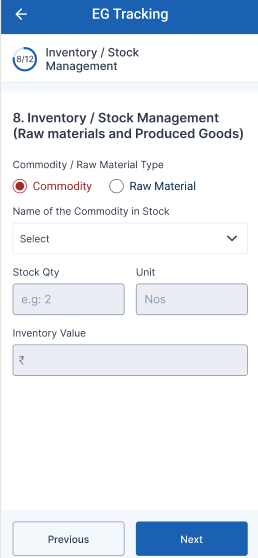
Step 2 : Commodity/ Raw Material Type
Step 2.1 : Choose the sales type as ‘Commodity’
Step 2.2 : Name of the Commodity in Stock : By clicking the dropdown to choose the name of the commodity in stock
Step 2.3 : The stock qty,units,Inventory Value will get auto populated based on the previous data.
Step 3 : Once the details have been entered by the ECP, click ‘Next’. The information will be saved in the draft automatically
54.9 How to Capture the Business Management Details in the EG Monthly Tracking (New & Existing):
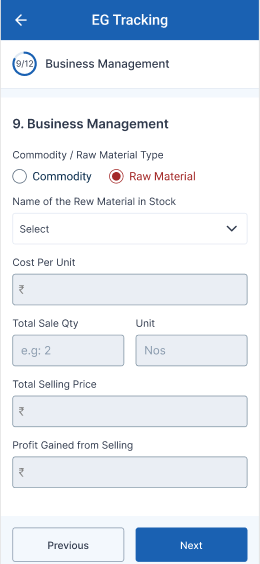
Step 2 : Commodity/ Raw Material Type
Step 2.1 : Choose the sales type as ‘Raw Material’
Step 2.2 : Name of the Raw Material in Stock : By clicking the dropdown to choose the name of the raw material in stock
Step 2.3 : The cost per unit, total sales qty, unit, total selling price and profit gained from the selling details will get auto populated based on the previous data.
Step 3 : Once the details have been entered by the ECP, click ‘Next’. The information will be saved in the draft automatically
54.10 How to Capture the Direct Input or Out Selling Shop in the EG Monthly Tracking (New & Existing) :

Step 1 : Direct Input or Out Selling Shop
Step 1.1 : If the EG has any direct input or output selling shop : Whether the EG has any direct input or output selling shop click ‘Yes’ or choose ‘No’. If ‘Yes’ , update the direct input output selling shop details.
Step 1.2 : If Yes State of the activity of the shop : Enter the state the activity of the shop
Step 1.3 : Name of the Shop : Enter the name of the shop
Step 1.4 : Block Name : By Clicking the dropdown to choose the block name
Step 1.5 : Shop Location (Village) : By Clicking the dropdown to choose the shop location village
Step 1.6 : Is the EG have any separate branding name for their produce : If the EG have any separate branding name for their produce click ‘Yes’ or choose ‘No’
Step 2 : Once the details have been entered by the ECP, click ‘Next’. The information will be saved in the draft automatically
54.11 How to Capture the Training Details in the EG Monthly Tracking (New & Existing) :

Step 1 : Training Details
Step 1.1 : Any Update on training during this month : Whether the PG has any update on training during this month click ‘Yes’ or choose ‘No’. If ‘Yes’ , update the training details.
Step 1.2 : Name of the Training attended by the EG or EG Member : Enter the number of training attended by the EG or EG member
Step 1.3 : Topic of the Training : Enter the topic of the training
Step 1.4 : Conducted by : Enter the conducted name of the institution or department
Step 1.5 : Duration of the training : Enter the duration of the training in months
Step 1.6 : Number of the members attended from the EG : Enter the number of members attended from the EG
Step 1.7 : Date of the training : By clicking the calendar to choose the date of the training
Step 2 : Once the details have been entered by the ECP, click ‘Next’. The information will be saved in the draft automatically
54.12 How to Capture the Details on Machinery in the EG Monthly Tracking (New & Existing) :
Step 1 : Details on Machinery
Step 1.1 : Any Update on machinery during this month : Whether the PG has any update on machinery during this month click ‘Yes’ or choose ‘No’. If ‘Yes’ , update the training details.
Step 1.2 : Has the PG Owned any Machineries/Equipment : If the PG has owned any machines or equipment click ‘Yes’ or choose ‘No’. If ‘Yes’ enter the name of the machineries
Step 1.3 : Purpose of the Machineries/ Equipments : Enter the purpose of the machines or Equipments
Step 1.4 : No of EG members benefited through the machineries during this month : Enter the number of EG members benefited through the machineries during this month
Step 1.5 : Has the EG gained any profit by these machineries/ equipments by rental: If the EG gained any profit by these machineries/ equipments by rental click ‘Yes’ or choose ‘No’
Step 2 : Once the details have been entered by the ECP, click ‘Next’. The information will be saved in the draft automatically
54.13 How to Review and Submit in EG Monthly Tracking Details (New & Existing):

Step 1 : Launch the app, Enter your respective ECPs username and password

Step 2 : To view the password, click the show password icon and it will display
Step 3 : Click Login

Step 4 : Following your login, a list of Enterprise Ecosystem Development modules will appear on the screen. When you select the Enterprise Promotion Module, you will be taken to the EPM home page.
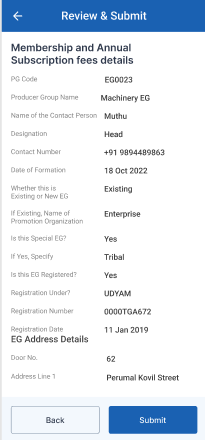

Step 5 : After completed all the annexure, all the details will be reflected in the ‘Review and Submit’ page
Step 6 : After reviewing the member details, select the Submit option.
Step 7 : If the ECPs staff needs to edit the data click Back, Once the screen went to the annexure update the changes the details will be saved automatically
Step 8 : Once entered the Submit button, Once the ECP submitted the member profile and the toast message like ‘Successfully Submitted’.
55. How to Continue the Monthly Tracking from the Draft (New & Existing):

Step 1 : Launch the app, Enter your respective ECPs username and password
Step 2 : To view the password, click the show password icon and it will display
Step 3 : Click Login

Step 4 : Following your login, a list of Enterprise Ecosystem Development modules will appear on the screen. When you select the Enterprise Promotion Module, you will be taken to the EPM home page.

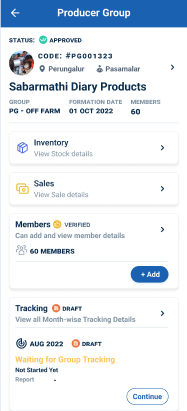
Step 5 : Once the profile has approved from the DYCOO, the ECP can start the monthly tracking for the EG group
Step 6 : Click ‘Tracking’ menu it will get redirect to the profile detail page
Step 7 : Click ‘Continue’ to continue the track the month wise tracking details
Step 8 : Once the ECP click continues it will redirect to the respective monthly capture annexure page.
56. How to View the Submitted Monthly Tracking Annexure (New & Existing):

Step 1 : Launch the app, Enter your respective ECPs username and password

Step 2 : To view the password, click the show password icon and it will display
Step 3 : Click Login
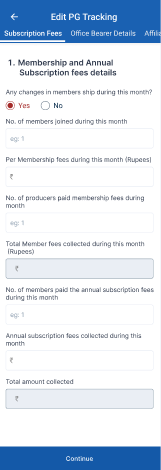
Step 4 : Following your login, a list of Enterprise Ecosystem Development modules will appear on the screen. When you select the Enterprise Promotion Module, you will be taken to the EPM home page.

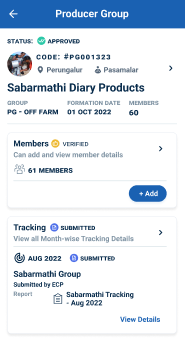
Step 5 : Once the profile has approved from the DYCOO, the ECP can start the monthly tracking for the EG group
Step 6 : Once the ECP has submitted the monthly tracking the tracking status of the profile has changed from ‘Pending’ to ‘Submitted’
57. How to Rework the Monthly Tracking Annexure (New & Existing):

Step 1 : Launch the app, Enter your respective ECPs username and password

Step 2 : To view the password, click the show password icon and it will display
Step 3 : Click Login

Step 4 : Following your login, a list of Enterprise Ecosystem Development modules will appear on the screen. When you select the Enterprise Promotion Module, you will be taken to the EPM home page.

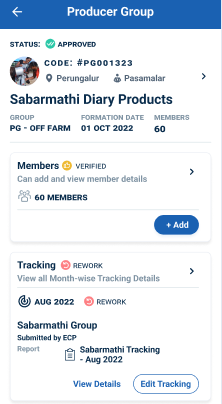
Step 5 : Once the Office Bearer has sent the monthly tracking as rework the status of the profile has changed from ‘Submitted’ to ‘Rework’
Step 6 : Select the tracking menu and profile will redirected to the tracking detail page
Step 7 : To rework the monthly tracking details click ‘Edit Tracking’ the profile will redirected to the annexure
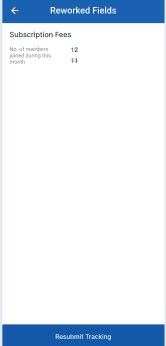
Step 7 : Update the changes and the reworked fields will get displayed in the ‘Reworked Fields’ tab. Once the file has updated click ‘Resubmit Tracking’

Step 8 : The status of the profile changed from ‘Rework’ to ‘Reworked’ and the details will be sent for OB verification.
58. How to Forward the Monthly Tracking Annexure (New & Existing):

Step 1 : Launch the app, Enter your respective ECPs username and password

Step 2 : To view the password, click the show password icon and it will display
Step 3 : Click Login

Step 4 : Following your login, a list of Enterprise Ecosystem Development modules will appear on the screen. When you select the Enterprise Promotion Module, you will be taken to the EPM home page.
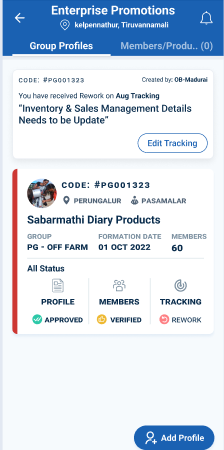
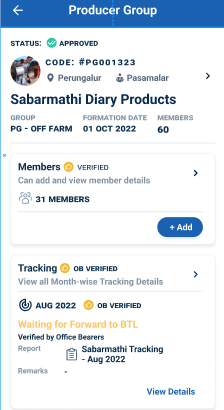
Step 5 : Once the Office Bearer has verified the monthly tracking and the status of the profile has displayed as ‘OB Verified’
Step 6 : Select the view details and profile will redirected to the tracking detail page
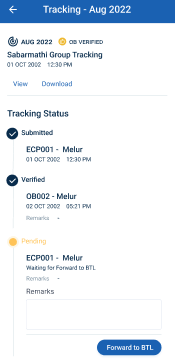
Step 7 : Remarks : Enter the remarks in the remarks section
Step 8 : Click ‘Forward to BTL’ once the profile has verified by the OB, enter the remarks and click forward
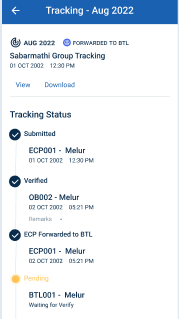
Step 9 : Once the ECP click ‘Forward to BTL’ the profile has moved to BTL login and the status of the monthly tracking has changed from ‘OB Verified’ to ‘Forwarded to BTL’
Step 10 : To view the forwarded profile, click ‘View Details’ to view the status of the monthly capture profile in more