1. How to Login into the Application:

Step 1 : Log in with their respective EDO username and password and click ‘Login’

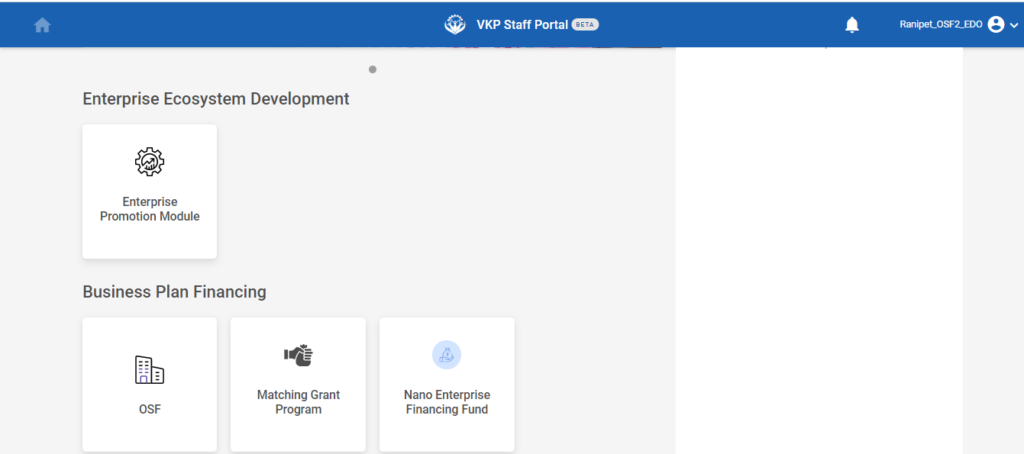
Step 2 : After logging in to the VKP staff portal, select the OSF module under the business plan financing component
Step 3 : After selecting the OSF module, the user will be redirected to the respective home page
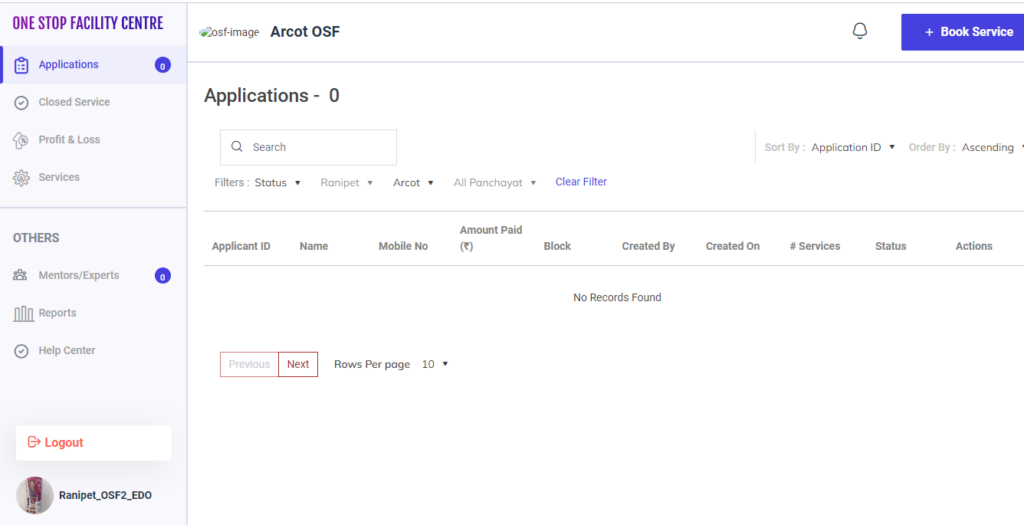
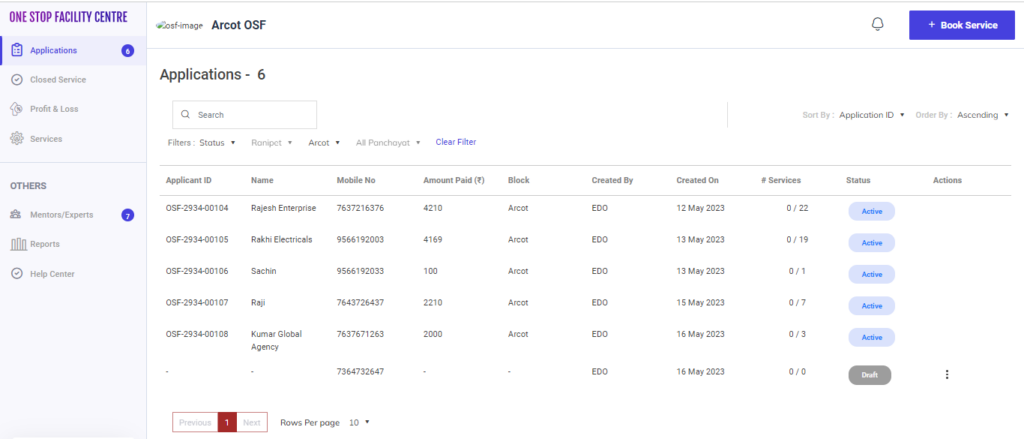
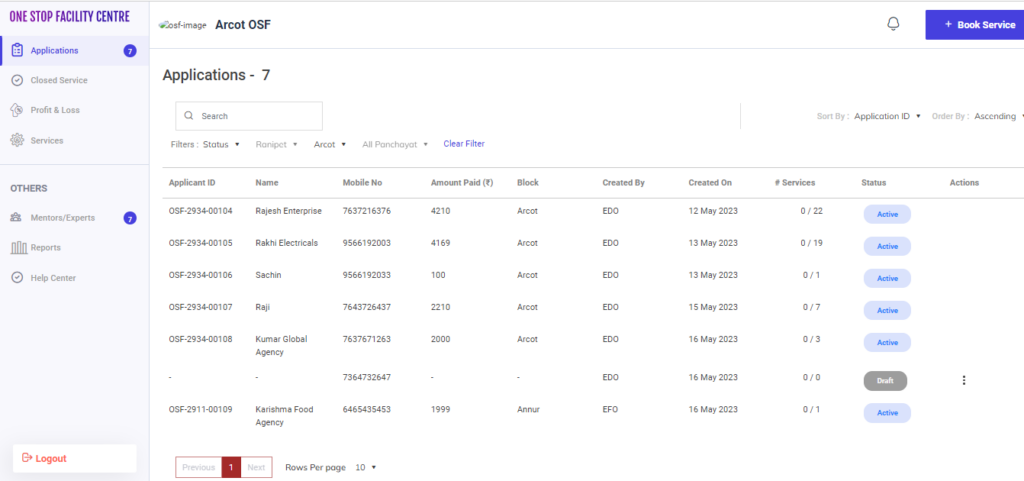
Step 4 : When logged in, click on the ‘Applications’ on the left side menu
Step 5 : To create book service, Click ‘Book Service’ under applications tab
Step 6 : To check closed service, Click ‘Closed Service’ under applications tab
Step 7 : To check profit or loss, Click ‘Profit & Loss’ under applications tab
Step 8 : To create mentor expert click ‘Add Mentor’, to create the expert click ‘Add Functional Expert’ under the ‘Others’ section
2. How to Add Mentor in the OSF Professional:

Step 1 : Log in with their respective EDO username and password and click ‘Login’

Step 2 : After logging in to the VKP staff portal, select the OSF module under the business plan financing component
Step 3 : After selecting the OSF module, the user will be redirected to the respective home page
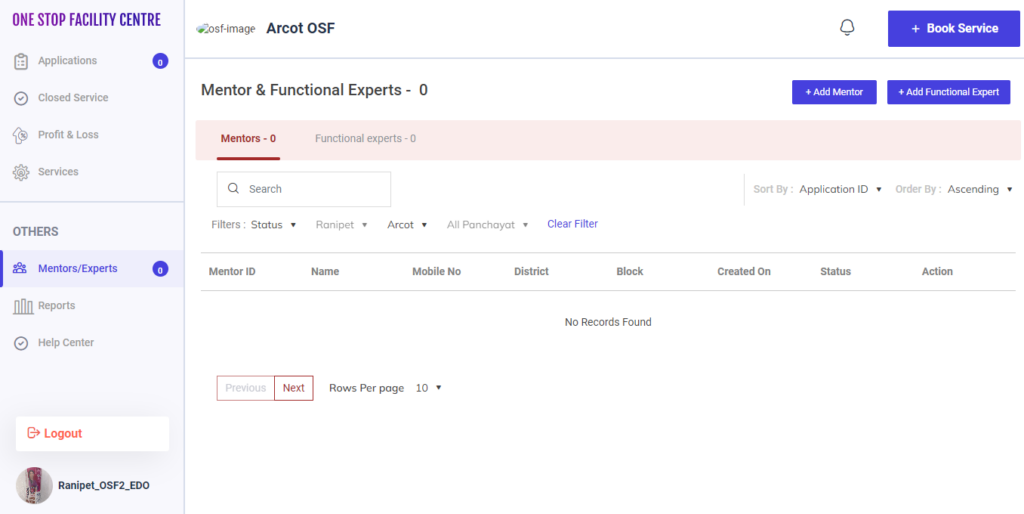
Step 4 : When logged in, click on the ‘Mentors/Experts’ on the left side menu under the ‘Others’ section
Step 5 : To create a mentor, Click the ‘Add Mentor’ tab and it will redirect to the respective annexure page.
2.1 How to Add the Basic Details in the Add Mentor:
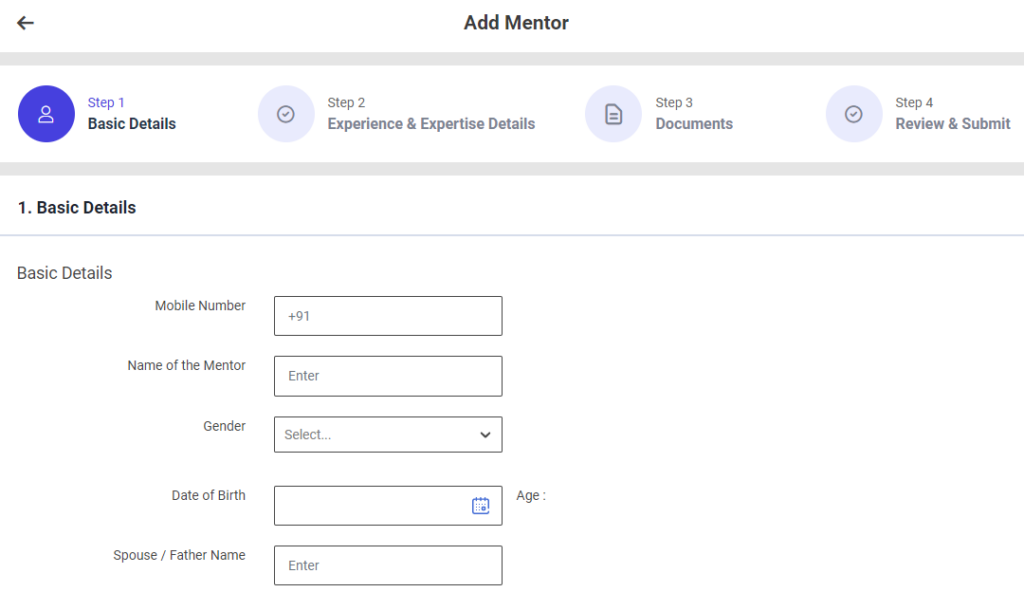
First Tab : Basic Details
Step 1 : Complete the ‘Basic Details’ section to add mentor
Step 2 : Basic Info
Step 2.1 : Mobile Number : Enter the mentor mobile number
Step 2.2 : Name of the Mentor : Enter the name of the mentor
Step 2.3 : Gender : By clicking the dropdown to choose the gender type
Step 2.4 : By clicking the calendar to choose the date of birth then Age will be auto populated based on DOB
Step 2.5 : Spouse/Father Name : Enter the father or spouse name
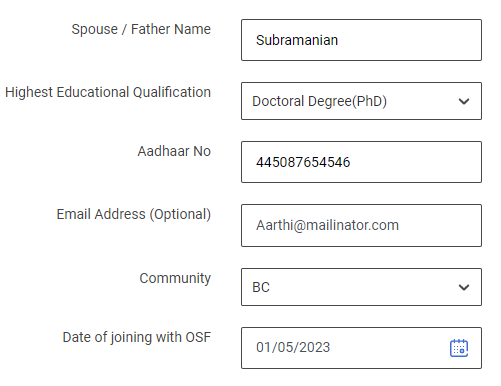
Step 2.6 : Highest Educational Qualification : By clicking the dropdown to choose the highest educational qualification of the mentor.
Step 2.7 : Aadhar No : Enter the aadhar number of the mentor
Step 2.8 : Email Address : Enter the email address of the mentor
Step 2.9 : Community : By clicking the dropdown to choose the community name of the mentor
Step 2.10 Date of Joining With OSF : By clicking the calendar to choose the OSF joining date
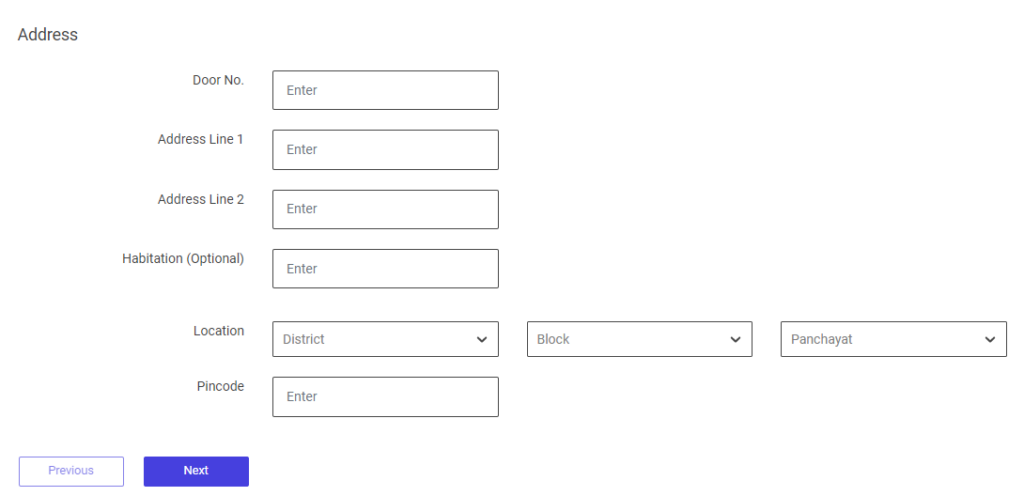
Step 3 : Address :
Step 3.1 Door No : Enter the door number
Step 3.2 Address Line 1 : Enter the address line 1 details
Step 3.3 Address Line 2 : Enter the address line 2 details
Step 3.4 Habitation : Enter the habitation details
Step 3.5 Location : By clicking the dropdown to choose the district, block and panchayat details
Step 3.6 Pincode : Enter the Pincode details
Step 4 : Once the information is entered, click on the ‘Next’ option. The information will be saved as a draft
2.2 How to Add the Experience & Expertise Details in the Add Mentor:
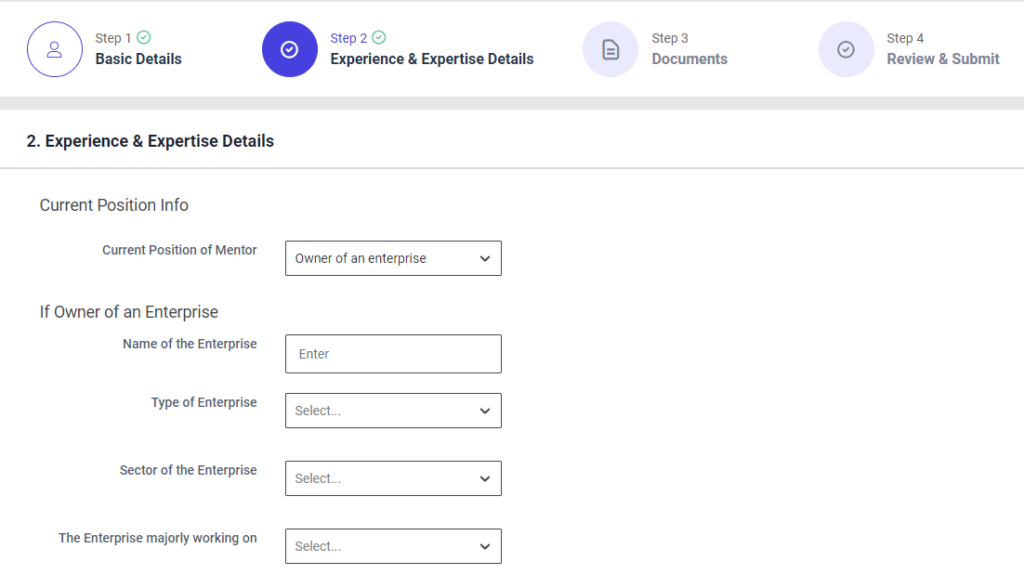
Second Tab : Experience & Expertise Details
Step 1 : Complete the ‘Experience & Expertise Details’ section to add mentor
Step 2 : Current Position Info : By clicking the dropdown to choose the current position information
Step 2.1 : Owner of the Enterprise
Step 2.1.1 : Name of the Enterprise : Enter the enterprise name
Step 2.1.2 : Type of the Enterprise : By clicking the dropdown to choose the type of the enterprise
Step 2.1.3 : Sector of the Enterprise : By clicking the dropdown to choose the sector of the enterprise
Step 2.1.4 : The Enterprise Majorly Working on : By clicking the dropdown to choose the enterprise majorly working on
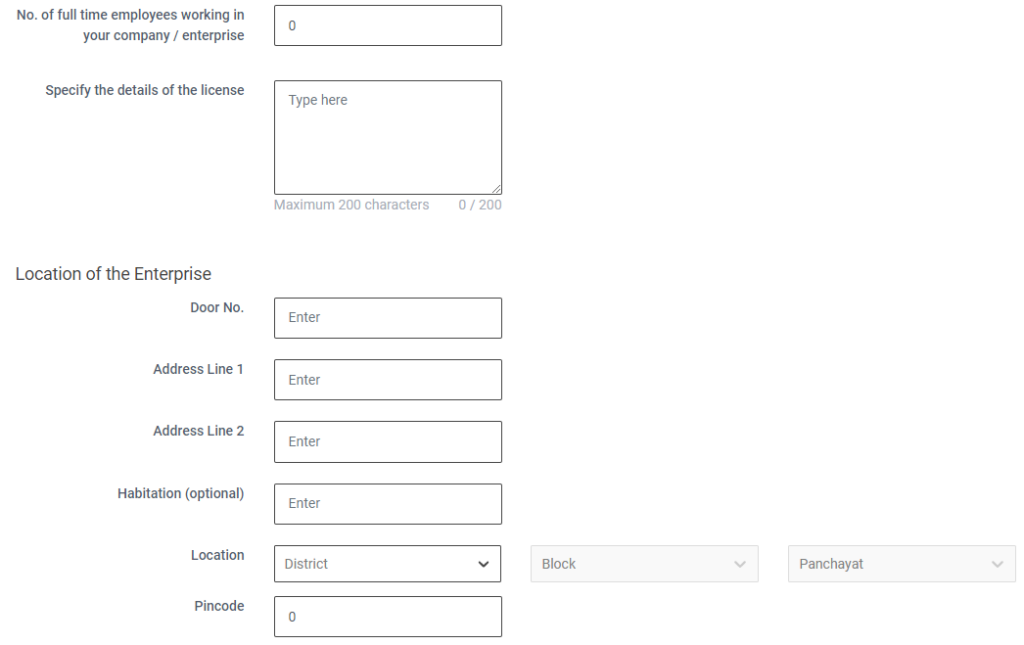
Step 2.1.5 : No of full time employees working in your company/enterprise : Enter the number of full time employees working in your company or enterprise
Step 2.1.6 : Specify the details of the licence : Enter the specific details of the licence
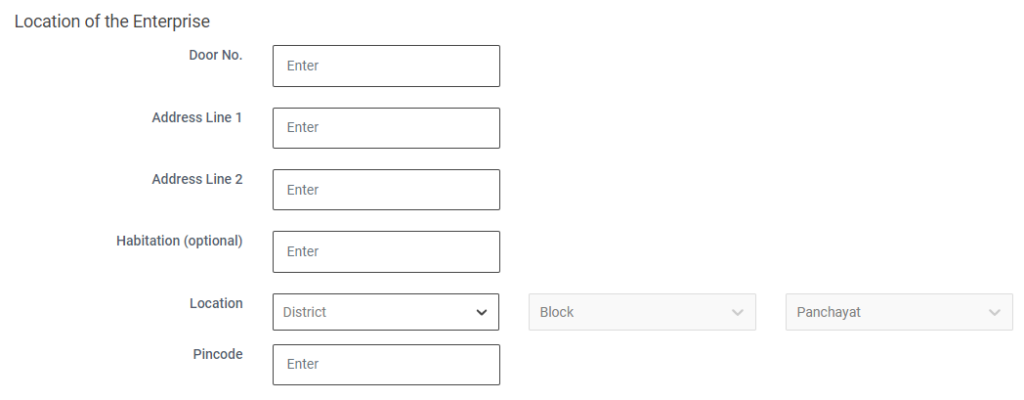
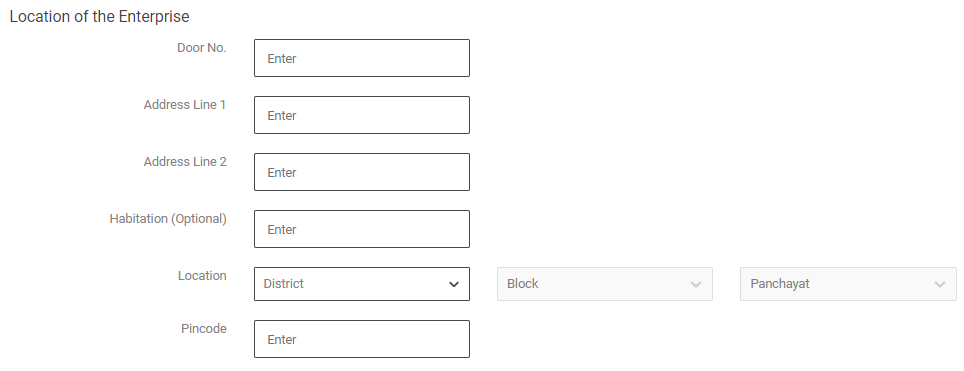
Step 2.2 : Location of the Enterprise :
Step 2.2.1 Door No : Enter the door number
Step 2.2.2 Address Line 1 : Enter the address line 1
Step 2.2.3 Address Line 2 : Enter the address line 2
Step 2.2.4 Habitation : Enter the habitation details
Step 2.2.5 Location : By clicking the dropdown to choose the district, block and panchayat details
Step 2.2.6 Pincode : Enter the pincode

Step 2.3 : Working in an Enterprise
Step 2.3.1 : Name of the Current Company/ Enterprise : Enter the name of the company or enterprise
Step 2.3.2 : Mentor Designation : Enter the mentor designation details
Step 2.3.3 : Specialised Area : Enter the specialised area of the mentor
Step 2.3.4 : Years of experience in that specialised area : Enter the total number of years of experience in the specialised area
Step 2.3.5 : Total Years of experience : Enter the total number of years of experience
Step 2.4 : Location of the Enterprise :
Step 2.4.1 Door No : Enter the door number
Step 2.4.2 Address Line 1 : Enter the address line 1
Step 2.4.3 Address Line 2 : Enter the address line 2
Step 2.4.4 Habitation : Enter the habitation details
Step 2.4.5 Location : By clicking the dropdown to choose the district, block and panchayat details
Step 2.4.6 Pincode : Enter the pincode
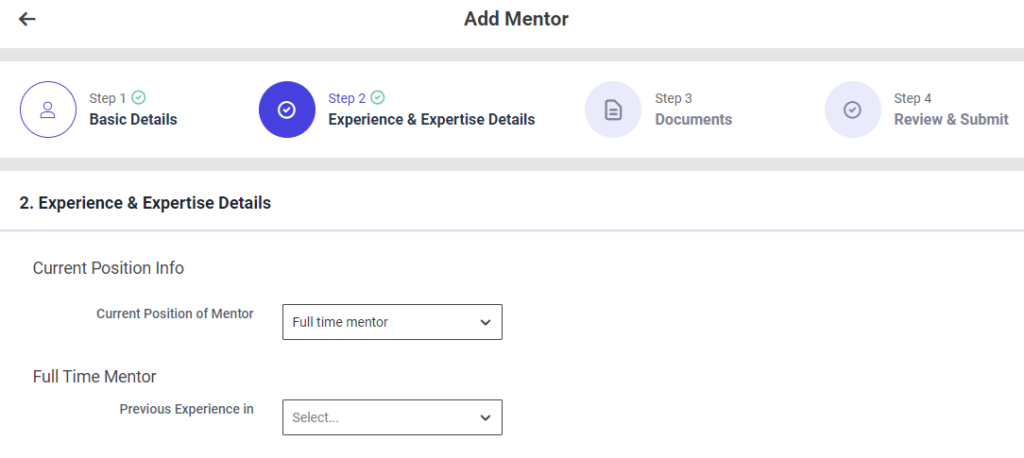
Step 2.5 : Full Time Mentor
Step 2.5.1 :Previous Years Experience : By clicking the dropdown to choose the previous years of experience
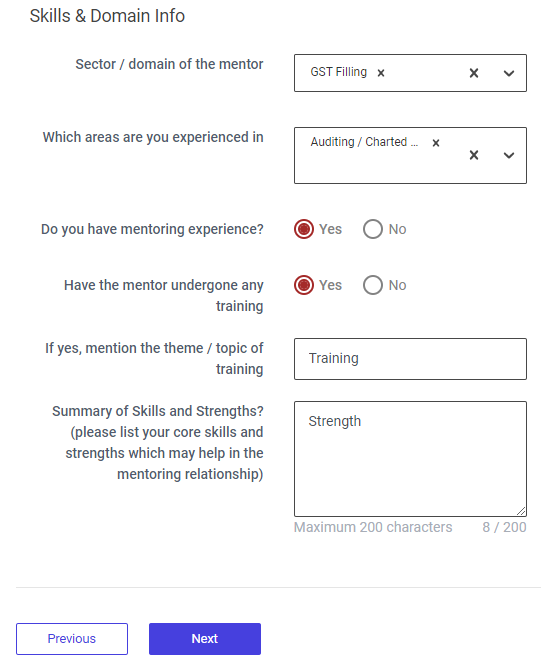
Step 3 : Skills & Domain Info :
Step 3.1 : Sector/ Domain of the Sector : By clicking the dropdown to choose the sector or domain of the sector
Step 3.2 : Which areas are you experienced in : By clicking the dropdown to choose which areas are you experienced in
Step 3.3 : Do you have mentoring experience? : Click ‘Yes’ if the mentor has mentoring experience or choose ‘No’
Step 3.4 : Have the mentor undergone any training? : Click ‘Yes’ if the mentor has mentor has undergone any training and enter the theme or topic of the training or choose ‘No’
Step 3.5 : Summary of Skills and Strengths? : Enter the summary of the skills and strengths
Step 4 : Once the information is entered, click on the ‘Next’ option. The information will be saved as a draft
2.3 How to Add the Documents in the Add Mentor:
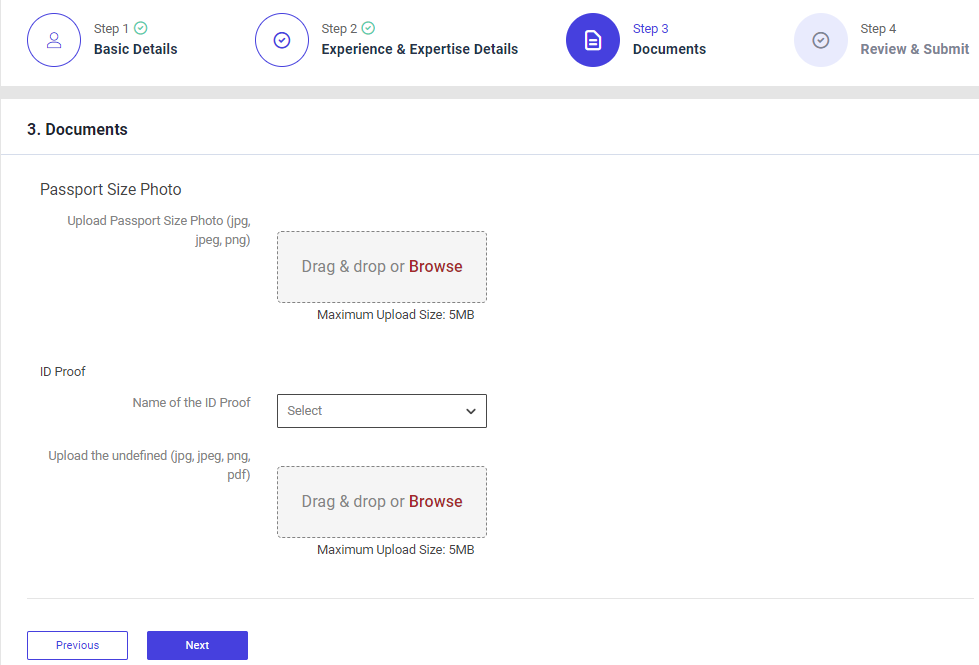
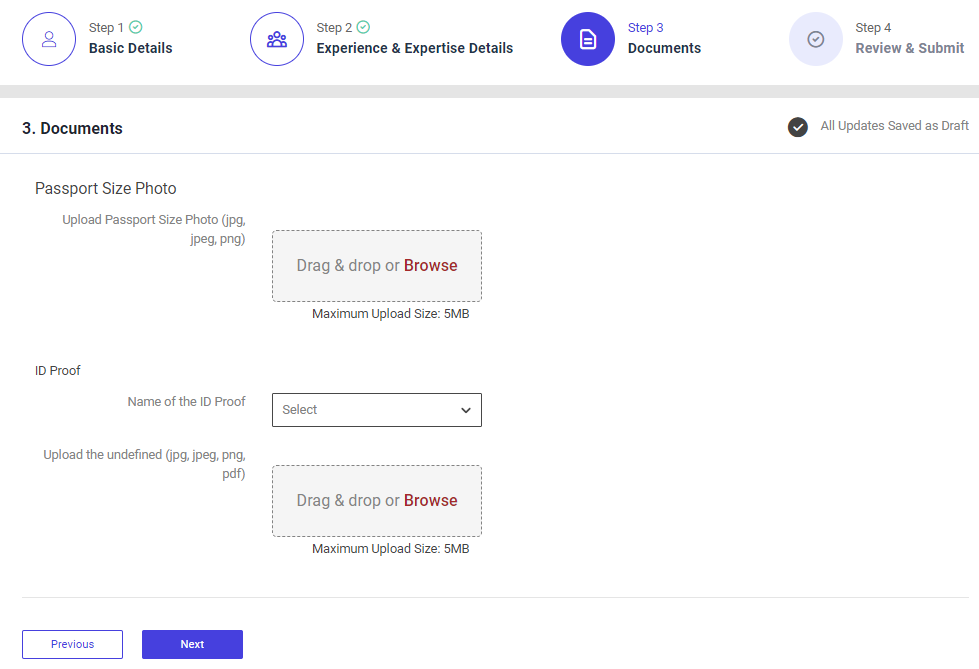
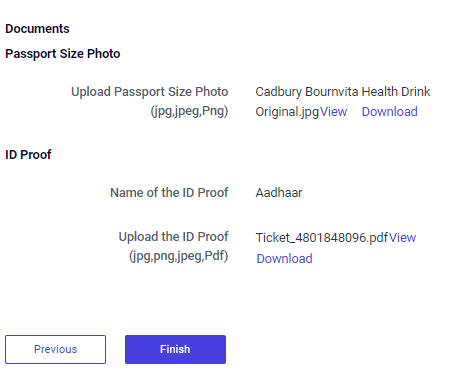
Third Tab : Documents
Step 1 : Complete the ‘Documents’ section to add mentor
Step 2 : Passport Size Photo : Click ‘Browse’ to upload the passport size photo and the maximum file upload size is 5 MB
Step 3 : Name of the ID Proof : By clicking the dropdown to choose the name of the ID proof and Click ‘Browse’ to upload the name of the proof and the maximum file upload size is 5 MB
Step 4 : Once the information is entered, click on the ‘Next’ option. The information will be saved as a draft
2.4 How to Review and Submit the Add Mentor:

Step 1: Once the information is entered in the ‘Document’ section, click on the ‘Next’ option. The information will be saved as a draft
Step 2 : Review the add mentor details, if there are any changes that need to be made in any of the fields, click ‘Previous’ or choose ‘Finish’

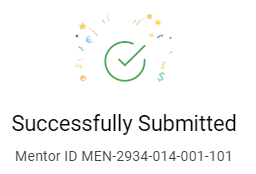
Step 6 : Once the EDO staff submitted, the popup will appear like ‘Success’ and the Mento ID also generated.
3. How to View/Edit the Mentor Details:

Step 1 : Log in with their respective EDO username and password and click ‘Login’

Step 2 : After logging in to the VKP staff portal, select the OSF module under the business plan financing component
Step 3 : After selecting the OSF module, the user will be redirected to the respective home page
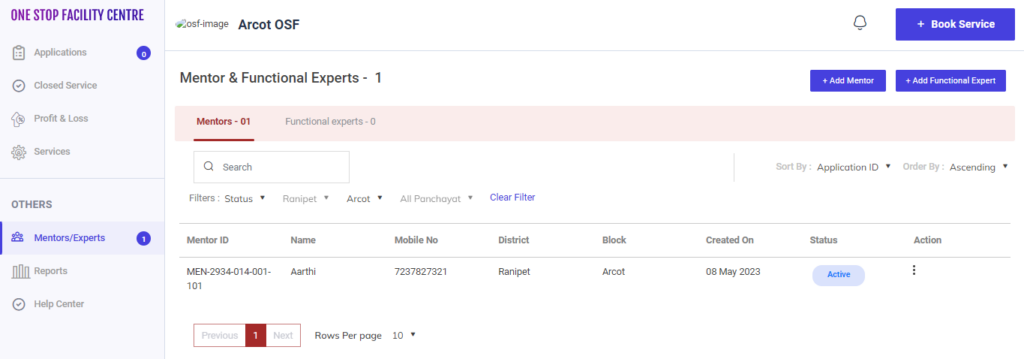
Step 4 : When logged in, click on the ‘Mentors/Experts’ on the left side menu under the ‘Others’ section
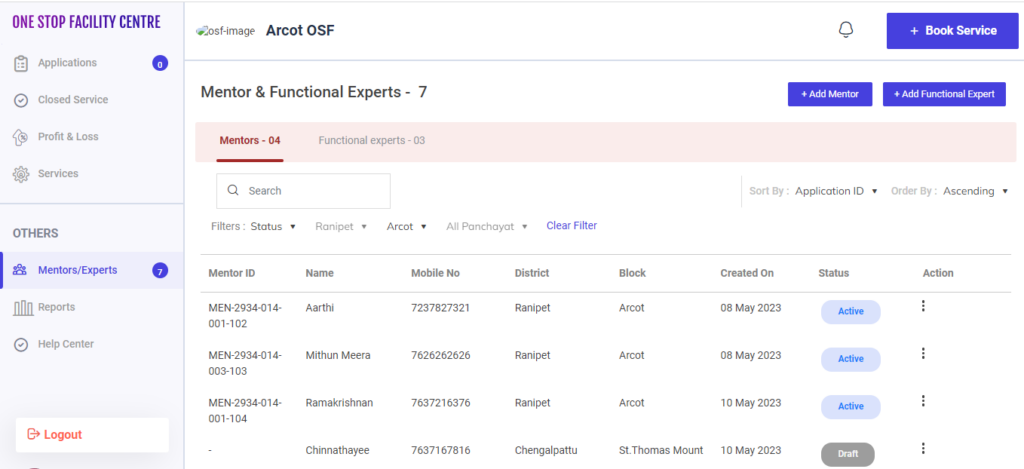
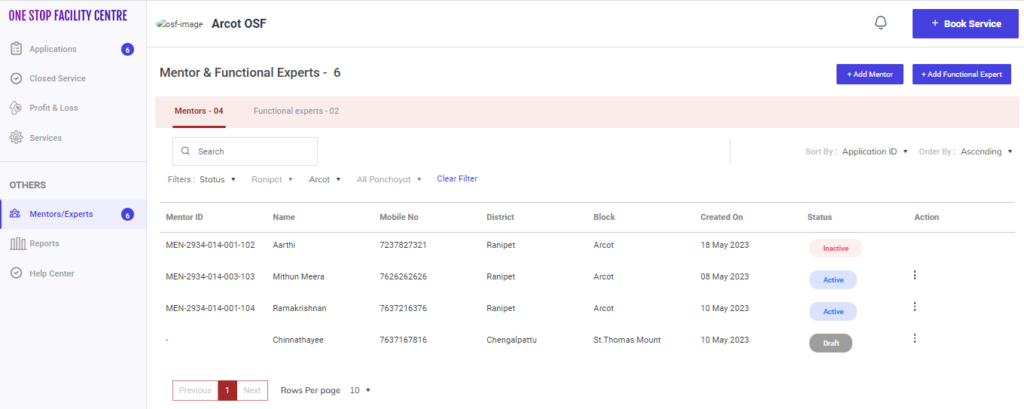
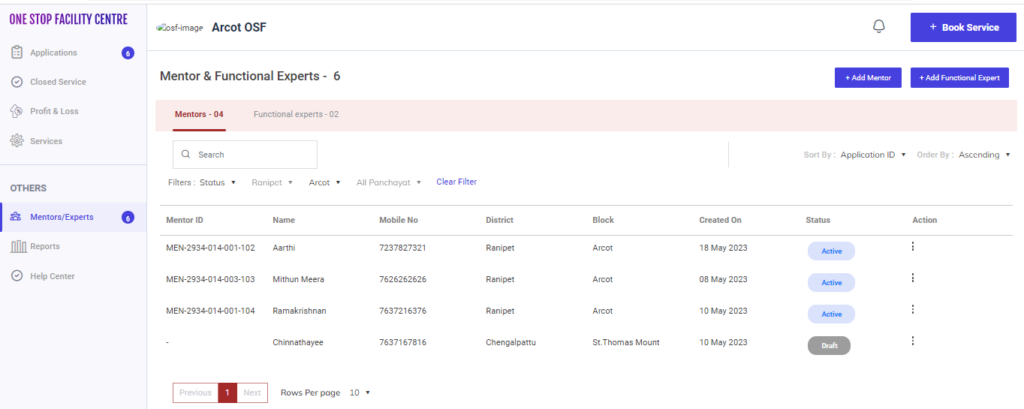
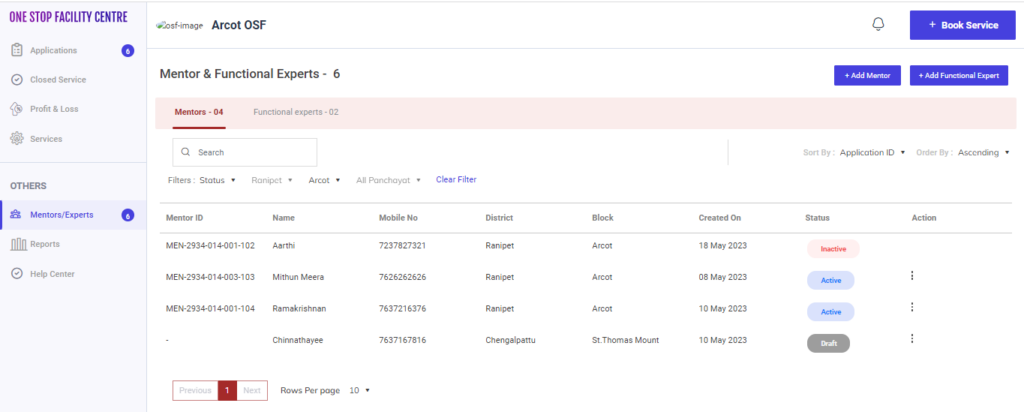
Step 5 : To view a mentor, Click the ‘Mentor’ tab the list of mentor details will appear on the below along with Mentor ID, Name, Mobile No, District, Block, Created On, Status and Actions tab
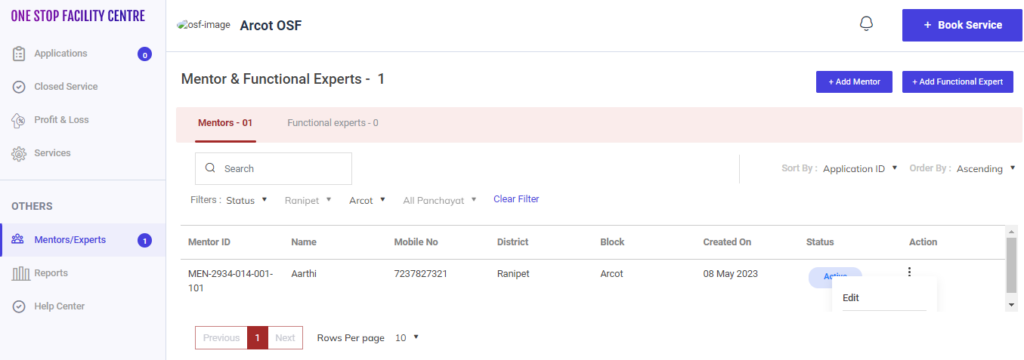
Step 6 : To edit the mentor details click the dropdown under the action tab and the edit popup will appear. Click ‘Edit’ it will redirect to the annexure page


Step 7 : Update the changes in the field and click ‘Finish’ and the updated changes details will reflect properly.
4. How to Continue the Mentor Details from the Draft:

Step 1 : Log in with their respective EDO username and password and click ‘Login’

Step 2 : After logging in to the VKP staff portal, select the OSF module under the business plan financing component
Step 3 : After selecting the OSF module, the user will be redirected to the respective home page
Step 4 : When logged in, click on the ‘Mentors/Experts’ on the left side menu under the ‘Others’ section
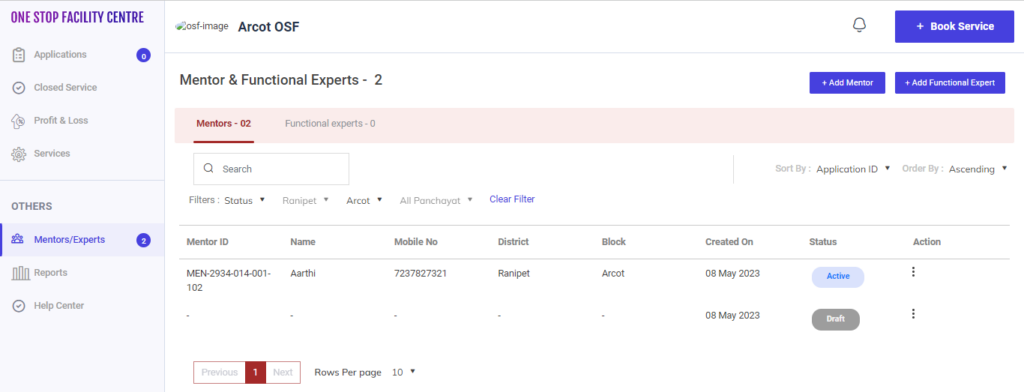
Step 5 : If the Mentor/Experts tab, select the mentor details from the draft and it will get redirected to the respective annexure page.
5. How to Add Functional Expert in the OSF Professional:

Step 1 : Log in with their respective EDO username and password and click ‘Login’

Step 2 : After logging in to the VKP staff portal, select the OSF module under the business plan financing component
Step 3 : After selecting the OSF module, the user will be redirected to the respective home page
Step 4 : When logged in, click on the ‘Mentors/Experts’ on the left side menu under the ‘Others’ section
Step 5 : To create a functional expert, Click the ‘Add Functional Expert’ tab and it will redirect to the respective annexure page.
5.1 How to Add the Basic Details in the Add Functional Expert:
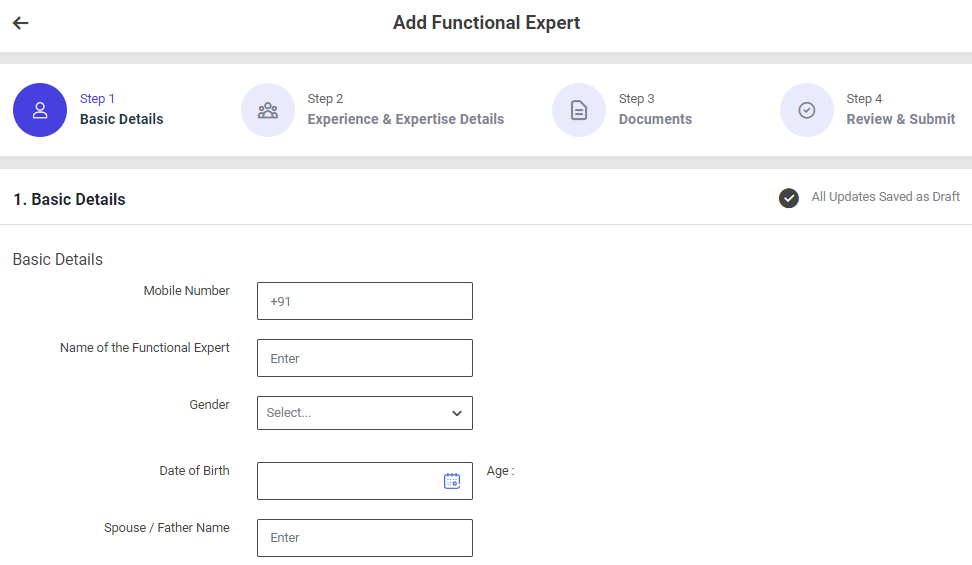
First Tab : Basic Details
Step 1 : Complete the ‘Basic Details’ section to add functional expert
Step 2 : Basic Details
Step 2.1 : Mobile Number : Enter the mentor mobile number
Step 2.2 : Name of the Functional Expert : Enter the name of the functional expert
Step 2.3 : Gender : By clicking the dropdown to choose the gender type
Step 2.4 : Date of Birth : By clicking the calendar to choose the date of birth then Age will be auto populated based on DOB
Step 2.5 : Spouse/Father Name : Enter the father or spouse name
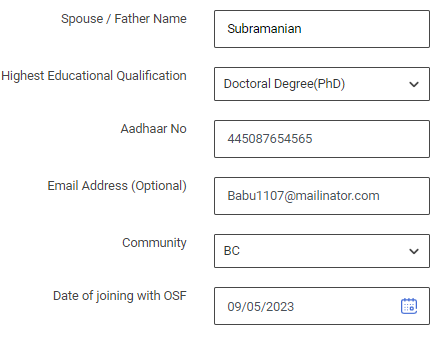
Step 2.6 : Highest Educational Qualification : By clicking the dropdown to choose the highest educational qualification of the functional expert.
Step 2.7 : Aadhar No : Enter the aadhar number of the functional expert
Step 2.8 : Email Address : Enter the email address of the functional expert
Step 2.9 : Community : By clicking the dropdown to choose the community name of the functional expert
Step 2.10 Date of Joining With OSF : By clicking the calendar to choose the OSF joining date
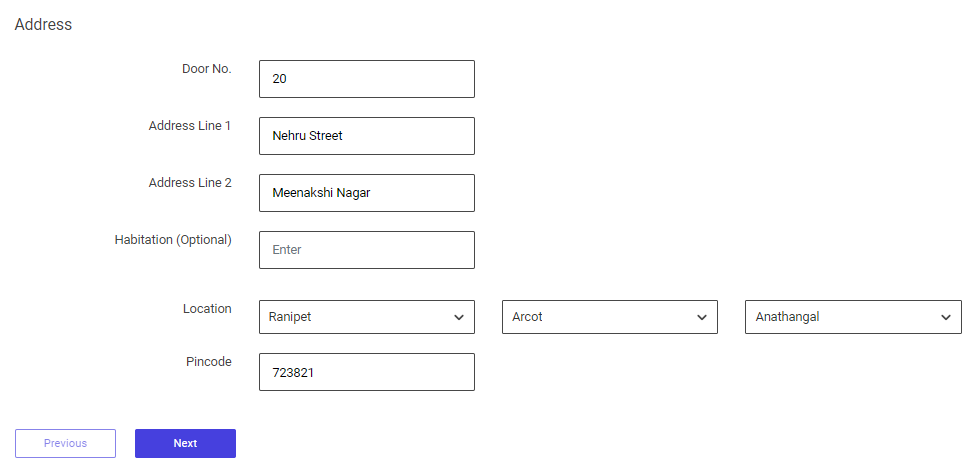
Step 3 : Address :
Step 3.1 Door No : Enter the door number
Step 3.2 Address Line 1 : Enter the address line 1 details
Step 3.3 Address Line 2 : Enter the address line 2 details
Step 3.4 Habitation : Enter the habitation details
Step 3.5 Location : By clicking the dropdown to choose the district, block and panchayat details
Step 3.6 Pincode : Enter the Pincode details
Step 4 : Once the information is entered, click on the ‘Next’ option. The information will be saved as a draft
5.2 How to Add the Experience & Expertise Details in the Add Functional Expert:
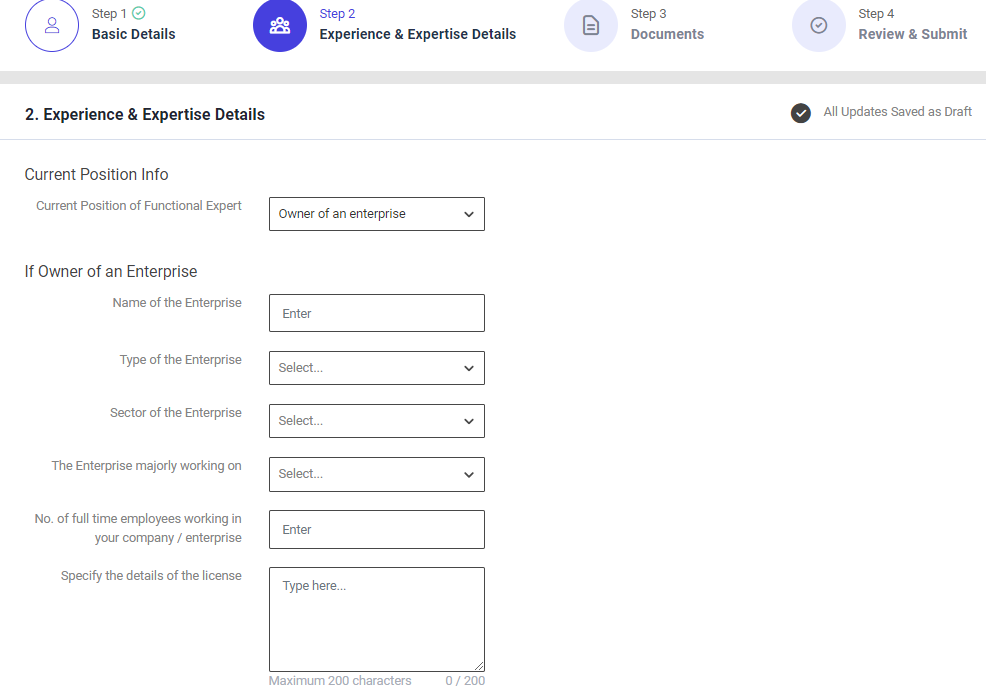
Second Tab : Experience & Expertise Details
Step 1 : Complete the ‘Experience & Expertise Details’ section to add functional expert
Step 2 : Current Position of functional expert : By clicking the dropdown to choose the current position information
Step 2.1 : Owner of the Enterprise
Step 2.1.1 : Name of the Enterprise : Enter the enterprise name
Step 2.1.2 : Type of the Enterprise : By clicking the dropdown to choose the type of the enterprise
Step 2.1.3 : Sector of the Enterprise : By clicking the dropdown to choose the sector of the enterprise
Step 2.1.4 : The Enterprise Majorly Working on : By clicking the dropdown to choose the enterprise majorly working on
Step 2.1.5 : No of full time employees working in your company/enterprise : Enter the number of full time employees working in your company or enterprise
Step 2.1.6 : Specify the details of the licence : Enter the specific details of the licence
Step 2.2 : Location of the Enterprise :
Step 2.2.1 Door No : Enter the door number
Step 2.2.2 Address Line 1 : Enter the address line 1
Step 2.2.3 Address Line 2 : Enter the address line 2
Step 2.2.4 Habitation : Enter the habitation details
Step 2.2.5 Location : By clicking the dropdown to choose the district, block and panchayat details
Step 2.2.6 Pincode : Enter the pincode
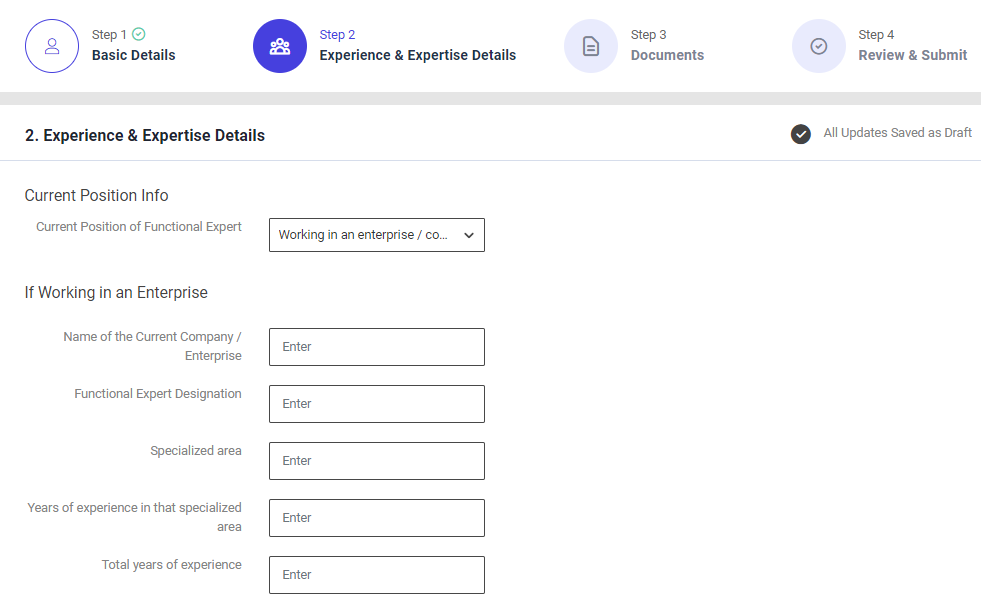
Step 2.3 : Working in an Enterprise
Step 2.3.1 : Name of the Current Company/ Enterprise : Enter the name of the company or enterprise
Step 2.3.2 : Mentor Designation : Enter the mentor designation details
Step 2.3.3 : Specialised Area : Enter the specialised area of the mentor
Step 2.3.4 : Years of experience in that specialised area : Enter the total number of years of experience in the specialised area
Step 2.3.5 : Total Years of experience : Enter the total number of years of experience

Step 2.4 : Location of the Enterprise :
Step 2.4.1 Door No : Enter the door number
Step 2.4.2 Address Line 1 : Enter the address line 1
Step 2.4.3 Address Line 2 : Enter the address line 2
Step 2.4.4 Habitation : Enter the habitation details
Step 2.4.5 Location : By clicking the dropdown to choose the district, block and panchayat details
Step 2.4.6 Pincode : Enter the pincode
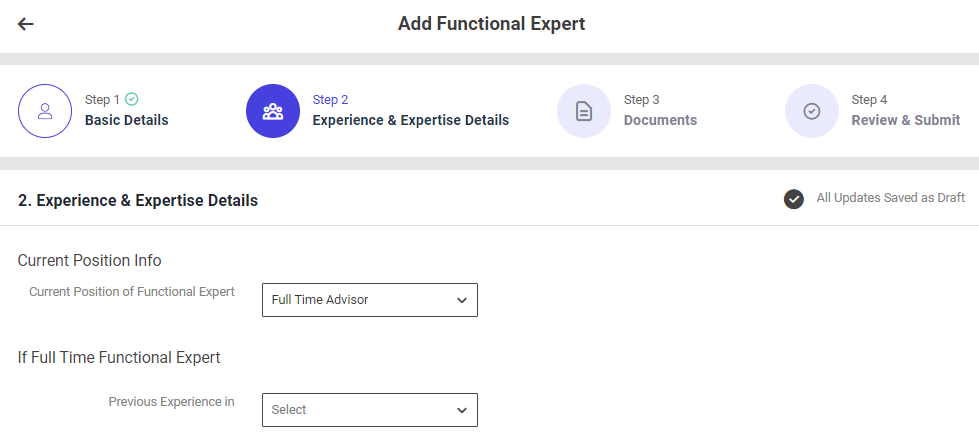
Step 2.5 : Full Time Mentor
Step 2.5.1 :Previous Years Experience : By clicking the dropdown to choose the previous years of experience
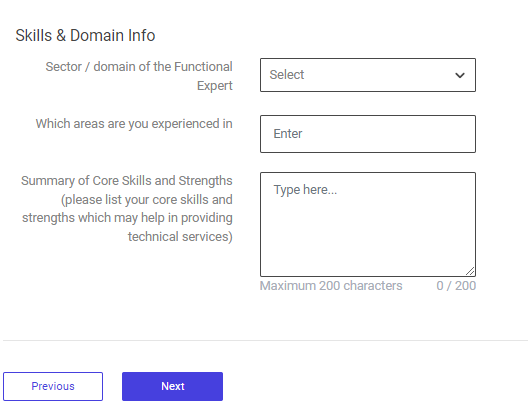
Step 3 : Skills & Domain Info :
Step 3.1 : Sector/ Domain of the Functional Expert : By clicking the dropdown to choose the sector or domain of the functional expert
Step 3.2 : Which areas are you experienced in : By clicking the dropdown to choose which areas are you experienced in
Step 3.3 : Summary of Skills and Strengths? : Enter the summary of the skills and strengths
Step 4 : Once the information is entered, click on the ‘Next’ option. The information will be saved as a draft
5.3 How to Add the Documents in the Add Functional Expert:
Third Tab : Documents
Step 1 : Complete the ‘Documents’ section to add functional expert
Step 2 : Passport Size Photo : Click ‘Browse’ to upload the passport size photo and the maximum file upload size is 5 MB
Step 3 : Name of the ID Proof : By clicking the dropdown to choose the name of the ID proof and Click ‘Browse’ to upload the name of the proof and the maximum file upload size is 5 MB
Step 4 : Once the information is entered, click on the ‘Next’ option. The information will be saved as a draft
5.4 How to Review and Submit the Add Functional Expert:
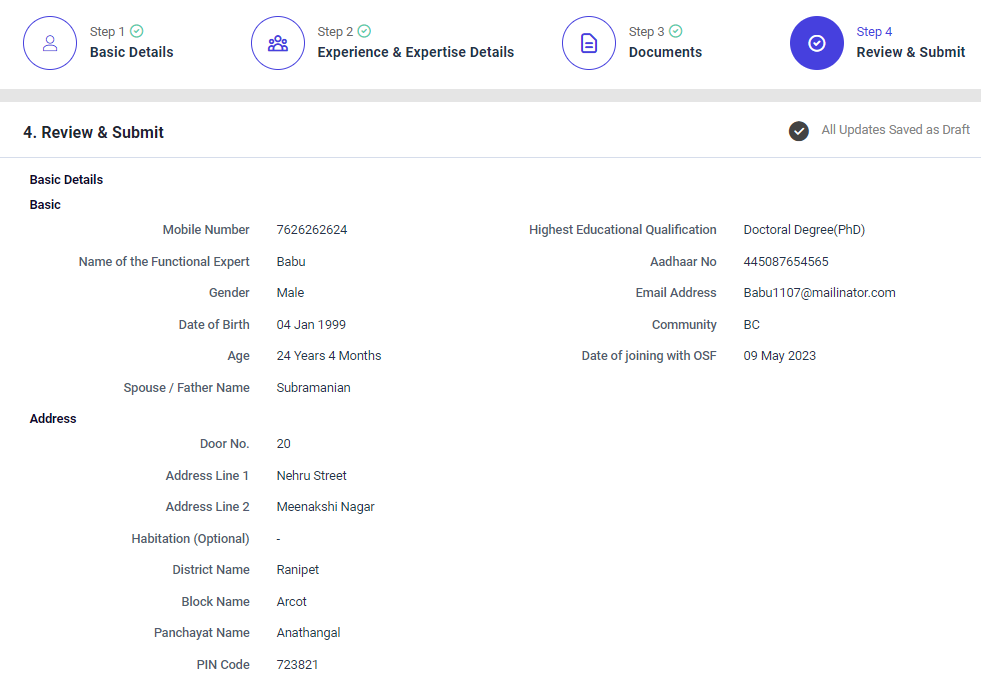
Step 1: Once the information is entered in the ‘Document’ section, click on the ‘Next’ option. The information will be saved as a draft
Step 2 : Review the add mentor details, if there are any changes that need to be made in any of the fields, click ‘Previous’ or choose ‘Finish’

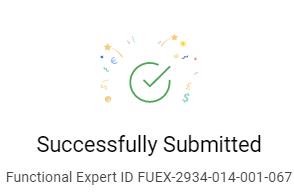
Step 6 : Once the EDO staff submitted, the popup will appear like ‘Success’ and the Functional Expert ID also generated.
6. How to View/Edit the Functional Experts Details:

Step 1 : Log in with their respective EDO username and password and click ‘Login’

Step 2 : After logging in to the VKP staff portal, select the OSF module under the business plan financing component
Step 3 : After selecting the OSF module, the user will be redirected to the respective home page

Step 4 : When logged in, click on the ‘Mentors/Experts’ on the left side menu under the ‘Others’ section
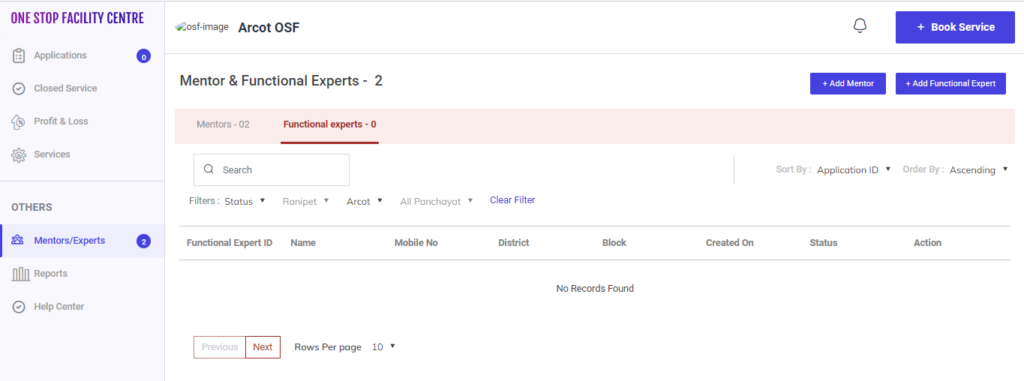
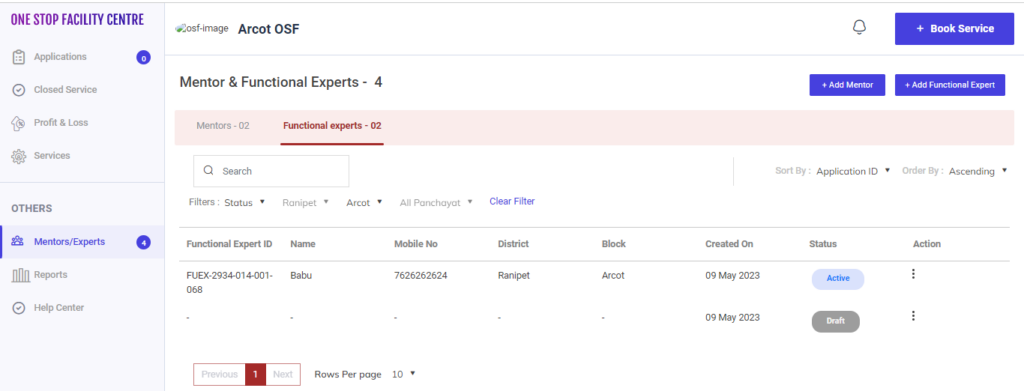
Step 5 : To view a functional experts, Click the ‘Functional Experts’ tab the list of functional experts details will appear on the below along with Functional experts ID, Name, Mobile No, District, Block, Created On, Status and Actions tab
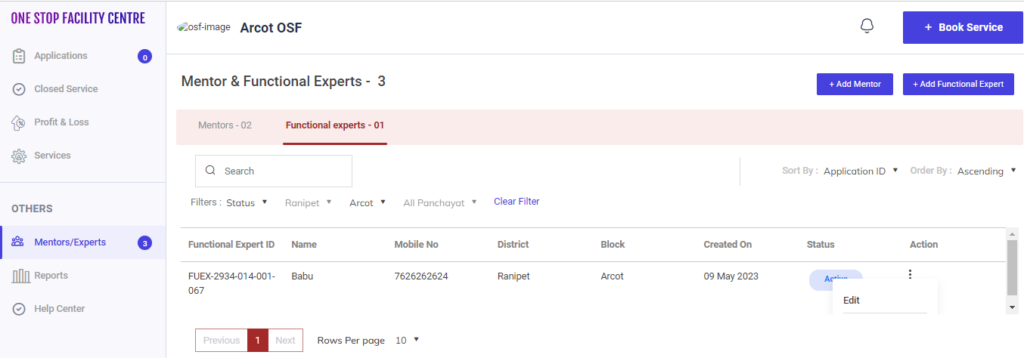
Step 6 : To edit the functional expert details click the dropdown under the action tab and the edit popup will appear. Click ‘Edit’ it will redirect to the annexure page

Step 7 : Update the changes in the field and click ‘Finish’ and the updated changes details will reflect properly.
7. How to Continue the Functional Expert Details from the Draft:

Step 1 : Log in with their respective EDO username and password and click ‘Login’

Step 2 : After logging in to the VKP staff portal, select the OSF module under the business plan financing component
Step 3 : After selecting the OSF module, the user will be redirected to the respective home page
Step 4 : When logged in, click on the ‘Mentors/Experts’ on the left side menu under the ‘Others’ section
Step 5 : If the Mentor/Experts tab, select the functional experts details from the draft and it will get redirected to the respective annexure page.
8. How to Create Book Service in the OSF Professional:

Step 1 : Log in with their respective EDO username and password and click ‘Login’

Step 2 : After logging in to the VKP staff portal, select the OSF module under the business plan financing component
Step 3 : After selecting the OSF module, the user will be redirected to the respective home page
Step 4 : When logged in, click on the ‘Mentors/Experts’ on the left side menu under the ‘Others’ section
Step 5 : To create a book service, Click the ‘Book Service’ tab and it will redirect to the respective annexure page.
9. How to Create Entrepreneur in Book New Service:
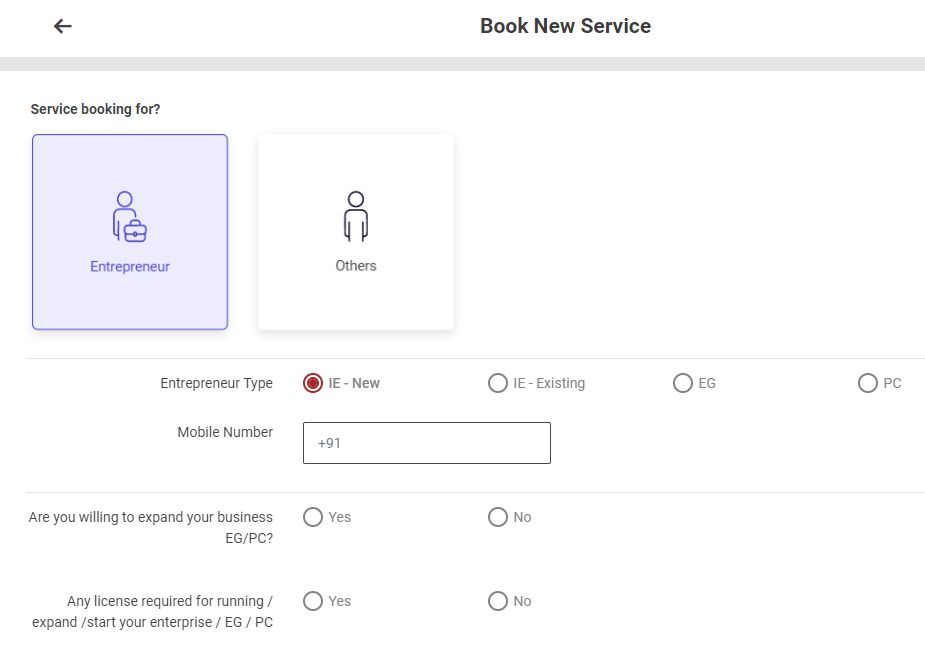
Step 1 : Service Booking for : Select the service booking for (Entrepreneur)
Step 2 : Entrepreneur Type : Select the entrepreneur type
Step 3 : Mobile Number : Enter the mobile number
Step 4 : Are you willing to expand your business EG/PC : Choose ‘Yes’ if you willing to expand your business EG/PC or choose ‘No’
Step 5 : Any license required for running / expand /start your enterprise / EG / PC : Choose ‘Yes’ if you have license required for running / expand /start your enterprise / EG / PC or choose ‘No’
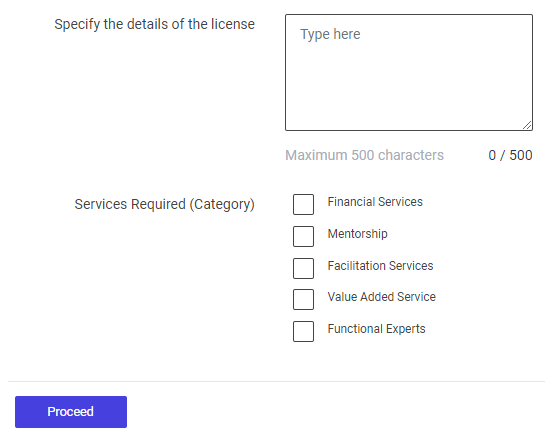
Step 6 : Specify the details of the license : Enter the specify the details of the license
Step 7 : Service Required : By click the checkbox to choose the required number of services
Step 8 : Click ‘Proceed’ and it will redirected to the book services new entrepreneur annexure page
9.1 How to Add the Applicant Details in the Book Services – New Entrepreneur:
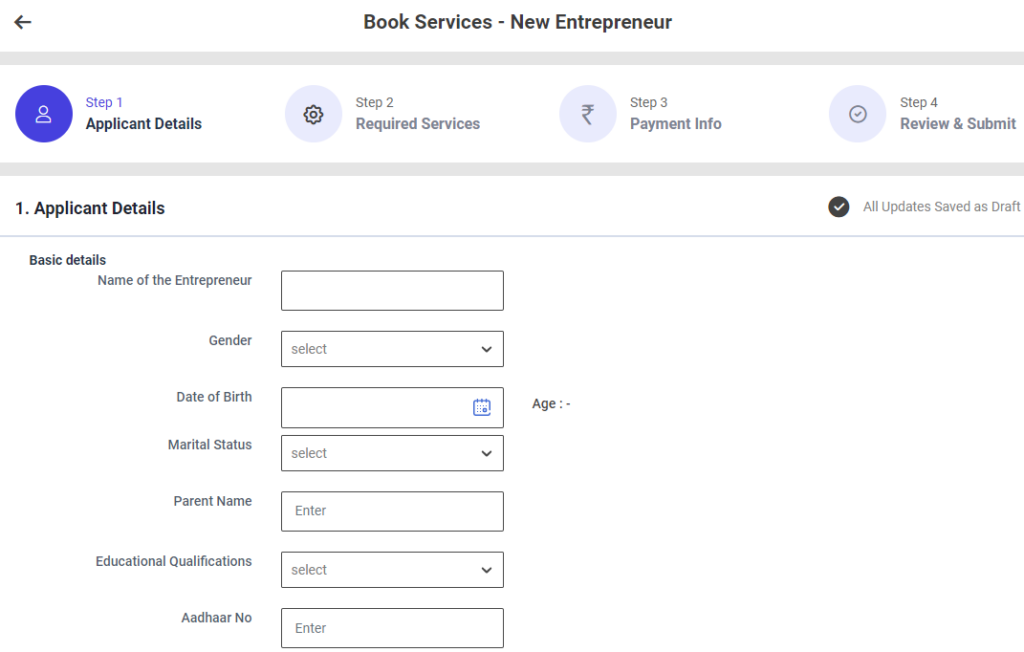
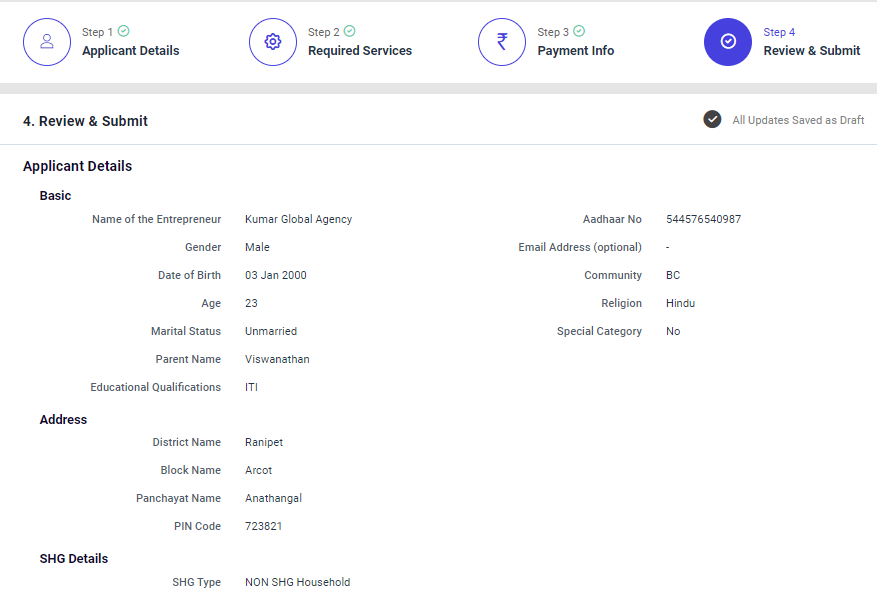
First Tab : Applicant Details
Step 1 : Complete the ‘Basic Details’ section to add book services new entrepreneur
Step 2 : Basic Details
Step 2.1 : Name of the Entrepreneur : Enter the name of the entrepreneur
Step 2.2 : Gender : By clicking the dropdown to choose the gender type
Step 2.3 : Date of Birth : By clicking the calendar to choose the date of birth then Age will be auto populated based on DOB
Step 2.4 : Marital Status : By clicking the dropdown to choose the marital status if ‘Married’ enter the spouse name
Step 2.5 : Parent Name : Enter the name of the parent
Step 2.6 : Educational Qualification : By clicking the dropdown to choose the educational qualification
Step 2.7 : Aadhar No : Enter the aadhar number of the functional expert

Step 2.8 : Email Address : Enter the email address
Step 2.9 : Community : By clicking the dropdown to choose the community name
Step 2.10 : Religion : By clicking the dropdown to choose the religion
Step 2.11 : Special Category : if the entrepreneur belongs to special category click ‘Yes’ if ‘Yes’ by clicking the dropdown to specify the category or choose ‘No’
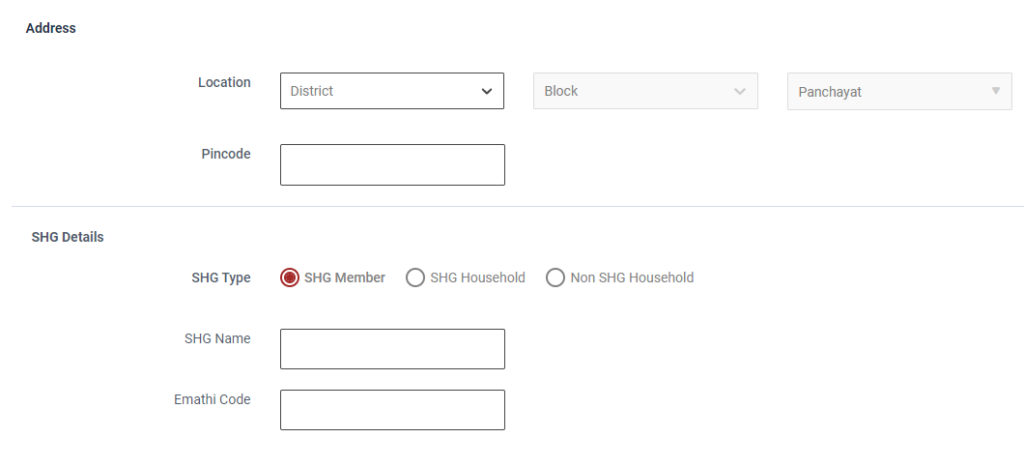
Step 3 : Address :
Step 3.1 Location : By clicking the dropdown to choose the district, block and panchayat details
Step 3.2 Pincode : Enter the Pincode details
Step 4 : SHG Details :
Step 4.1 SHG Type : If we select the SHG Member: Enter the SHG Name, SHG Code (14 digit) and Emathi Code (16 digit)
Step 4.2 SHG Type : If we select the SHG Household: Enter the SHG Name, Member of the SHG Household name and Emathi Code (16 digit)

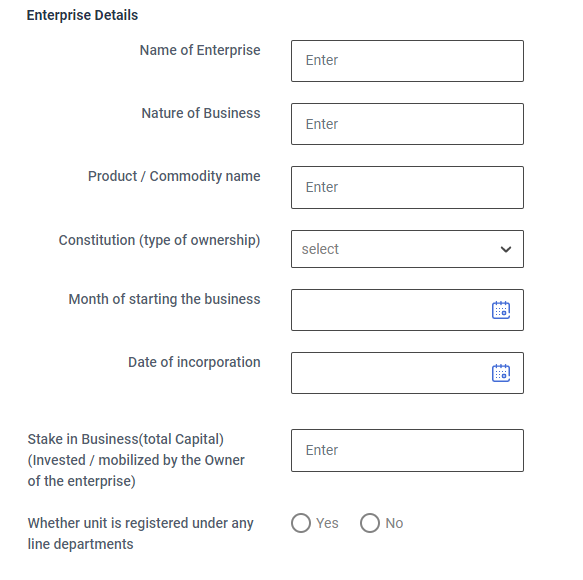
Step 5 : Entreprise Details :
Step 5.1 Name of Enterprise : Enter the name of the enterprise
Step 5.2 Name of Business : Enter the name of the business
Step 5.3 Product/Commodity Name : Enter the name of the product or commodity
Step 5.4 Constitution (type of ownership) : By clicking the dropdown to choose constitution type
Step 5.5 : Month of starting the business: By clicking the calendar to choose the month of starting the business
Step 5.6 : Date of Incorporation: By clicking the calendar to choose the incorporation date
Step 5.7 : Stake in Business(total Capital)(Invested / mobilized by the Owner of the enterprise) : Enter the sake in business
Step 5.8 : Whether unit is registered under any line departments : Whether unit is registered under any line departments Click ‘Yes’ if ‘Yes’ by clicking the dropdown to choose the registered under and enter the registered number or choose ‘No’
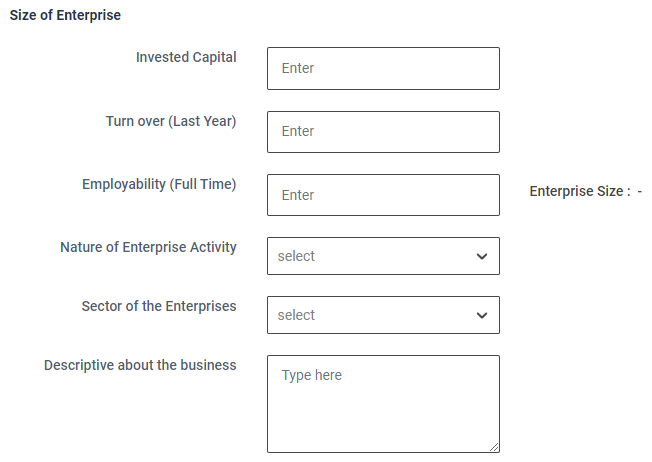
Step 6 : Size of Entreprise :
Step 6.1 Invested Capital : Enter the capital invested amount
Step 6.2 Turn over (Last Year) : Enter the last year turn over amount
Step 6.3 Employability (Full Time) : Enter the employability count and the enterprise size will get auto populated based on the details
Step 6.4 Nature of Enterprise Activity : By clicking the dropdown to choose nature of the enterprise activity
Step 6.5 Sector of the Enterprises : By clicking the dropdown to choose sector of the enterprises
Step 6.6 Descriptive about the business : Enter the descriptive about the business

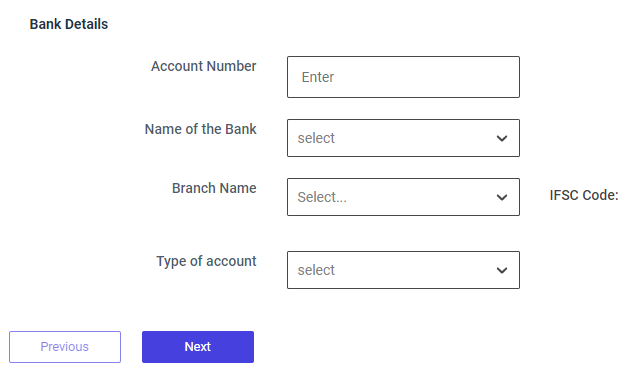
Step 7 : Bank Details :
Step 7.1 Account Number : Enter the bank account number
Step 7.2 Name of the Bank : By clicking the dropdown to choose bank name
Step 7.3 Branch Name : By clicking the dropdown to choose branch name and the IFSC code will get auto populated based on the details
Step 7.4 Type of Account : By clicking the dropdown to choose the account type
Step 8 : Once the information is entered, click on the ‘Next’ option. The information will be saved as a draft
9.2 How to Add the Required Services in the Book Services – New Entrepreneur:
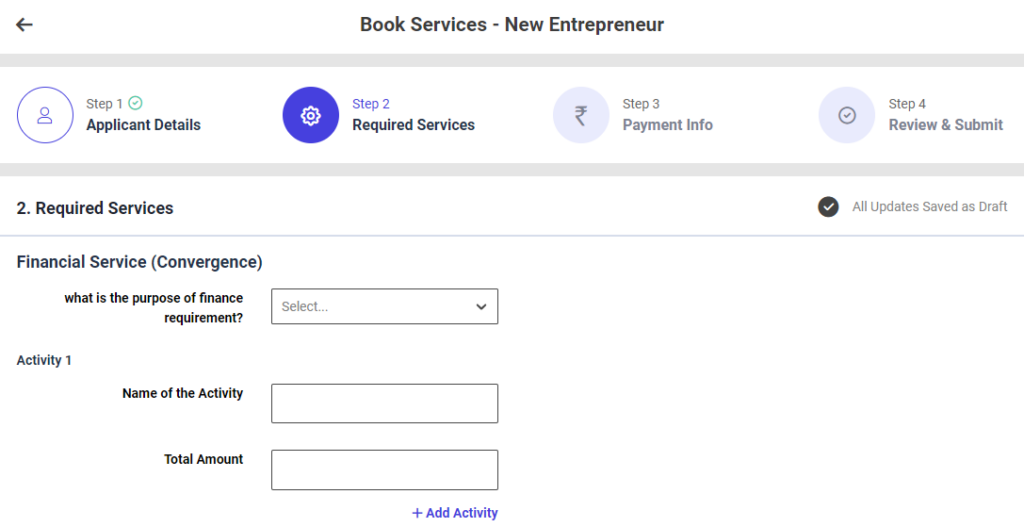
Second Tab : Required Services
Step 1 : Complete the ‘Required Services’ section to add book services new entrepreneur
Step 2 : Financial Services
Step 2.1 : What is the purpose of the finance requirement?: By clicking the dropdown to choose the purpose of the finance requirement
Step 2.2 : Total Amount : Enter the total amount
Step 2.3 : Click ‘Add Activity’ to add the activity more


Step 3 : Mentorship
Step 3.1 : Sector of the Enterprise: By clicking the dropdown to choose the sector of the enterprise
Step 3.2 : Describe the needs of the mentoring : Enter the description to needs of the mentoring
Step 3.3 : Type of Service Required : By click the checkbox to choose which type of service required
Step 3.4 : Pay Type : By click the dropdown to choose the paytype option
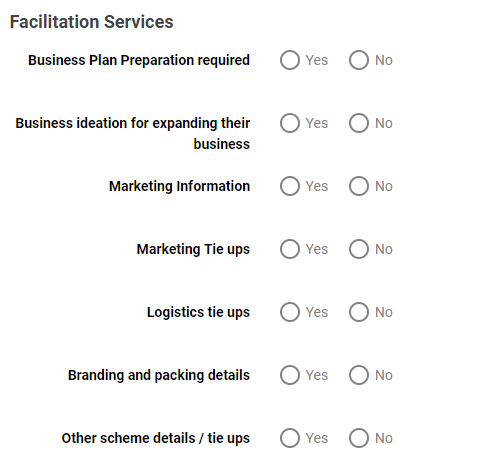
Step 4 : Facilitation Services
Step 4.1 : Business Plan Preparation required: Click ‘Yes’ to choose the business plan preparation required or choose ‘No’
Step 4.2 : Business ideation for expanding their business : Click ‘Yes’ to choose the business ideation for expanding their business and enter what are the business ideation required or choose ‘No’
Step 4.3 : Market Information : Click ‘Yes’ to choose the market information and enter what type of marketing information required or choose ‘No’
Step 4.4 : Marketing Tie ups : Click ‘Yes’ to choose the marketing tie ups and enter what type of marketing tie ups required or choose ‘No’
Step 4.5 : Location Tie ups : Click ‘Yes’ to choose the location tie ups and enter what type of location tie ups required or choose ‘No’
Step 4.6 : Branding and Packing Details : Click ‘Yes’ to choose the branding and packing details and enter what type of details required or choose ‘No’
Step 4.7 : Other scheme details/tie ups : Click ‘Yes’ to choose the other scheme details and tie ups and click the dropdown to choose the finance required from the scheme or choose ‘No’

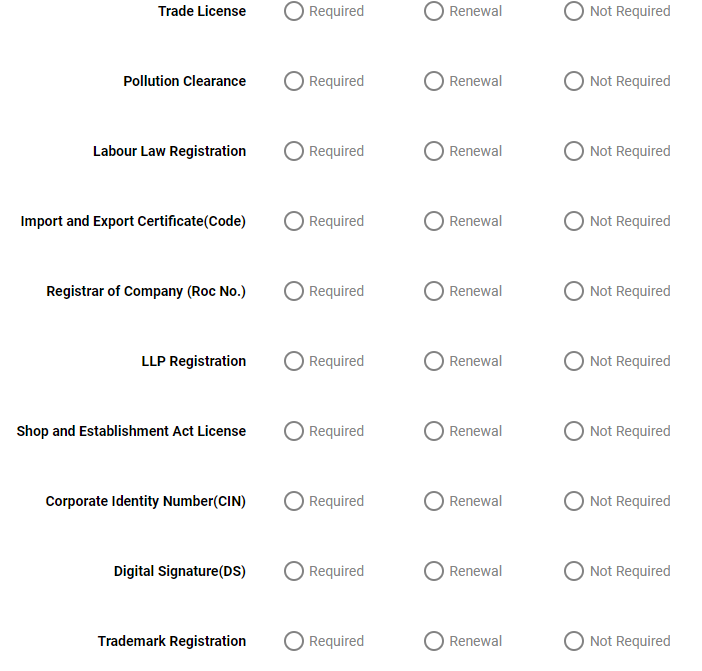

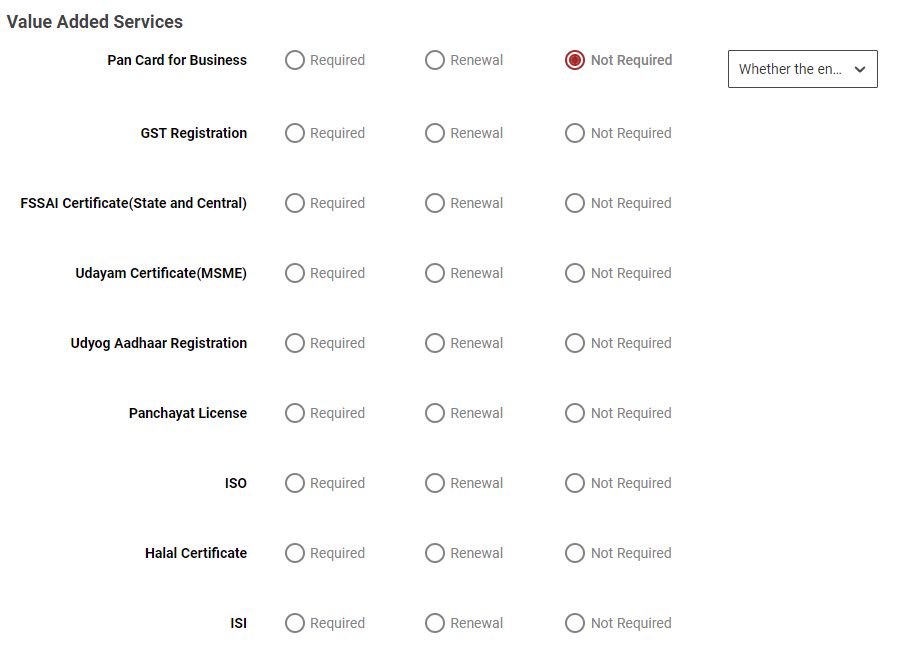
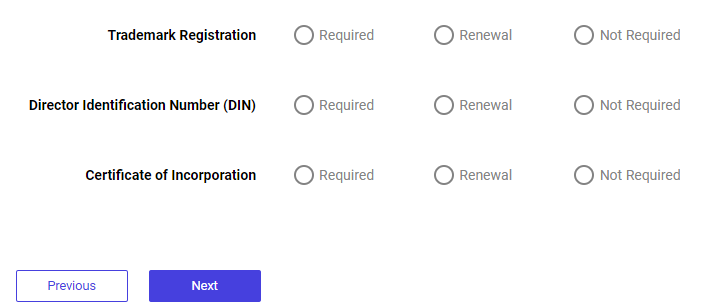
Step 5 : Value Added Services
Step 5.1 : Choose ‘Required’ to value added services or choose ‘Renewal’ or choose ‘Not Required’ and click the dropdown to choose the type of not required option
Step 6 : Once the information is entered, click on the ‘Next’ option. The information will be saved as a draft
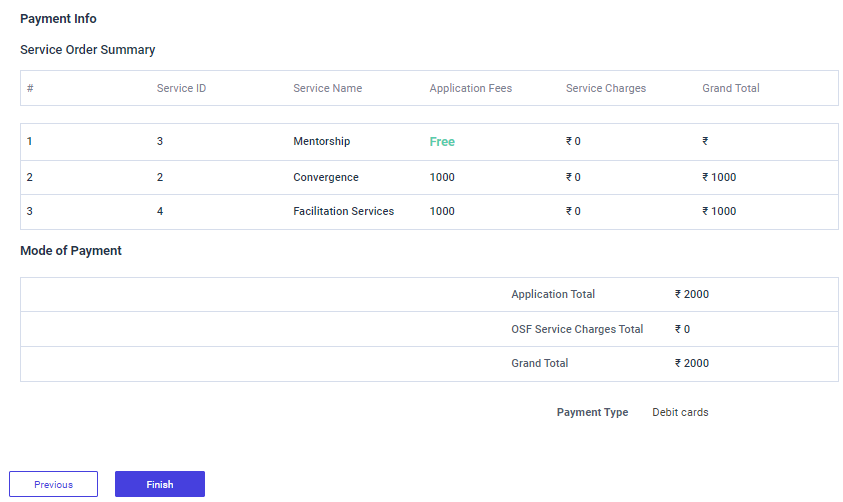
9.3 How to Add the Payment Info in the Book Services – New Entrepreneur:
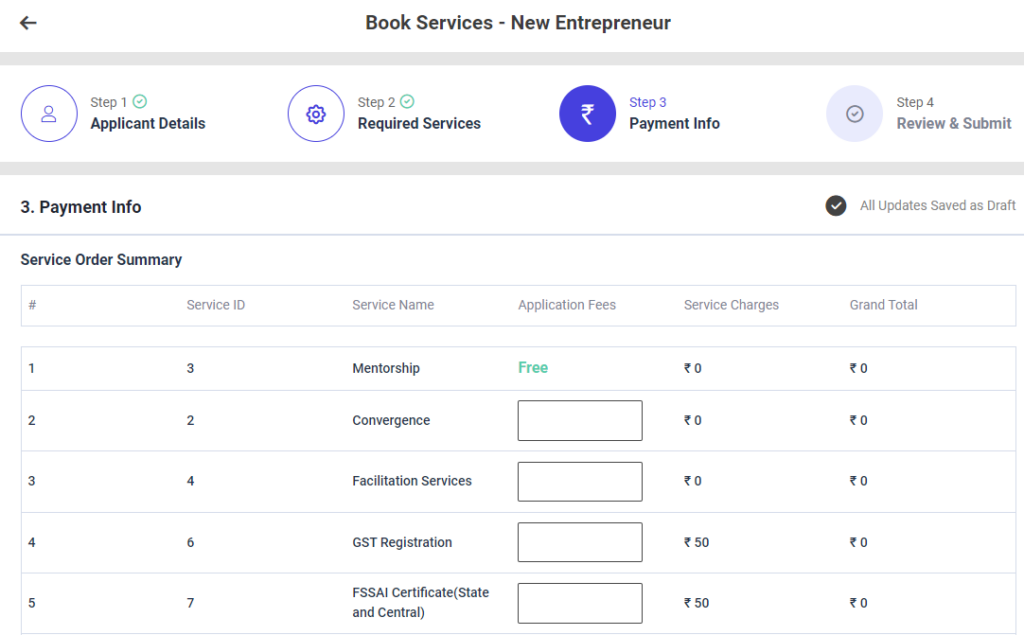
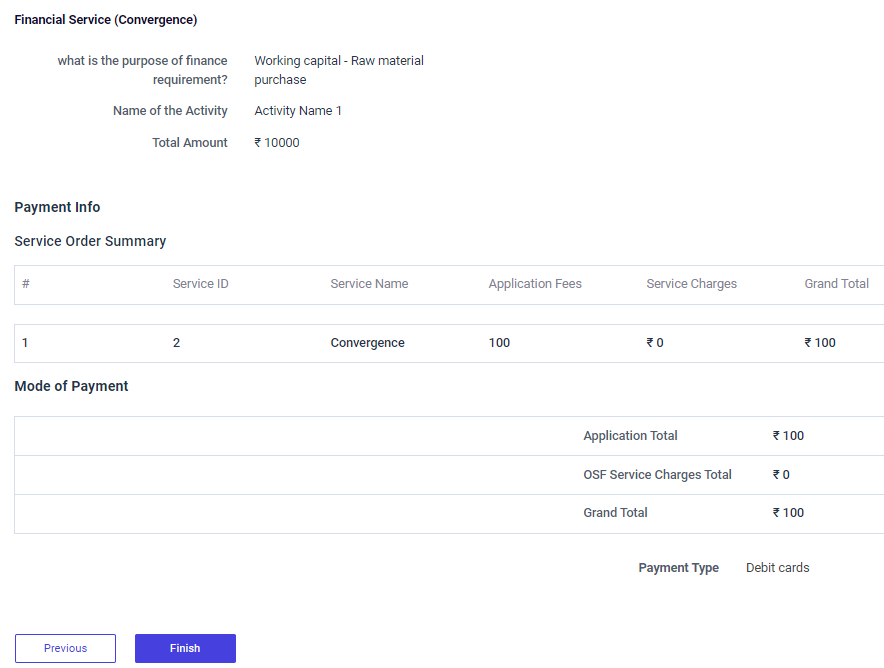
Third Tab : Payment Info
Step 1 : Complete the ‘Payment Info’ section to add book services new entrepreneur
Step 2 : Service Order Summary
Step 3.1 : Service ID : The service ID will get auto populated
Step 3.2 : Service Name : The Service name will get auto populated based on the previous data
Step 3.3 : Application Fees : Enter the application fees
Step 3.4 : Service Charge : The Service charge will get auto populated based on the previous data
Step 3.5 : Grand Total : The grand total will get auto populated based on the data entered in the application fees and service charges
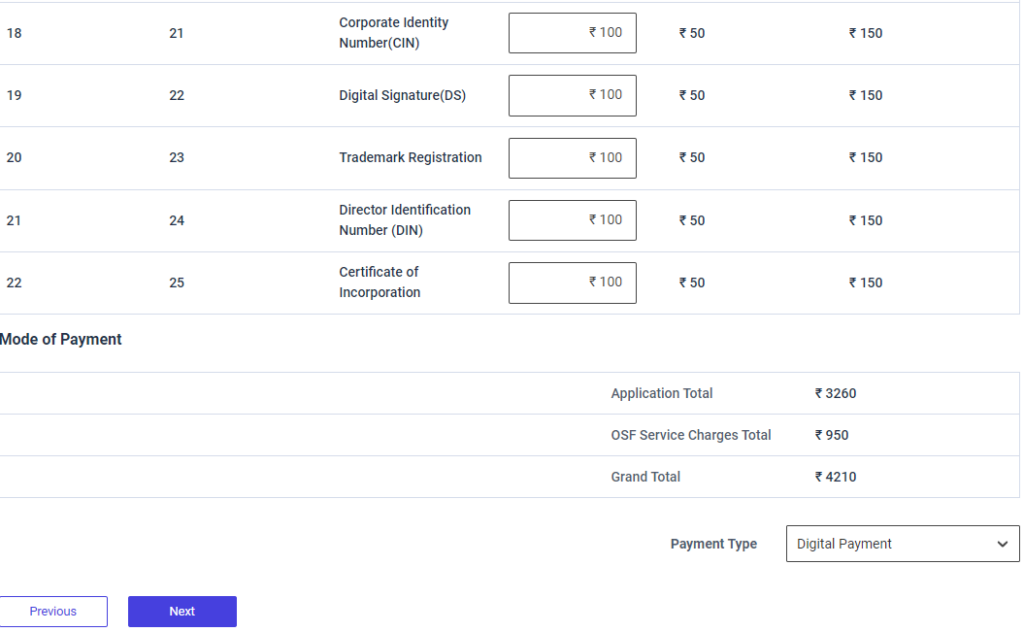
Step 4 : Mode of Payment :
Step 4.1 : The Application total and the OSF Service charges total and the grand total will get auto populated based on the previous data.
Step 4.2 : Payment Type : By clicking the dropdown to choose the payment type
Step 5 : Once the information is entered, click on the ‘Next’ option. The information will be saved as a draft
9.4 How to Review & Submit in the Book Services – New Entrepreneur:
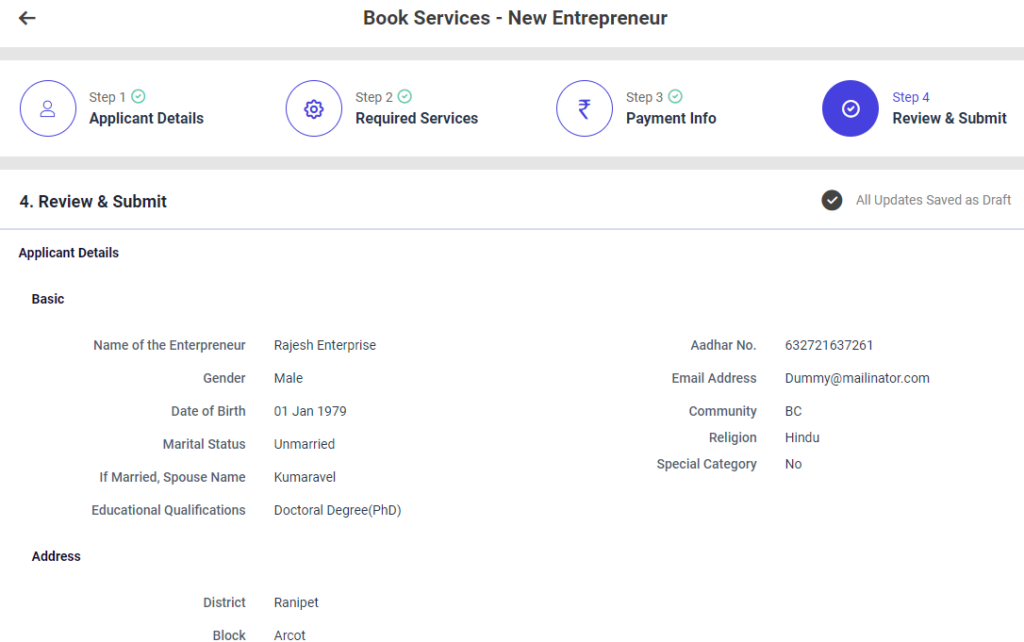
Step 1: Once the information is entered in the ‘Payment Info’ section, click on the ‘Next’ option. The information will be saved as a draft

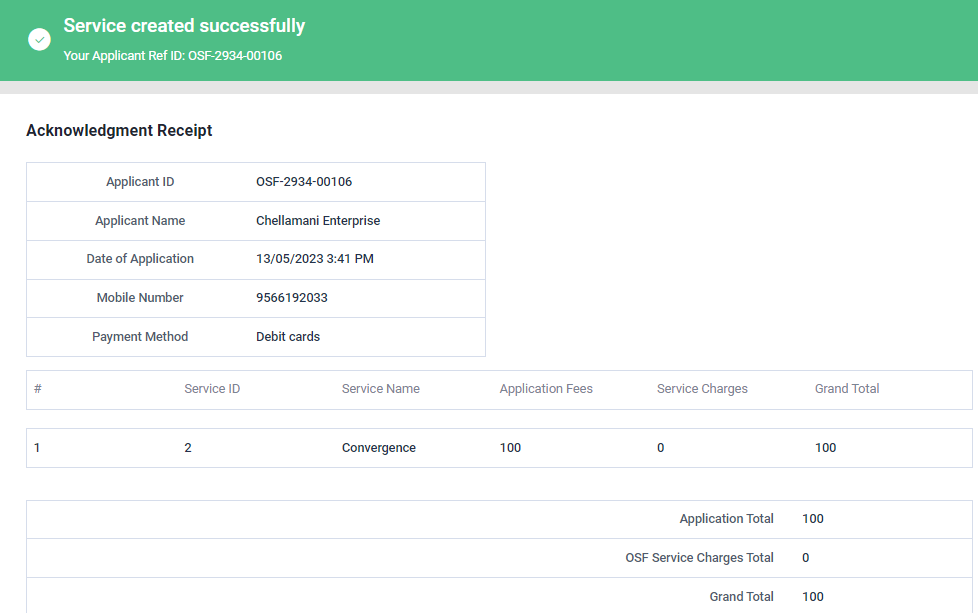
Step 2 : Review the book services New Entrepreneur details, if there are any changes that need to be made in any of the fields, click ‘Previous’ or choose ‘Finish’
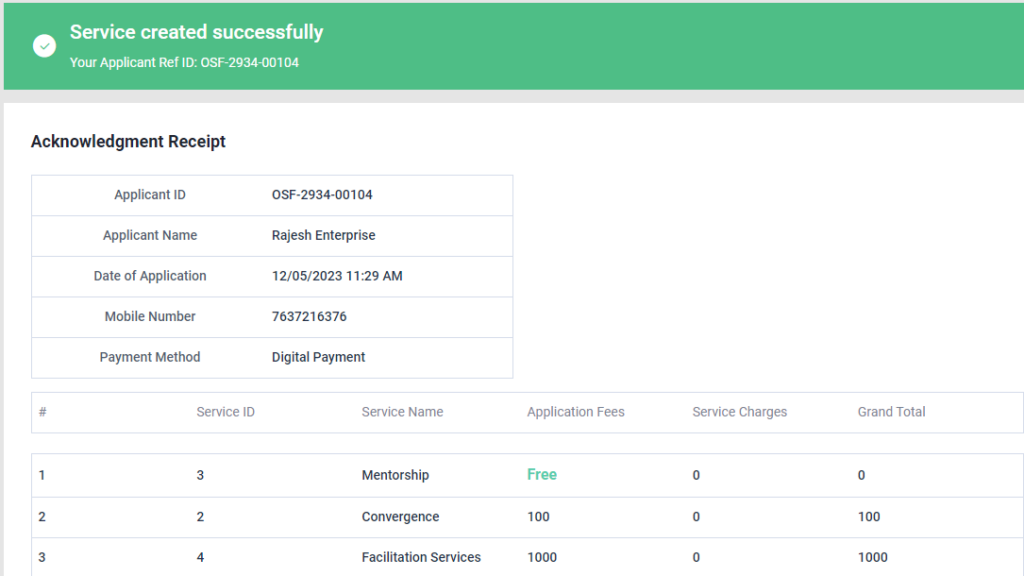
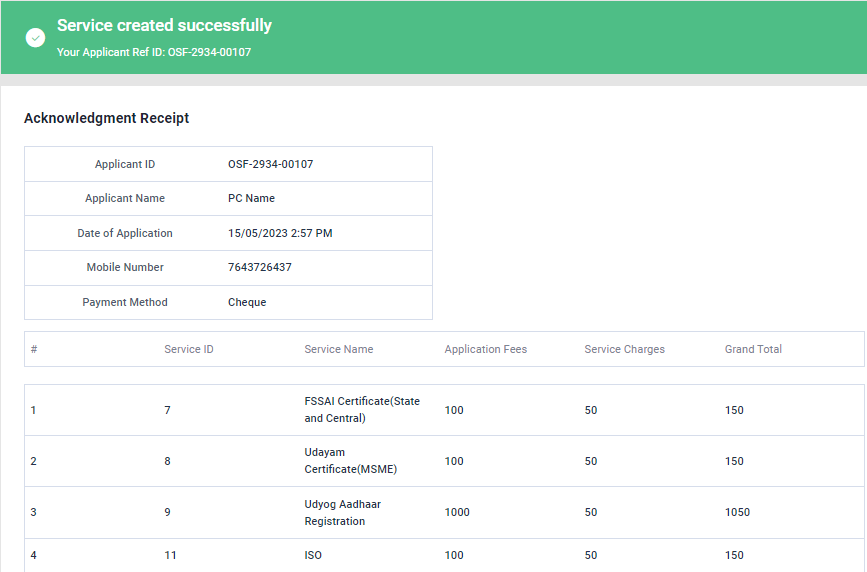
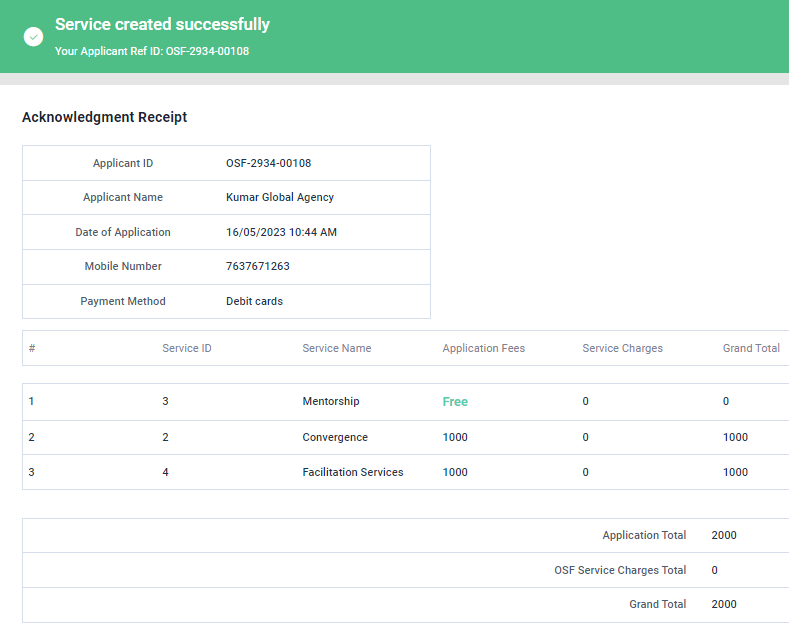
Step 3 : Once the EDO staff submitted, the popup will appear like ‘Service Created Successfully’ and the Application reference ID also generated.
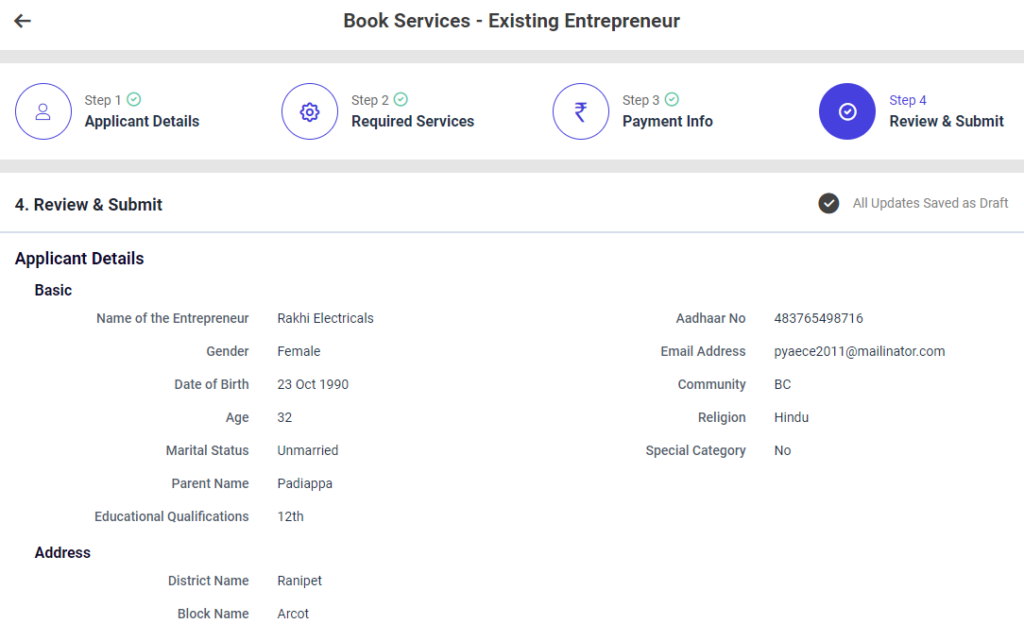
9.5 How to Add the Applicant Details in the Book Services – Existing Entrepreneur:
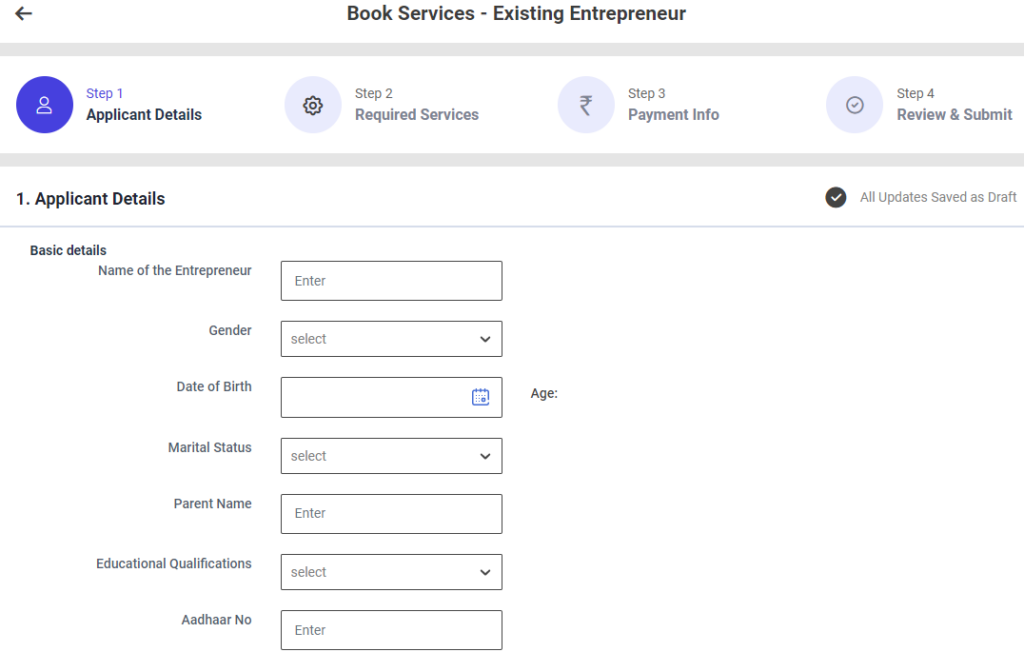
First Tab : Applicant Details
Step 1 : Complete the ‘Basic Details’ section to add book services new entrepreneur
Step 2 : Basic Details
Step 2.1 : Name of the Entrepreneur : Enter the name of the entrepreneur
Step 2.2 : Gender : By clicking the dropdown to choose the gender type
Step 2.3 : Date of Birth : By clicking the calendar to choose the date of birth then Age will be auto populated based on DOB
Step 2.4 : Marital Status : By clicking the dropdown to choose the marital status if ‘Married’ enter the spouse name
Step 2.5 : Parent Name : Enter the name of the parent
Step 2.6 : Educational Qualification : By clicking the dropdown to choose the educational qualification
Step 2.7 : Aadhar No : Enter the aadhar number of the functional expert

Step 2.8 : Email Address : Enter the email address
Step 2.9 : Community : By clicking the dropdown to choose the community name
Step 2.10 : Religion : By clicking the dropdown to choose the religion
Step 2.11 : Special Category : if the entrepreneur belongs to special category click ‘Yes’ if ‘Yes’ by clicking the dropdown to specify the category or choose ‘No’
Step 3 : Address :
Step 3.1 Location : By clicking the dropdown to choose the district, block and panchayat details
Step 3.2 Pincode : Enter the Pincode details
Step 4 : SHG Details :
Step 4.1 SHG Type : If we select the SHG Member: Enter the SHG Name, SHG Code (14 digit) and Emathi Code (16 digit)
Step 4.2 SHG Type : If we select the SHG Household: Enter the SHG Name, Member of the SHG Household name and Emathi Code (16 digit)
Step 5 : Entreprise Details :
Step 5.1 Name of Enterprise : Enter the name of the enterprise
Step 5.2 Name of Business : Enter the name of the business
Step 5.3 Product/Commodity Name : Enter the name of the product or commodity
Step 5.4 Constitution (type of ownership) : By clicking the dropdown to choose constitution type
Step 5.5 : Month of starting the business: By clicking the calendar to choose the month of starting the business
Step 5.6 : Date of Incorporation: By clicking the calendar to choose the incorporation date
Step 5.7 : Stake in Business(total Capital)(Invested / mobilized by the Owner of the enterprise) : Enter the sake in business
Step 5.8 : Whether unit is registered under any line departments : Whether unit is registered under any line departments Click ‘Yes’ if ‘Yes’ by clicking the dropdown to choose the registered under and enter the registered number or choose ‘No’

Step 6 : Size of Entreprise :
Step 6.1 Invested Capital : Enter the capital invested amount
Step 6.2 Turn over (Last Year) : Enter the last year turn over amount
Step 6.3 Employability (Full Time) : Enter the employability count and the enterprise size will get auto populated based on the details
Step 6.4 Nature of Enterprise Activity : By clicking the dropdown to choose nature of the enterprise activity
Step 6.5 Sector of the Enterprises : By clicking the dropdown to choose sector of the enterprises
Step 6.6 Descriptive about the business : Enter the descriptive about the business
Step 7 : Bank Details :
Step 7.1 Account Number : Enter the bank account number
Step 7.2 Name of the Bank : By clicking the dropdown to choose bank name
Step 7.3 Branch Name : By clicking the dropdown to choose branch name and the IFSC code will get auto populated based on the details
Step 7.4 Type of Account : By clicking the dropdown to choose the account type
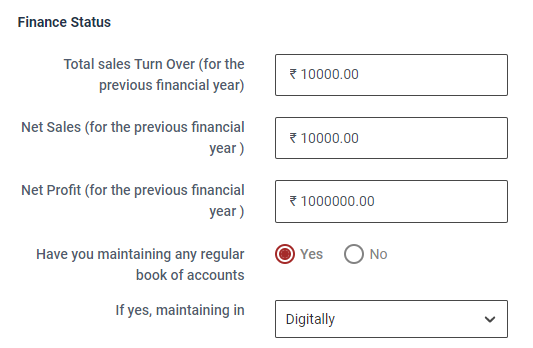
Step 8 : Finance Status :
Step 8.1 Total Sales Turn Over (for the previous financial year) : Enter the total sales turn over (for the previous financial year)
Step 8.2 Net Sales (for the previous financial year) : Enter the net sales amount for the previous financial year
Step 8.3 Net Profit (for the previous financial year) : Enter the Net Sales amount for the previous financial year
Step 8.4 Have you maintaining any regular book of accounts: Click ‘Yes’ if you maintaining any regular book of accounts and click the dropdown to choose the maintaining data or choose ‘No’
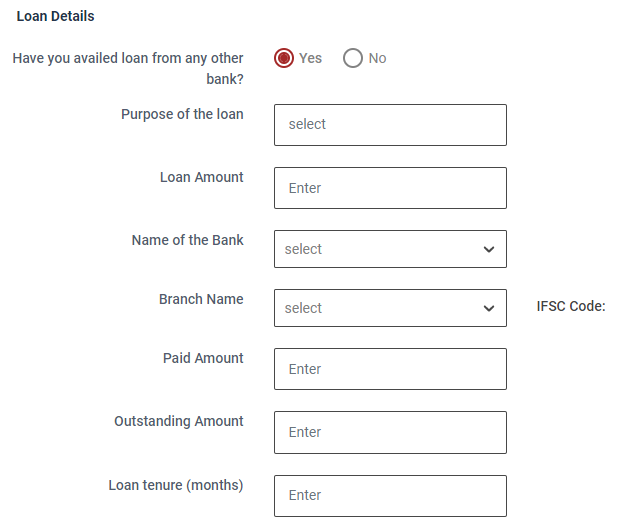
Step 9 : Loan Details :
Step 9.1 Have you availed a loan from any other bank? : Click ‘Yes’ if you have availed a loan from any other bank or choose ‘No’. If ‘Yes’ enter the purpose of loan, loan amount, Name of the bank, branch name, Paid amount and outstanding amount and loan tenure details details
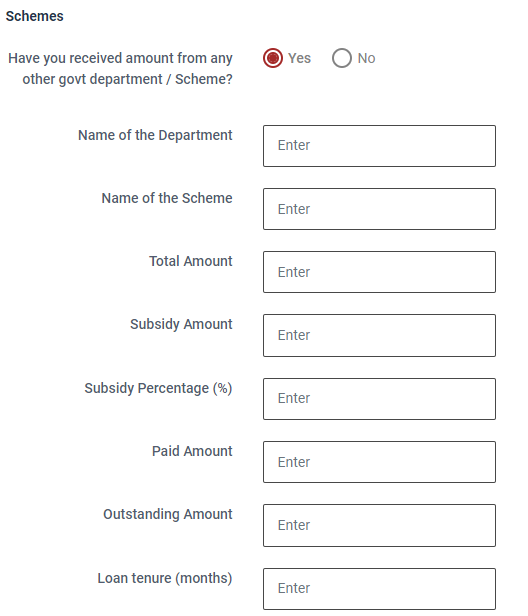
Step 10 : Schemes :
Step 10.1 Have you received an amount from any other government department / Scheme? : Click ‘Yes’ if Have you received an amount from any other government department / Scheme or choose ‘No’. If ‘Yes’ enter the name of the department, scheme name, total amount, subsidy amount, subsidy percentage, Paid amount and outstanding amount and loan tenure details details
Step 11 : Once the information is entered, click on the ‘Next’ option. The information will be saved as a draft
9.6 How to Add the Required Services in the Book Services – Existing Entrepreneur:
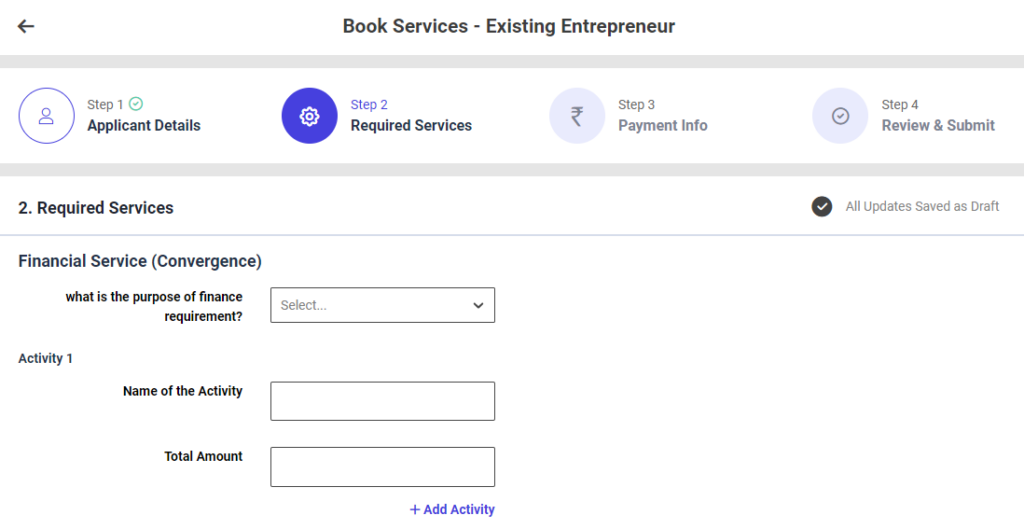
Second Tab : Required Services
Step 1 : Complete the ‘Required Services’ section to add book services new entrepreneur
Step 2 : Financial Services
Step 2.1 : What is the purpose of the finance requirement?: By clicking the dropdown to choose the purpose of the finance requirement
Step 2.2 : Total Amount : Enter the total amount
Step 2.3 : Click ‘Add Activity’ to add the activity more
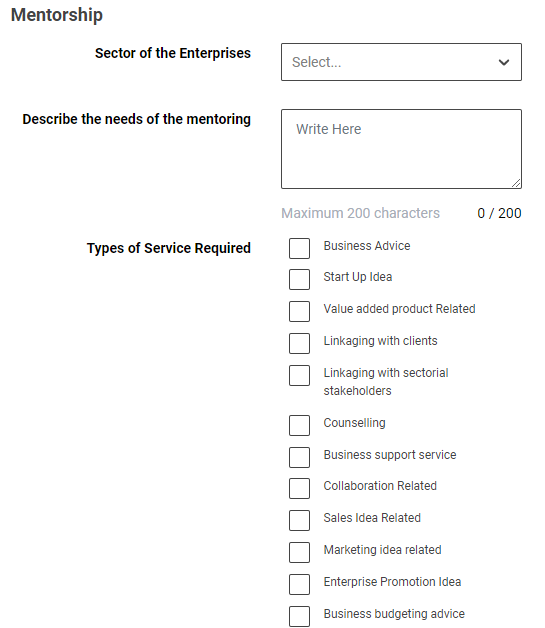
Step 3 : Mentorship
Step 3.1 : Sector of the Enterprise: By clicking the dropdown to choose the sector of the enterprise
Step 3.2 : Describe the needs of the mentoring : Enter the description to needs of the mentoring
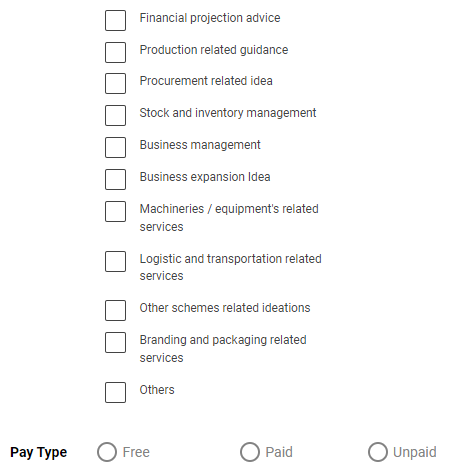
Step 3.3 : Type of Service Required : By click the checkbox to choose which type of service required
Step 3.4 : Pay Type : By click the dropdown to choose the paytype option
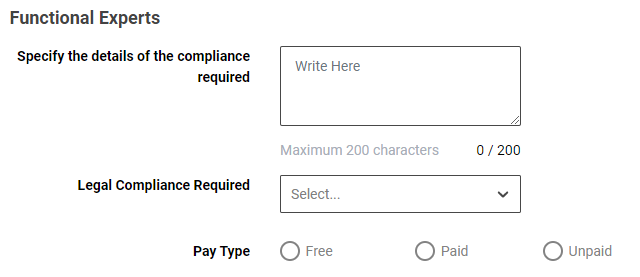
Step 4 : Functional Experts
Step 4.1 : Specify the details of the compliance required: Enter the specify the details of the compliance required
Step 4.2 : Legal Compliance Required : By clicking the dropdown to choose the legal compliance required
Step 4.3 : Pay Type : By click the dropdown to choose the paytype option

Step 5 : Facilitation Services
Step 5.1 : Business Plan Preparation required: Click ‘Yes’ to choose the business plan preparation required or choose ‘No’
Step 5.2 : Business ideation for expanding their business : Click ‘Yes’ to choose the business ideation for expanding their business and enter what are the business ideation required or choose ‘No’
Step 5.3 : Market Information : Click ‘Yes’ to choose the market information and enter what type of marketing information required or choose ‘No’
Step 5.4 : Marketing Tie ups : Click ‘Yes’ to choose the marketing tie ups and enter what type of marketing tie ups required or choose ‘No’
Step 5.5 : Location Tie ups : Click ‘Yes’ to choose the location tie ups and enter what type of location tie ups required or choose ‘No’
Step 5.6 : Branding and Packing Details : Click ‘Yes’ to choose the branding and packing details and enter what type of details required or choose ‘No’
Step 5.7 : Other scheme details/tie ups : Click ‘Yes’ to choose the other scheme details and tie ups and click the dropdown to choose the finance required from the scheme or choose ‘No’

Step 6 : Value Added Services
Step 6.1 : Choose ‘Required’ to value added services or choose ‘Renewal’ or choose ‘Not Required’ and click the dropdown to choose the type of not required option
Step 7 : Once the information is entered, click on the ‘Next’ option. The information will be saved as a draft
9.7 How to Add the Payment Info in the Book Services – Existing Entrepreneur:
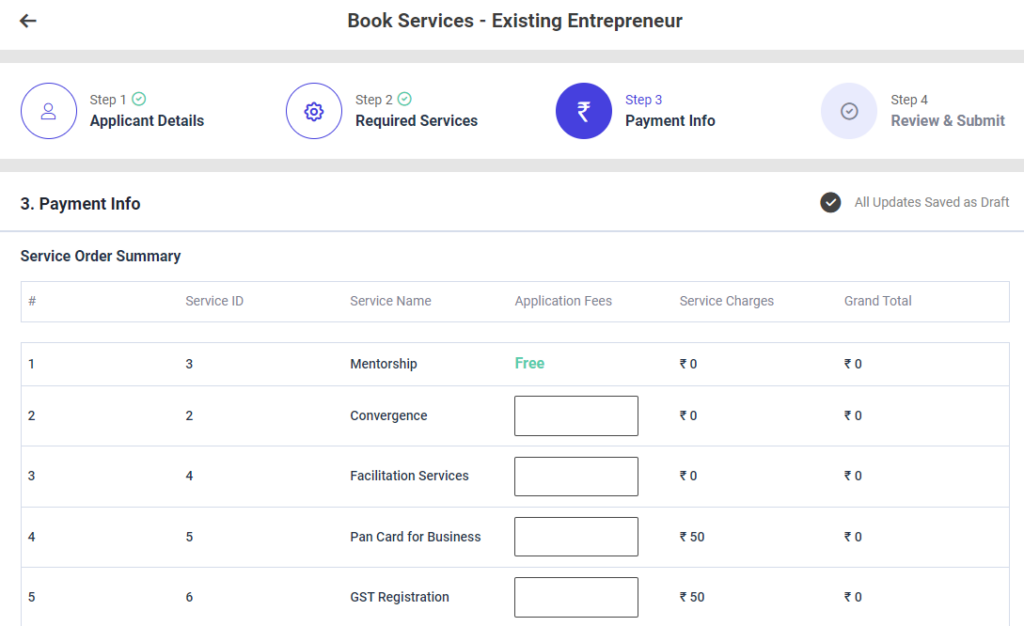
Third Tab : Payment Info
Step 1 : Complete the ‘Payment Info’ section to add book services new entrepreneur
Step 2 : Service Order Summary
Step 3.1 : Service ID : The service ID will get auto populated
Step 3.2 : Service Name : The Service name will get auto populated based on the previous data
Step 3.3 : Application Fees : Enter the application fees
Step 3.4 : Service Charge : The Service charge will get auto populated based on the previous data
Step 3.5 : Grand Total : The grand total will get auto populated based on the data entered in the application fees and service charges
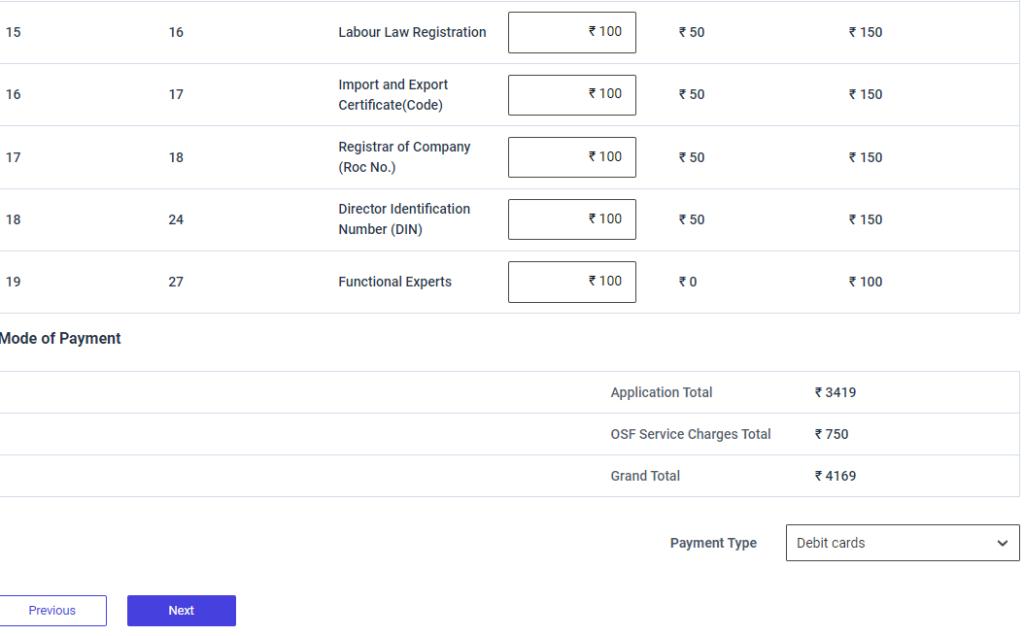
Step 4 : Mode of Payment :
Step 4.1 : The Application total and the OSF Service charges total and the grand total will get auto populated based on the previous data.
Step 4.2 : Payment Type : By clicking the dropdown to choose the payment type
Step 5 : Once the information is entered, click on the ‘Next’ option. The information will be saved as a draft
9.8 How to Review & Submit in the Book Services – Existing Entrepreneur:
Step 1: Once the information is entered in the ‘Payment Info’ section, click on the ‘Next’ option. The information will be saved as a draft
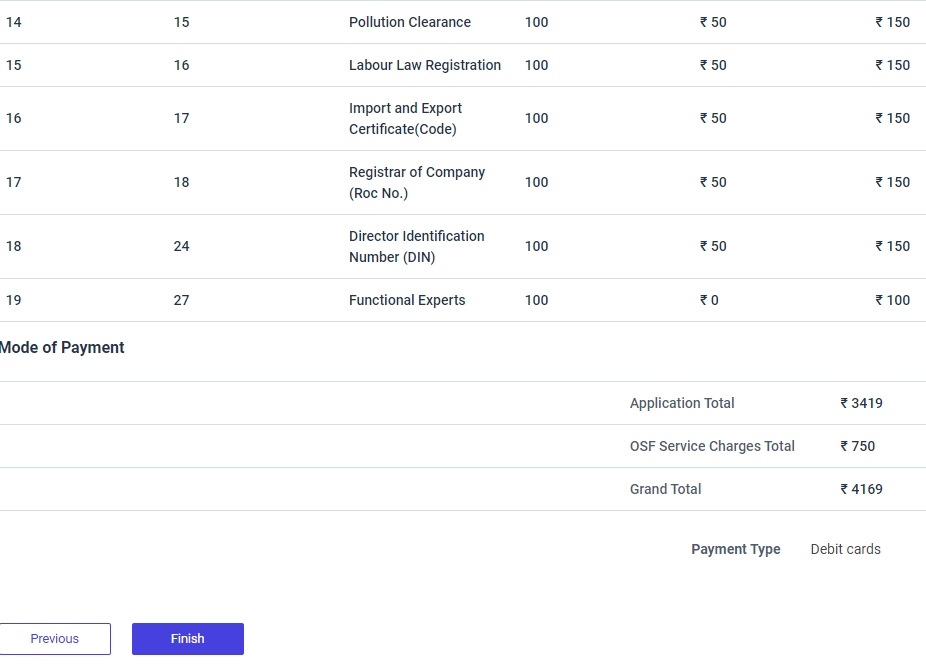
Step 2 : Review the book services existing Entrepreneur details, if there are any changes that need to be made in any of the fields, click ‘Previous’ or choose ‘Finish’
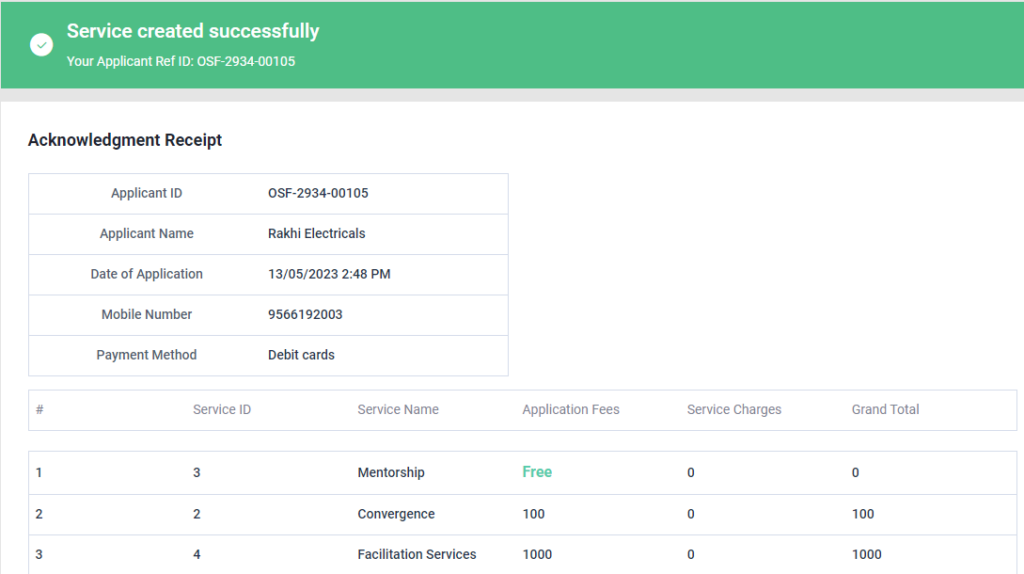
Step 3 : Once the EDO staff submitted, the popup will appear like ‘Service Created Successfully’ and the Application reference ID also generated.
9.9 How to Add the Enterprise Group Details in the Book Services – Enterprise Group:
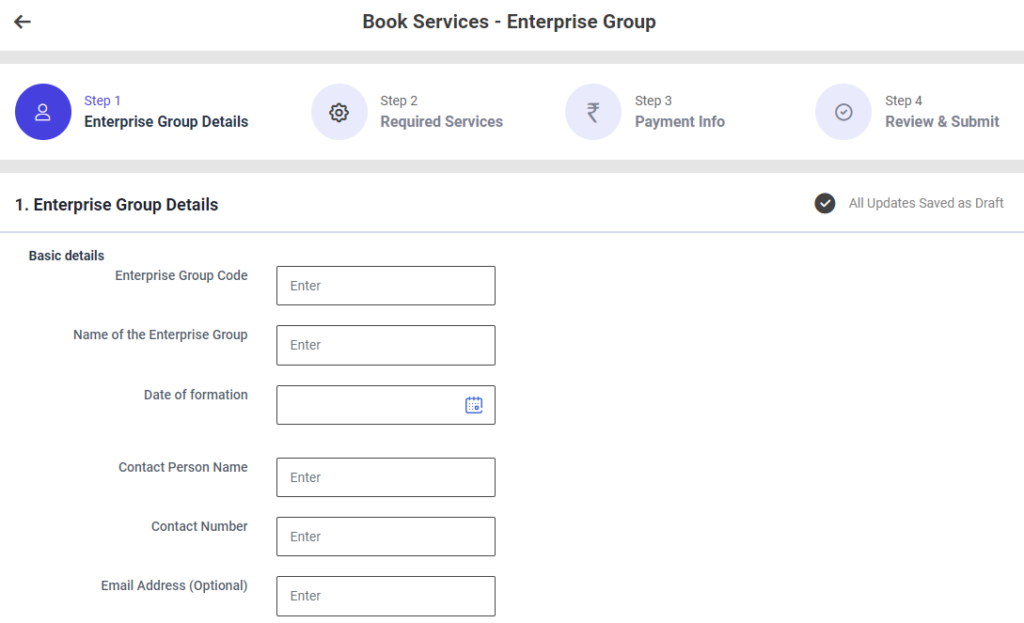
First Tab : Enterprise Group Details
Step 1 : Complete the ‘Basic Details’ section to add book services new entrepreneur
Step 2 : Basic Details
Step 2.1 : Enterprise Group Code : Enter the enterprise group code
Step 2.2 : Name of the Entrepreneur : Enter the name of the entrepreneur
Step 2.3 : Date of Formation : By clicking the calendar to choose the formation date
Step 2.4 : Contact Person Name : Enter the contact person name
Step 2.5 : Contact Number : Enter the contact number
Step 2.6 : Email Address : Enter the email address
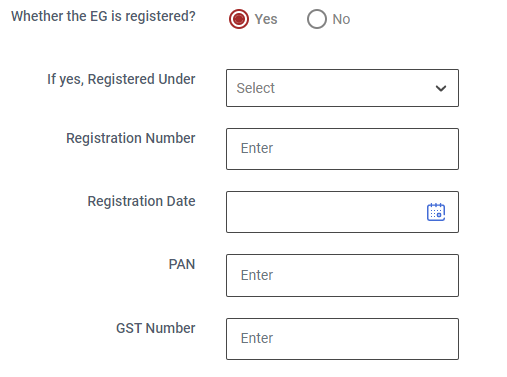
Step 2.7 : Whether the EG is registered? : Click ‘Yes’ whether the EG is registered or choose ‘No’. If ‘Yes’ enter the registered under, registration number, registration date, PAN and GST number details
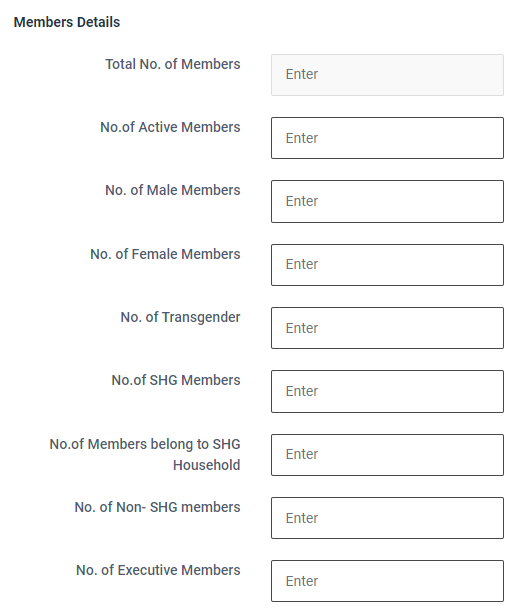
Step 3 : Member Details :
Step 3.1 : Enter the total number of active members, No of Male members, No of female members, No of transgender, No of SHG members, No of members belong to SHG household, No of non SHG members and No of executive members and the total number of members will get auto populated based on the data entered in the above tab.

Step 3 : Address :
Step 3.1 Location : By clicking the dropdown to choose the district, block and panchayat details
Step 3.2 Pincode : Enter the Pincode details
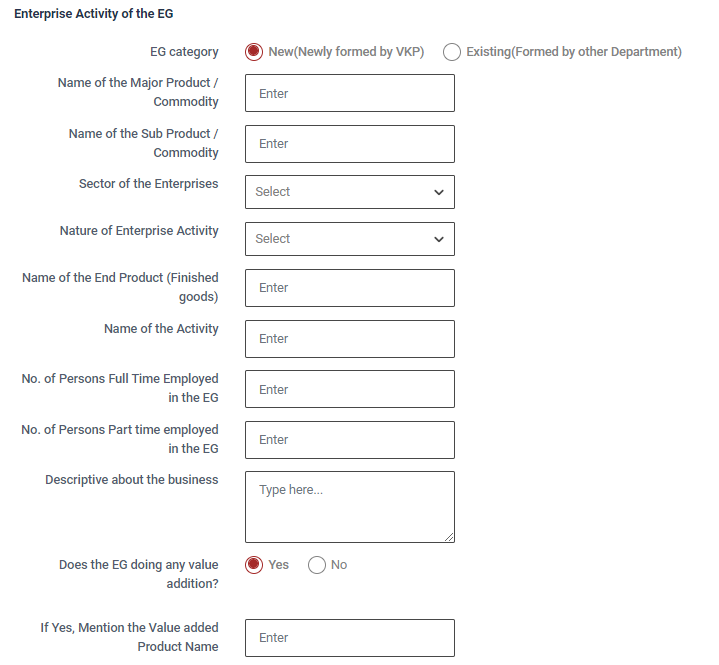
Step 4 : Enterprise Activity of the EG :
Step 4.1 EG category : Choose the EG category (New)
Step 4.2 Name of the Major Product / Commodity : Enter the name of the major product/commodity
Step 4.3 Name of the Sub Product / Commodity : Enter the name of the sub product/commodity
Step 4.4 Sector of the Enterprises : By click the dropdown to choose the sector of the enterprise
Step 4.5 Nature of Enterprise Activity : By click the dropdown to choose the nature of enterprise activity
Step 4.6 Name of the End Product (Finished goods) : Enter the name of the end product (finished goods)
Step 4.7 Name of the Activity : Enter the name of the activity
Step 4.8 No. of Persons Full Time Employed in the EG : Enter the number of the persons full time employed in the EG
Step 4.9 No. of Persons Part Time Employed in the EG : Enter the number of the persons part time employed in the EG
Step 4.10 Descriptive about the business : Enter the descriptive about the business
Step 4.11 Does the EG doing any value addition? : Click ‘Yes’ does the EG doing any value addition or choose ‘No’
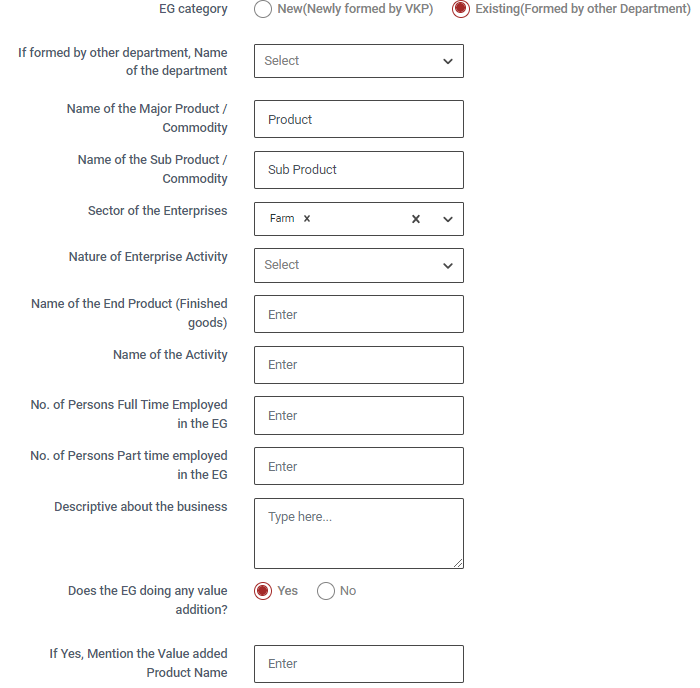
Step 4.12 EG category : Choose the EG category (Existing)
Step 4.13 If formed by other department, Name of the department : Click the dropdown to choose the name of the department
Step 4.14 Name of the Major Product / Commodity : Enter the name of the major product/commodity
Step 4.15 Name of the Sub Product / Commodity : Enter the name of the sub product/commodity
Step 4.16 Sector of the Enterprises : By click the dropdown to choose the sector of the enterprise
Step 4.17 Nature of Enterprise Activity : By click the dropdown to choose the nature of enterprise activity
Step 4.18 Name of the End Product (Finished goods) : Enter the name of the end product (finished goods)
Step 4.19 Name of the Activity : Enter the name of the activity
Step 4.20 No. of Persons Full Time Employed in the EG : Enter the number of the persons full time employed in the EG
Step 4.21 No. of Persons Part Time Employed in the EG : Enter the number of the persons part time employed in the EG
Step 4.22 Descriptive about the business : Enter the descriptive about the business
Step 4.23 Does the EG doing any value addition? : Click ‘Yes’ does the EG doing any value addition or choose ‘No’ If ‘Yes’ Enter the value added product name
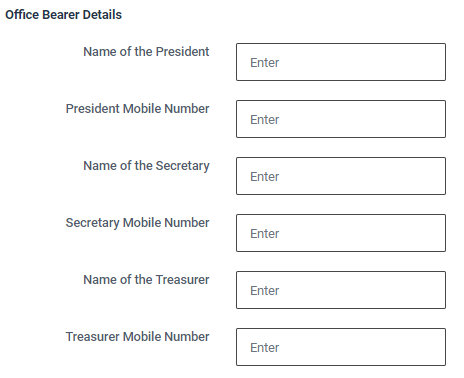
Step 5 : Office Bearer Details :
Step 5.1 Name of the President : Enter the name of the president
Step 5.2 President Mobile Number : Enter the president mobile number
Step 5.3 Name of the Secretary : Enter the name of the secretary
Step 5.4 Secretary Mobile Number : Enter the secretary mobile number
Step 5.5 Name of the Treasurer : Enter the name of the treasurer
Step 5.6 Treasurer Mobile Number : Enter the treasurer mobile number
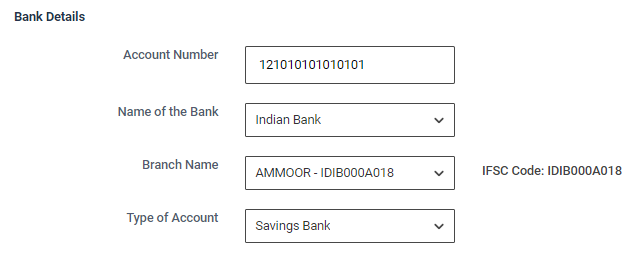
Step 6 : Bank Details :
Step 6.1 Account Number : Enter the bank account number
Step 6.2 Name of the Bank : By clicking the dropdown to choose bank name
Step 6.3 Branch Name : By clicking the dropdown to choose branch name and the IFSC code will get auto populated based on the details
Step 6.4 Type of Account : By clicking the dropdown to choose the account type
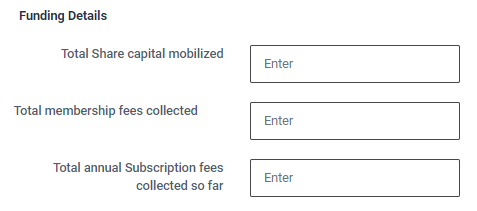
Step 7 : Funding Details :
Step 7.1 Total Share Capital Mobilised : Enter the total share capital mobilised
Step 7.2 Total membership fees collected : Enter the total membership collected fees
Step 7.3 Total annual Subscription fees collected so far : Enter the total annual subscription fees collected so far

Step 8 : Finance Status :
Step 8.1 Total Turn Over (for the previous financial year) : Enter the total turn over (for the previous financial year)
Step 8.2 Net Sales (for the previous financial year) : Enter the net sales amount for the previous financial year
Step 8.3 Net Profit (for the previous financial year) : Enter the Net Sales amount for the previous financial year
Step 8.4 Have you maintaining any regular book of accounts: Click ‘Yes’ if you maintaining any regular book of accounts and click the dropdown to choose the maintaining data or choose ‘No’

Step 9 : Loan Details :
Step 9.1 Have you availed a loan from any other bank? : Click ‘Yes’ if you have availed a loan from any other bank or choose ‘No’. If ‘Yes’ enter the purpose of loan, sanctioned date, total sanctioned amount, percentage of interest and paid amount
Step 9.2 Have the EG fully paid the loan? : Click ‘Yes’ if you have availed a loan from any other bank or choose ‘No’. If ‘Yes’ enter the balance outstanding amount and term loan repayment
Step 9.3 Insurance for assets of the EG : Click ‘Yes’ if you have insurance for assets of the EG or choose ‘No’.
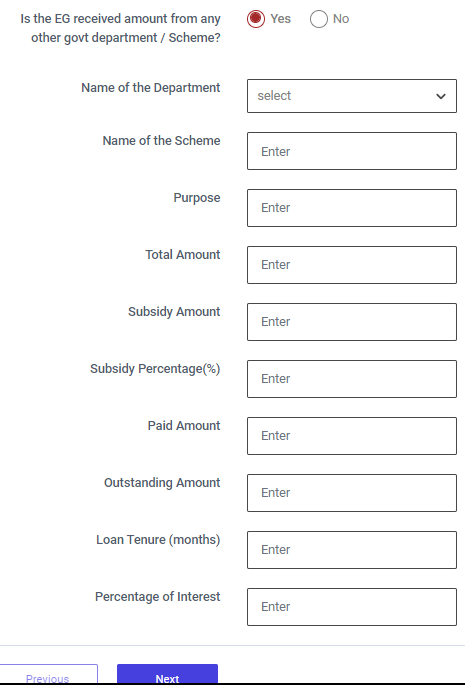
Step 10 : Schemes :
Step 10.1 Have you received an amount from any other government department / Scheme? : Click ‘Yes’ if Have you received an amount from any other government department / Scheme or choose ‘No’. If ‘Yes’ enter the name of the department, scheme name, total amount, subsidy amount, subsidy percentage, Paid amount and outstanding amount and loan tenure details details
Step 11 : Once the information is entered, click on the ‘Next’ option. The information will be saved as a draft
9.10 How to Add the Required Services in the Book Services – Enterprise Group:
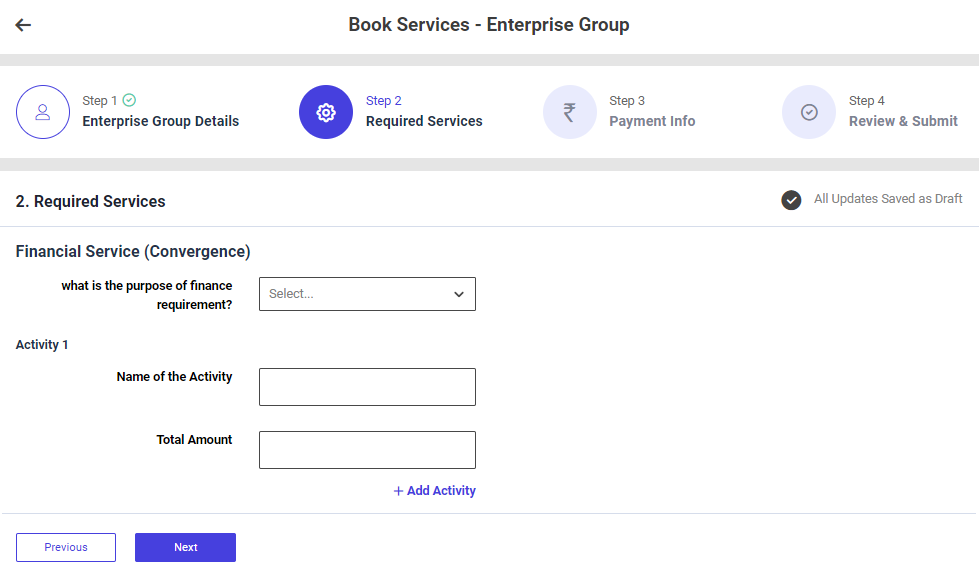
Second Tab : Required Services
Step 1 : Complete the ‘Required Services’ section to add book services new entrepreneur
Step 2 : Financial Services
Step 2.1 : What is the purpose of the finance requirement?: By clicking the dropdown to choose the purpose of the finance requirement
Step 2.2 : Total Amount : Enter the total amount
Step 2.3 : Click ‘Add Activity’ to add the activity more
Step 3 : Once the information is entered, click on the ‘Next’ option. The information will be saved as a draft
9.11 How to Add the Payment Info in the Book Services – Enterprise Group:

Third Tab : Payment Info
Step 1 : Complete the ‘Payment Info’ section to add book services new entrepreneur
Step 2 : Service Order Summary
Step 3.1 : Service ID : The service ID will get auto populated
Step 3.2 : Service Name : The Service name will get auto populated based on the previous data
Step 3.3 : Application Fees : Enter the application fees
Step 3.4 : Service Charge : The Service charge will get auto populated based on the previous data
Step 3.5 : Grand Total : The grand total will get auto populated based on the data entered in the application fees and service charges
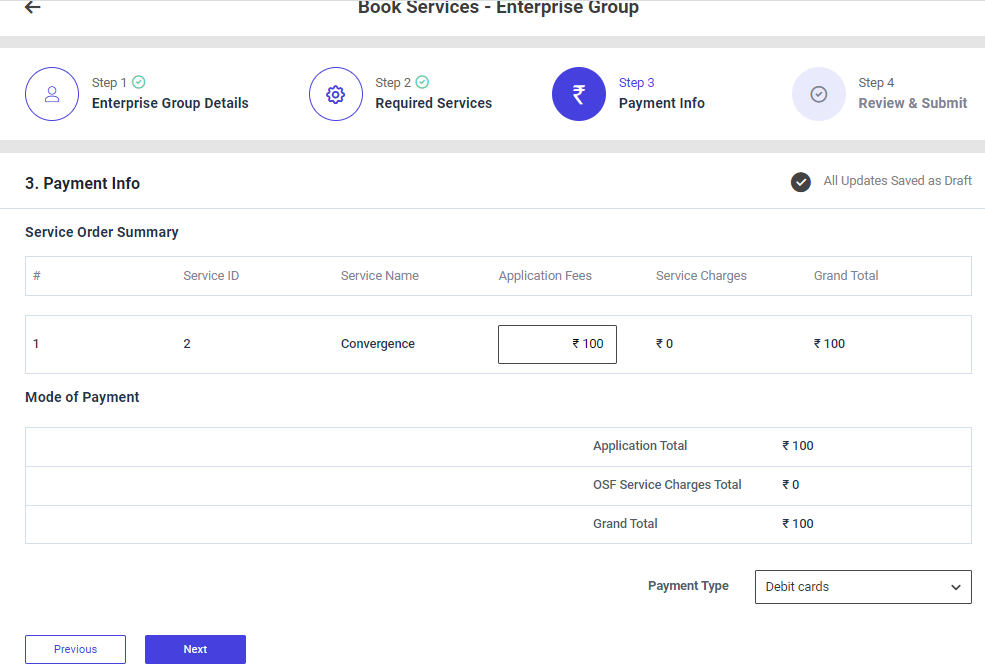
Step 4 : Mode of Payment :
Step 4.1 : The Application total and the OSF Service charges total and the grand total will get auto populated based on the previous data.
Step 4.2 : Payment Type : By clicking the dropdown to choose the payment type
Step 5 : Once the information is entered, click on the ‘Next’ option. The information will be saved as a draft
9.12 How to Review & Submit in the Book Services – Enterprise Group:
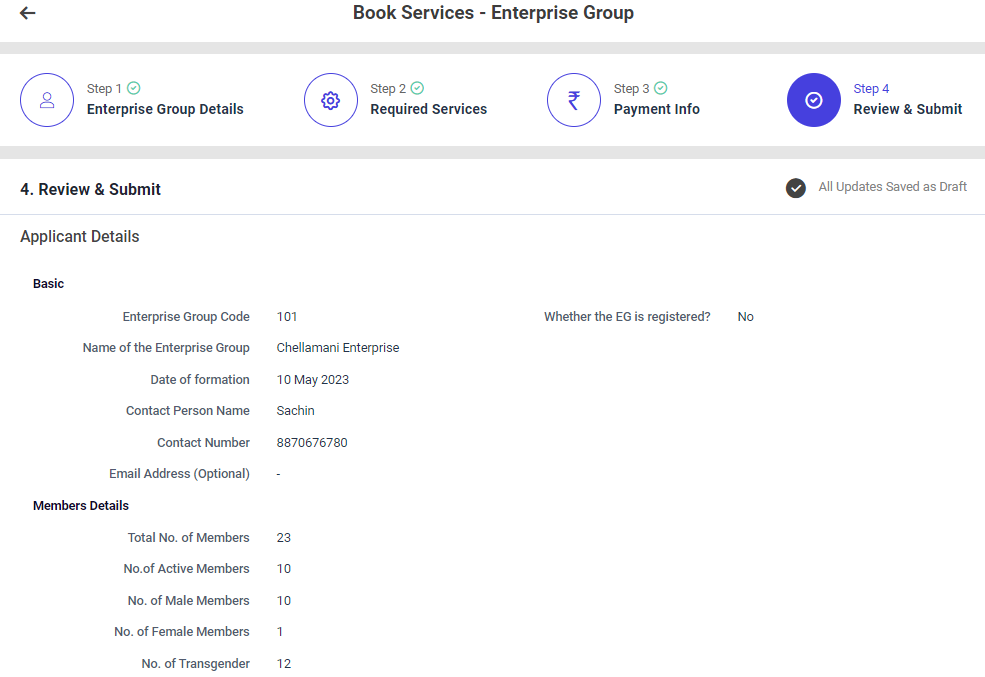
Step 1: Once the information is entered in the ‘Payment Info’ section, click on the ‘Next’ option. The information will be saved as a draft
Step 2 : Review the book services existing Entrepreneur details, if there are any changes that need to be made in any of the fields, click ‘Previous’ or choose ‘Finish’
Step 3 : Once the EDO staff submitted, the popup will appear like ‘Service Created Successfully’ and the Application reference ID also generated.
9.13 How to Add the Producer Collective Details in the Book Services – Producer Collective:
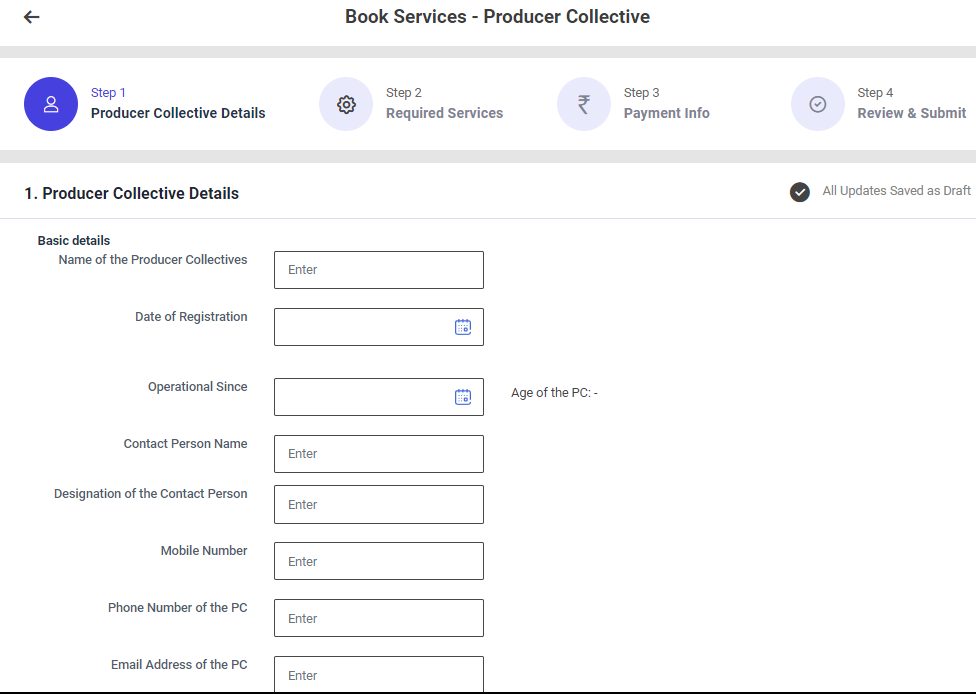
First Tab : Producer Collective Details
Step 1 : Complete the ‘Basic Details’ section to add book services new producer collective
Step 2 : Basic Details
Step 2.1 : Name of the Producer Collective : Enter the name of the producer collective
Step 2.2 : Date of Registration : By clicking the calendar to choose the registration date
Step 2.3 : Operational Since : By clicking the calendar to choose operation since and the age of the PC will get auto populated based on the data
Step 2.4 : Contact Person Name : Enter the contact person name
Step 2.5 : Designation of the Contact Person : Enter the contact person designation
Step 2.6 : Mobile Number : Enter the mobile number
Step 2.7 : Phone Number of the PC : Enter the phone number of the PC
Step 2.8 : Email Address of the PC : Enter the email address of the PC
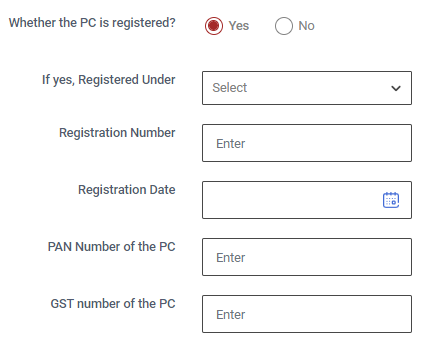
Step 2.7 : Whether the PC is registered? : Click ‘Yes’ whether the EG is registered or choose ‘No’. If ‘Yes’ enter the registration number, registration date, PAN and GST number details of PC
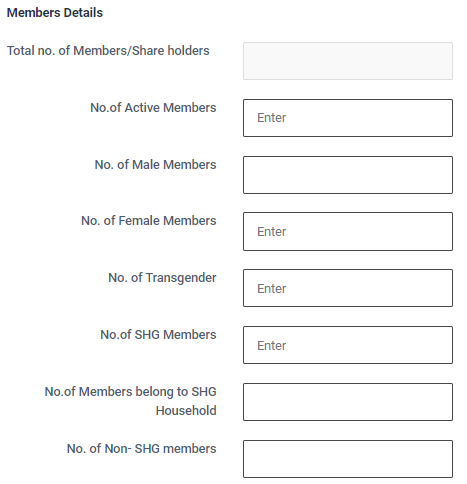
Step 3 : Member Details :
Step 3.1 : Enter the total number of active members, No of Male members, No of female members, No of transgender, No of SHG members, No of members belong to SHG household, No of non SHG members and No of executive members and the total number of members will get auto populated based on the data entered in the above tab.

Step 4 : Address :
Step 4.1 Location : By clicking the dropdown to choose the district, block and panchayat details
Step 4.2 Pincode : Enter the Pincode details
Step 5 : Enterprise Activity of the PC :
Step 5.1 Category of the PC : Choose the PC category (New)
Step 5.2 Name of the business activity : Enter the name of the business activity
Step 5.3 Secondary Business : Enter the name of the secondary business
Step 5.4 Name of the Supporting Agency : Enter the name of the supporting agency
Step 5.5 Name of the Major Product / Commodity : Enter the name of the major product/commodity
Step 5.6 Name of the Sub Product / Commodity : Enter the name of the sub product/commodity
Step 5.7 Sector of the Enterprises : By click the dropdown to choose the sector of the enterprise
Step 5.8 Nature of Enterprise Activity : By click the dropdown to choose the nature of enterprise activity
Step 5.9 Name of the End Product (Finished goods) : Enter the name of the end product (finished goods)
Step 5.10 Name of the Activity : Enter the name of the activity
Step 5.11 No. of Persons Full Time Employed in the PC : Enter the number of the persons full time employed in the PC
Step 5.12 No. of Persons Part Time Employed in the PC : Enter the number of the persons part time employed in the PC
Step 5.13 Descriptive about the business : Enter the descriptive about the business
Step 5.14 Does the PC doing any value addition? : Click ‘Yes’ does the PC doing any value addition or choose ‘No’
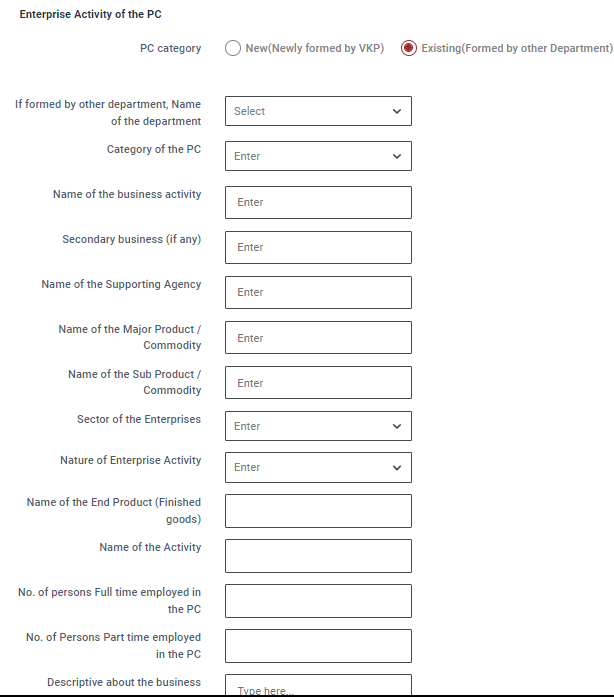
Step 5.15 PC category : Choose the PC category (Existing)
Step 5.16 If formed by other department, Name of the department : Click the dropdown to choose the name of the department
Step 5.17 Name of the business activity : Enter the name of the business activity
Step 5.18 Secondary Business : Enter the name of the secondary business
Step 5.19 Name of the Supporting Agency : Enter the name of the supporting agency
Step 5.20 Name of the Major Product / Commodity : Enter the name of the major product/commodity
Step 5.21 Name of the Sub Product / Commodity : Enter the name of the sub product/commodity
Step 5.22 Sector of the Enterprises : By click the dropdown to choose the sector of the enterprise
Step 5.23 Nature of Enterprise Activity : By click the dropdown to choose the nature of enterprise activity
Step 5.24 Name of the End Product (Finished goods) : Enter the name of the end product (finished goods)
Step 5.25 Name of the Activity : Enter the name of the activity
Step 5.26 No. of Persons Full Time Employed in the PC : Enter the number of the persons full time employed in the PC
Step 5.27 No. of Persons Part Time Employed in the PC : Enter the number of the persons part time employed in the PC
Step 5.28 Descriptive about the business : Enter the descriptive about the business
Step 5.29 Does the PC doing any value addition? : Click ‘Yes’ does the PC doing any value addition or choose ‘No’ If ‘Yes’ Enter the value added product name
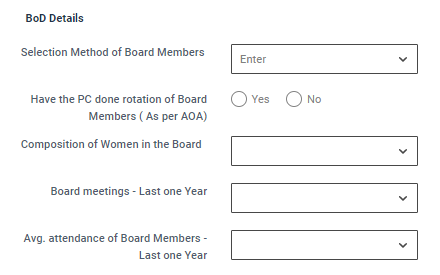
Step 6 : BOD Details :
Step 6.1 Selection Method of Board Members : Enter the selection method of board members
Step 6.2 Have the PC done rotation of Board Members ( As per AOA) : By clicking the calendar to choose the rotation of the board members
Step 6.3 Composition of Women in the Board : Enter the composition of women in the board
Step 6.4 Board meetings – Last one Year : Enter the number of board meetings for the last year
Step 6.5 Avg.attendance of Board Members Last one Year : Enter the average number of attendance board meetings for last year
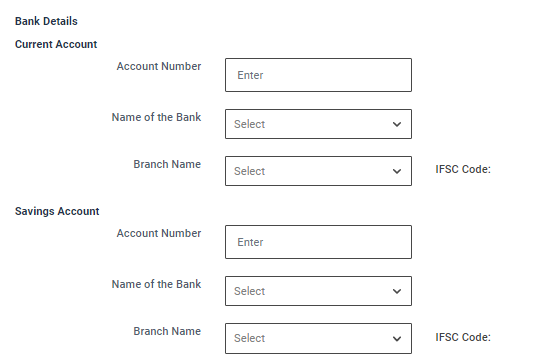
Step 7 : Bank Details : Savings & Current Account :
Step 7.1 Account Number : Enter the bank account number
Step 7.2 Name of the Bank : By clicking the dropdown to choose bank name
Step 7.3 Branch Name : By clicking the dropdown to choose branch name and the IFSC code will get auto populated based on the details

Step 8 : Funding Details :
Step 8.1 Total Share Capital Mobilised : Enter the total share capital mobilised
Step 8.2 Total membership fees collected : Enter the total membership collected fees
Step 8.3 Total annual Subscription fees collected so far : Enter the total annual subscription fees collected so far
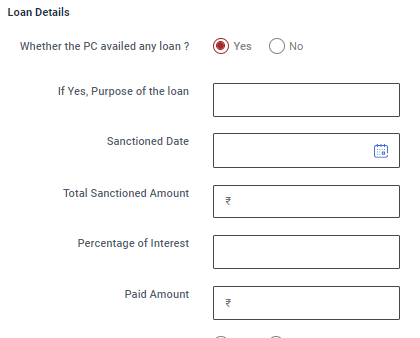
Step 9 : Loan Details :
Step 9.1 Whether the PC availed any loan ? : Click ‘Yes’ if you have availed a loan from any loan or choose ‘No’. If ‘Yes’ enter the purpose of loan, sanctioned date, total sanctioned amount, percentage of interest and paid amount
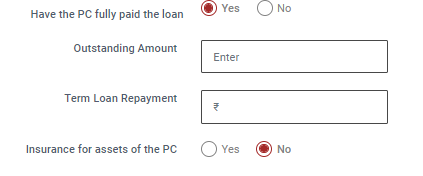
Step 9.2 Have the PC fully paid the loan? : Click ‘Yes’ if you have availed a loan from any other bank or choose ‘No’. If ‘Yes’ enter the balance outstanding amount and term loan repayment
Step 9.3 Insurance for assets of the PC : Click ‘Yes’ if you have insurance for assets of the PC or choose ‘No’.
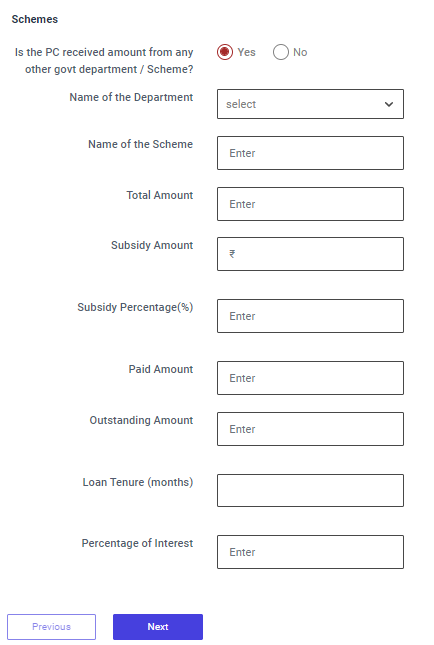
Step 10 : Schemes :
Step 10.1 Have you received an amount from any other government department / Scheme? : Click ‘Yes’ if Have you received an amount from any other government department / Scheme or choose ‘No’. If ‘Yes’ enter the name of the department, scheme name, total amount, subsidy amount, subsidy percentage, Paid amount and outstanding amount and loan tenure details details
Step 11 : Once the information is entered, click on the ‘Next’ option. The information will be saved as a draft
9.14 How to Add the Required Services in the Book Services – Producer Collective:
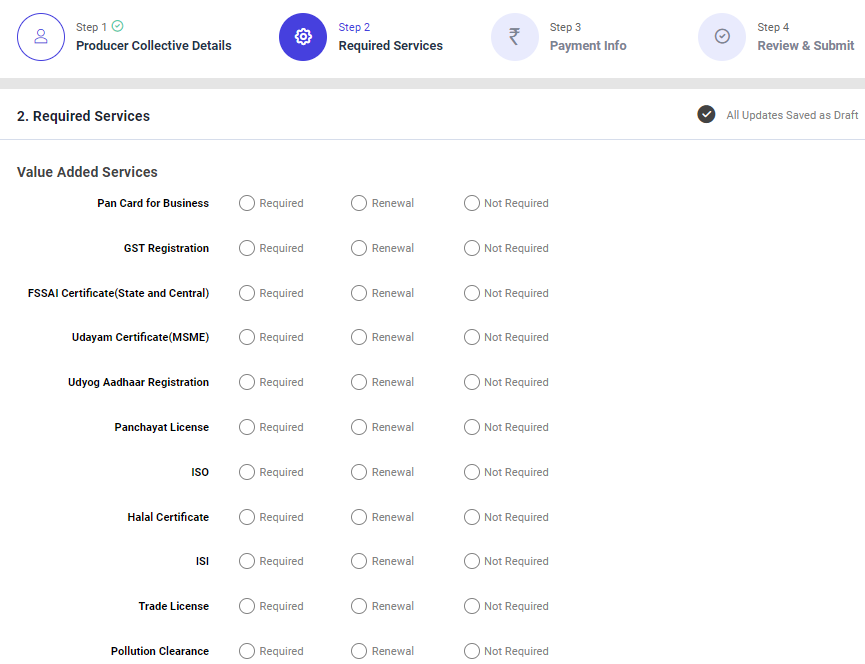
Second Tab : Required Services
Step 1 : Complete the ‘Value Added Services’ section to add book services new producer collective
Step 5 : Value Added Services
Step 5.1 : Choose ‘Required’ to value added services or choose ‘Renewal’ or choose ‘Not Required’ and click the dropdown to choose the type of not required option
Step 6 : Once the information is entered, click on the ‘Next’ option. The information will be saved as a draft
9.15 How to Add the Payment Info in the Book Services – Producer Collective:
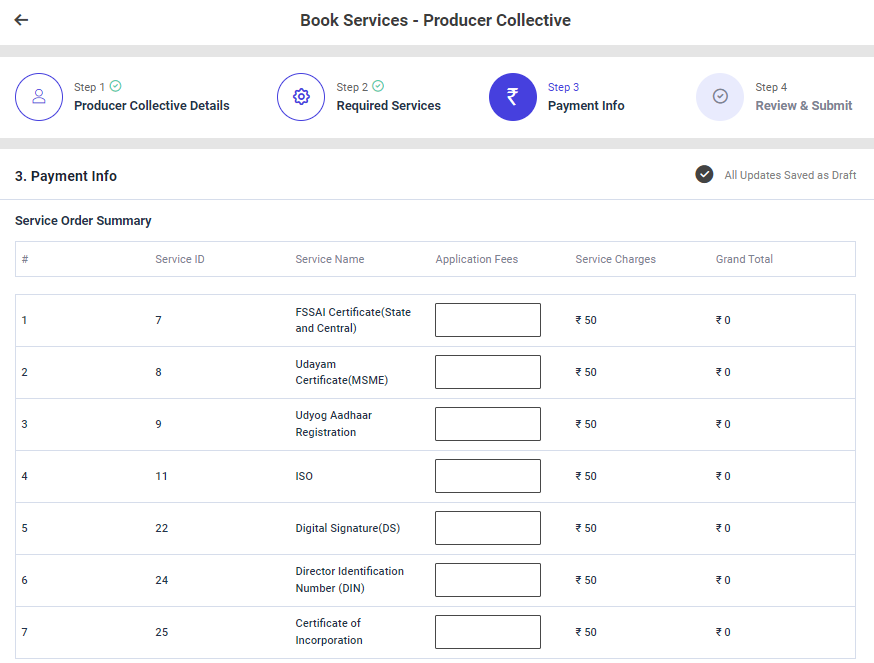
Third Tab : Payment Info
Step 1 : Complete the ‘Payment Info’ section to add book services new entrepreneur
Step 2 : Service Order Summary
Step 3.1 : Service ID : The service ID will get auto populated
Step 3.2 : Service Name : The Service name will get auto populated based on the previous data
Step 3.3 : Application Fees : Enter the application fees
Step 3.4 : Service Charge : The Service charge will get auto populated based on the previous data
Step 3.5 : Grand Total : The grand total will get auto populated based on the data entered in the application fees and service charges
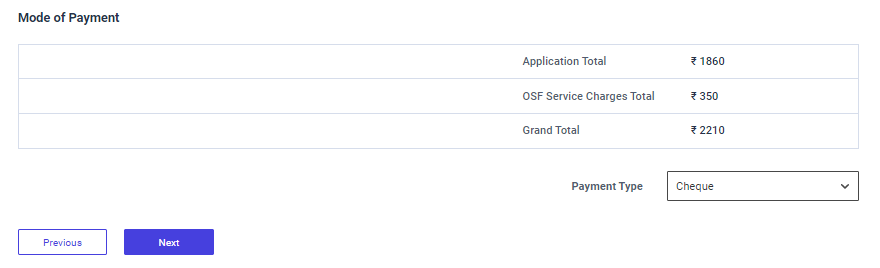
Step 4 : Mode of Payment :
Step 4.1 : The Application total and the OSF Service charges total and the grand total will get auto populated based on the previous data.
Step 4.2 : Payment Type : By clicking the dropdown to choose the payment type
Step 5 : Once the information is entered, click on the ‘Next’ option. The information will be saved as a draft
9.16 How to Review & Submit in the Book Services – Producer Collectives:
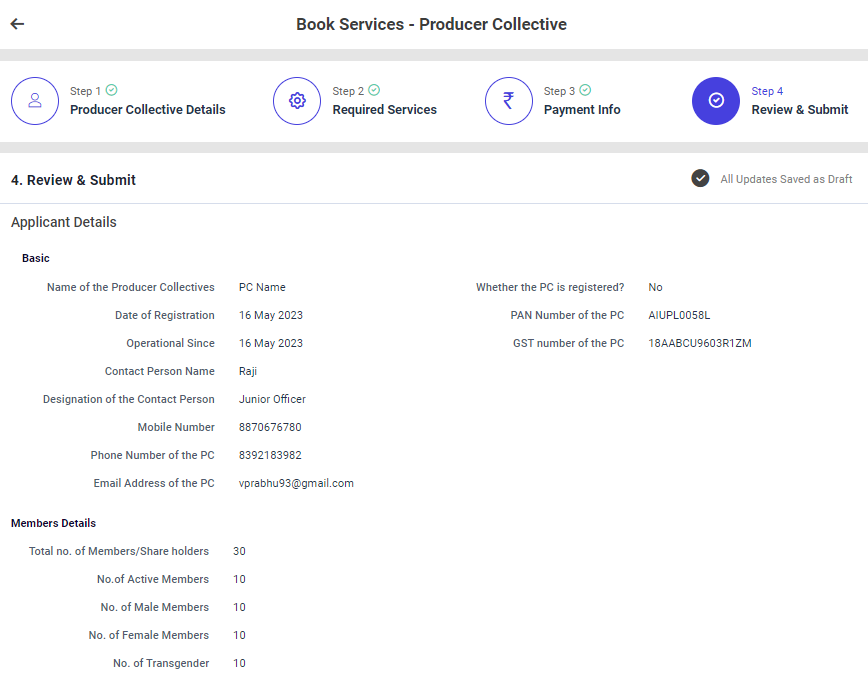
Step 1: Once the information is entered in the ‘Payment Info’ section, click on the ‘Next’ option. The information will be saved as a draft
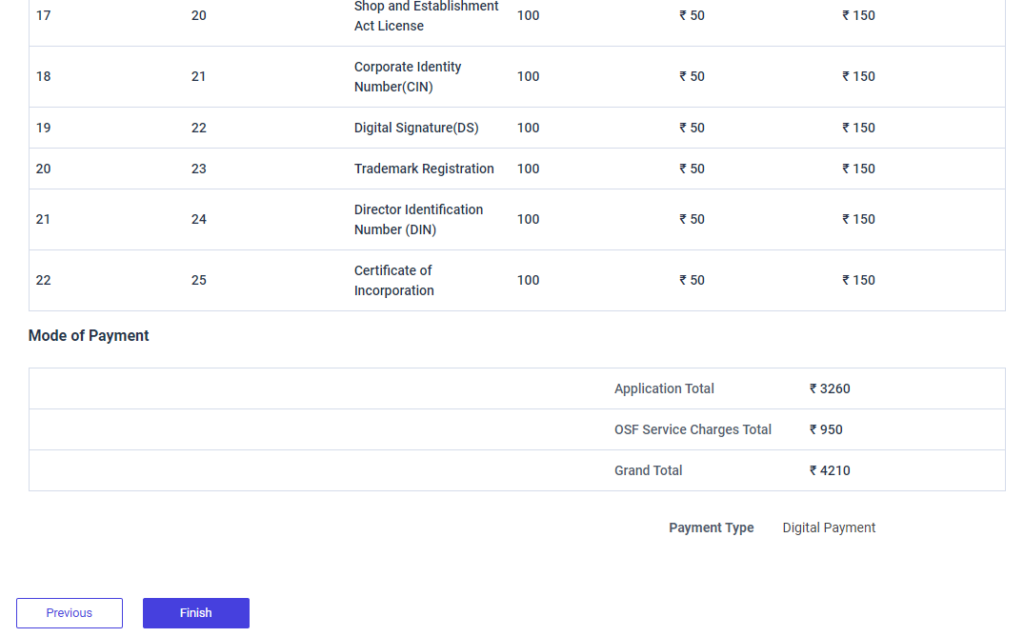
Step 2 : Review the book services New Entrepreneur details, if there are any changes that need to be made in any of the fields, click ‘Previous’ or choose ‘Finish’
Step 3 : Once the EDO staff submitted, the popup will appear like ‘Service Created Successfully’ and the Application reference ID also generated.
10. How to Create Others Service in Book New Service:
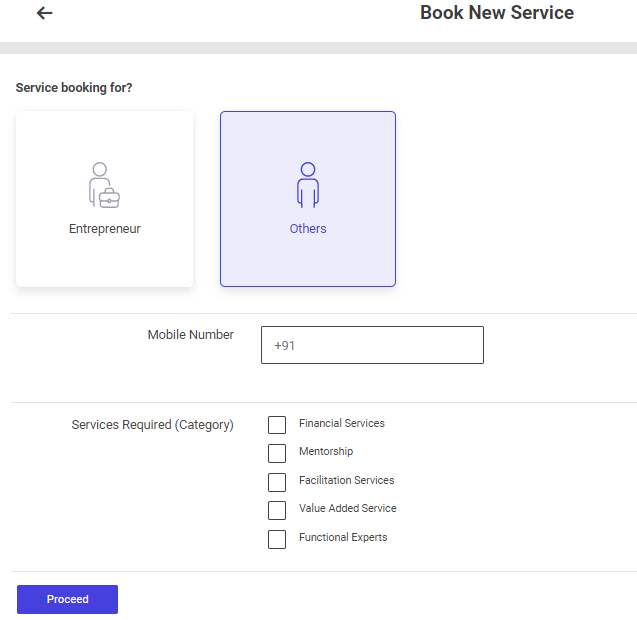
Step 1 : Service Booking for : Select the service booking for (Others)
Step 2 : Mobile Number : Enter the mobile number
Step 3 : Service Required : By click the checkbox to choose the required number of services
Step 4 : Click ‘Proceed’ and it will redirected to the book services new entrepreneur annexure page
10.1 How to Add the Applicant Details in the Book Services – Others:
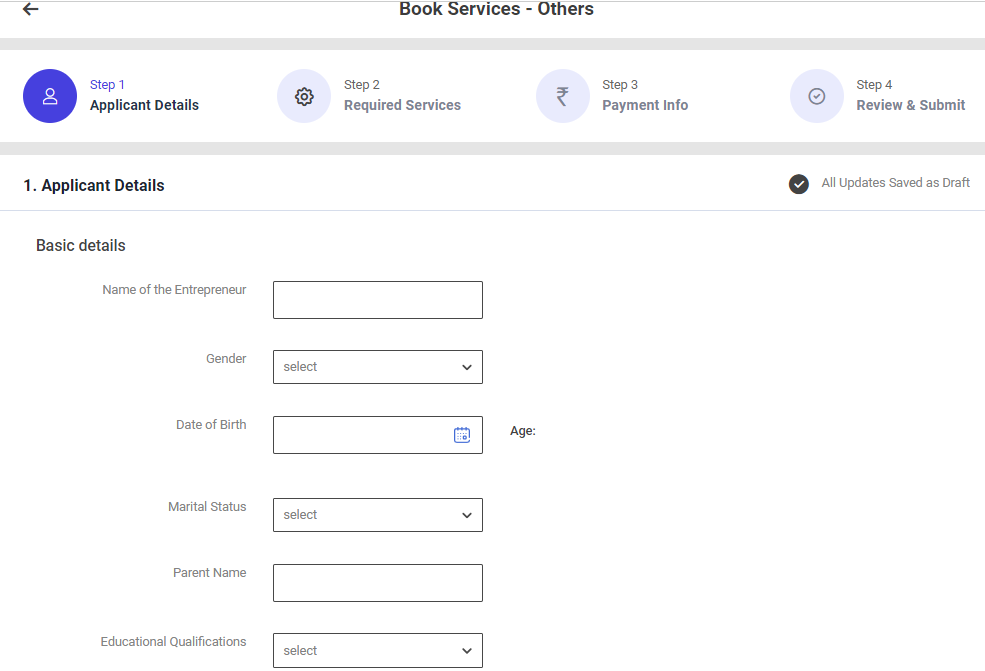
First Tab : Applicant Details
Step 1 : Complete the ‘Basic Details’ section to add book services new entrepreneur
Step 2 : Basic Details
Step 2.1 : Name of the Entrepreneur : Enter the name of the entrepreneur
Step 2.2 : Gender : By clicking the dropdown to choose the gender type
Step 2.3 : Date of Birth : By clicking the calendar to choose the date of birth then Age will be auto populated based on DOB
Step 2.4 : Marital Status : By clicking the dropdown to choose the marital status if ‘Married’ enter the spouse name
Step 2.5 : Parent Name : Enter the name of the parent
Step 2.6 : Educational Qualification : By clicking the dropdown to choose the educational qualification
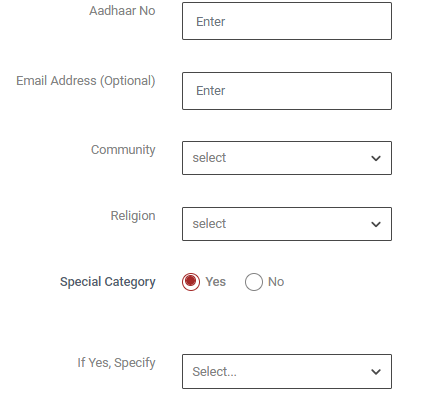
Step 2.7 : Aadhar No : Enter the aadhar number of the functional expert
Step 2.8 : Email Address : Enter the email address
Step 2.9 : Community : By clicking the dropdown to choose the community name
Step 2.10 : Religion : By clicking the dropdown to choose the religion
Step 2.11 : Special Category : if the entrepreneur belongs to special category click ‘Yes’ if ‘Yes’ by clicking the dropdown to specify the category or choose ‘No’
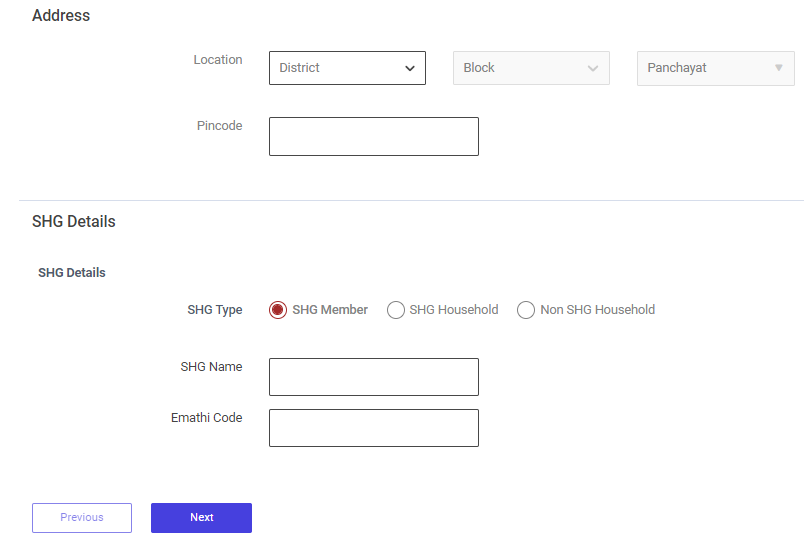
Step 3 : Address :
Step 3.1 Location : By clicking the dropdown to choose the district, block and panchayat details
Step 3.2 Pincode : Enter the Pincode details
Step 4 : SHG Details :
Step 4.1 SHG Type : If we select the SHG Member: Enter the SHG Name, SHG Code (14 digit) and Emathi Code (16 digit)
Step 4.2 SHG Type : If we select the SHG Household: Enter the SHG Name, Member of the SHG Household name and Emathi Code (16 digit)
Step 5 : Once the information is entered, click on the ‘Next’ option. The information will be saved as a draft
10.2 How to Add the Required Services in the Book Services – Others:
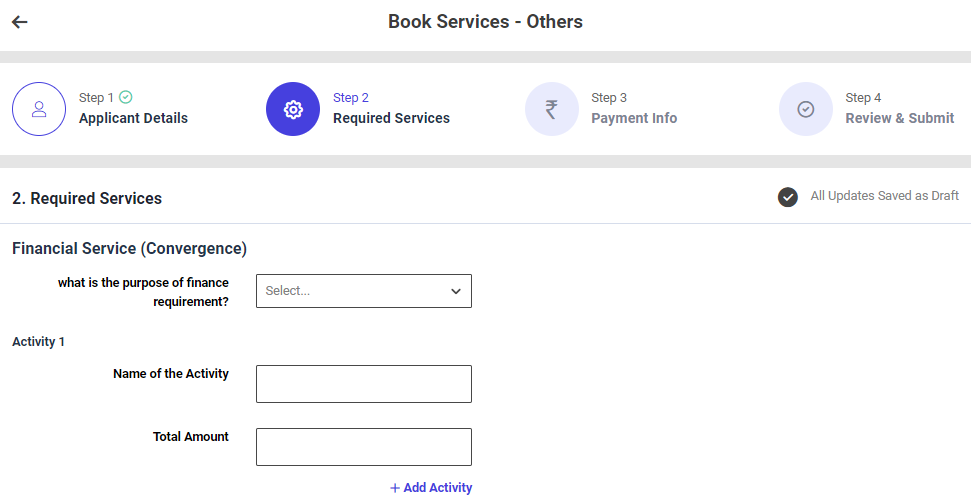
Second Tab : Required Services
Step 1 : Complete the ‘Required Services’ section to add book services others
Step 2 : Financial Services
Step 2.1 : What is the purpose of the finance requirement?: By clicking the dropdown to choose the purpose of the finance requirement
Step 2.2 : Total Amount : Enter the total amount
Step 2.3 : Click ‘Add Activity’ to add the activity more


Step 3 : Mentorship
Step 3.1 : Sector of the Enterprise: By clicking the dropdown to choose the sector of the enterprise
Step 3.2 : Describe the needs of the mentoring : Enter the description to needs of the mentoring
Step 3.3 : Type of Service Required : By click the checkbox to choose which type of service required
Step 3.4 : Pay Type : By click the dropdown to choose the paytype option
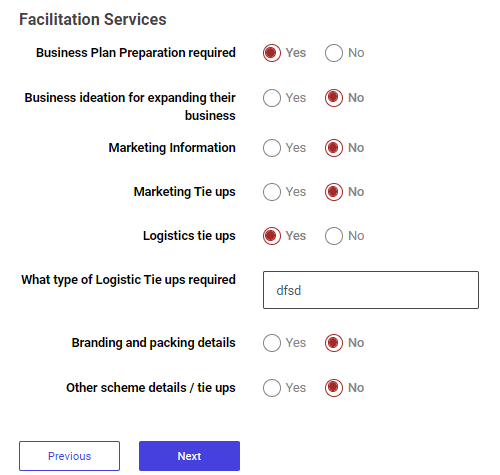
Step 4 : Facilitation Services
Step 4.1 : Business Plan Preparation required: Click ‘Yes’ to choose the business plan preparation required or choose ‘No’
Step 4.2 : Business ideation for expanding their business : Click ‘Yes’ to choose the business ideation for expanding their business and enter what are the business ideation required or choose ‘No’
Step 4.3 : Market Information : Click ‘Yes’ to choose the market information and enter what type of marketing information required or choose ‘No’
Step 4.4 : Marketing Tie ups : Click ‘Yes’ to choose the marketing tie ups and enter what type of marketing tie ups required or choose ‘No’
Step 4.5 : Location Tie ups : Click ‘Yes’ to choose the location tie ups and enter what type of location tie ups required or choose ‘No’
Step 4.6 : Branding and Packing Details : Click ‘Yes’ to choose the branding and packing details and enter what type of details required or choose ‘No’
Step 4.7 : Other scheme details/tie ups : Click ‘Yes’ to choose the other scheme details and tie ups and click the dropdown to choose the finance required from the scheme or choose ‘No’
Step 5 : Once the information is entered, click on the ‘Next’ option. The information will be saved as a draft
10.3 How to Add the Payment Info in the Book Services – Others:
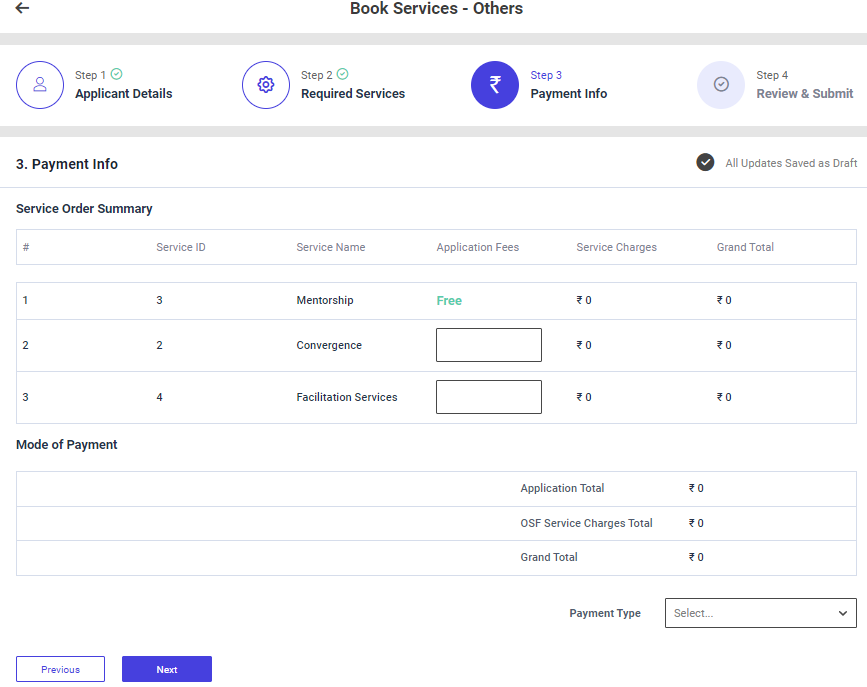
Third Tab : Payment Info
Step 1 : Complete the ‘Payment Info’ section to add book services new entrepreneur
Step 2 : Service Order Summary
Step 3.1 : Service ID : The service ID will get auto populated
Step 3.2 : Service Name : The Service name will get auto populated based on the previous data
Step 3.3 : Application Fees : Enter the application fees
Step 3.4 : Service Charge : The Service charge will get auto populated based on the previous data
Step 3.5 : Grand Total : The grand total will get auto populated based on the data entered in the application fees and service charges
Step 4 : Mode of Payment :
Step 4.1 : The Application total and the OSF Service charges total and the grand total will get auto populated based on the previous data.
Step 4.2 : Payment Type : By clicking the dropdown to choose the payment type
Step 5 : Once the information is entered, click on the ‘Next’ option. The information will be saved as a draft
10.4 How to Review & Submit in the Book Services – Others:
Step 1: Once the information is entered in the ‘Payment Info’ section, click on the ‘Next’ option. The information will be saved as a draft
Step 2 : Review the book services New Entrepreneur details, if there are any changes that need to be made in any of the fields, click ‘Previous’ or choose ‘Finish’
Step 3 : Once the EDO staff submitted, the popup will appear like ‘Service Created Successfully’ and the Application reference ID also generated.
11. How to Continue Book Service from the Draft:

Step 1 : Log in with their respective EDO username and password and click ‘Login’

Step 2 : After logging in to the VKP staff portal, select the OSF module under the business plan financing component
Step 3 : After selecting the OSF module, the user will be redirected to the respective home page
Step 4 : When logged in, click on the ‘Application’ on the left side menu
Step 5 : To continue a book service from the draft, Select the application and it will redirect to the respective annexure page.
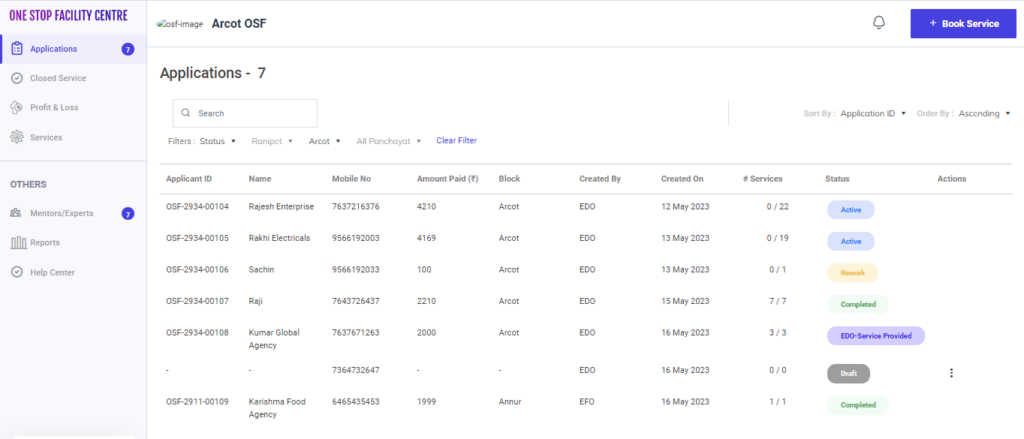
12. How to Update the Service Provided Details:

Step 1 : Log in with their respective EDO username and password and click ‘Login’

Step 2 : After logging in to the VKP staff portal, select the OSF module under the business plan financing component
Step 3 : After selecting the OSF module, the user will be redirected to the respective home page
Step 4 : When logged in, click on the ‘Application’ on the left side menu
Step 5 : Select the application and it will get redirect to the application detail page.
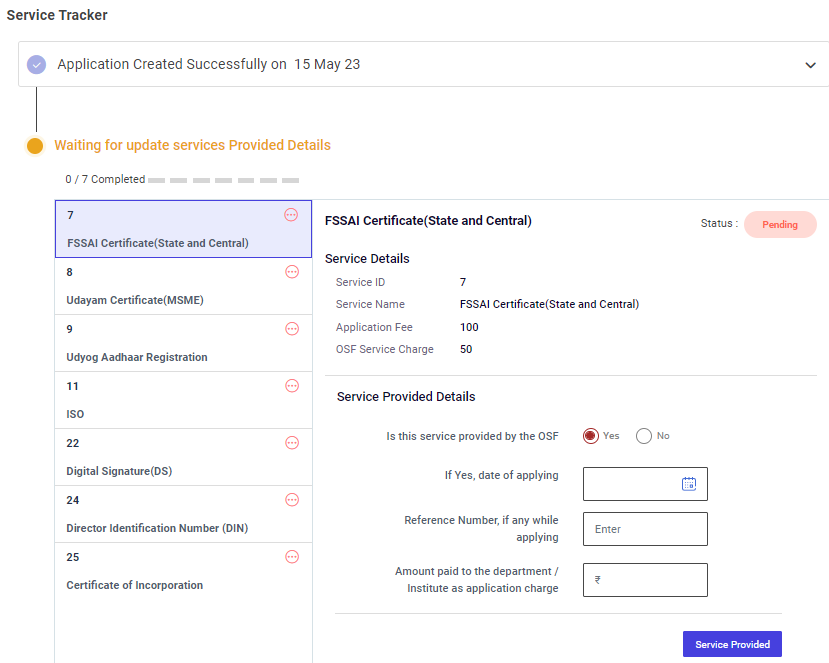
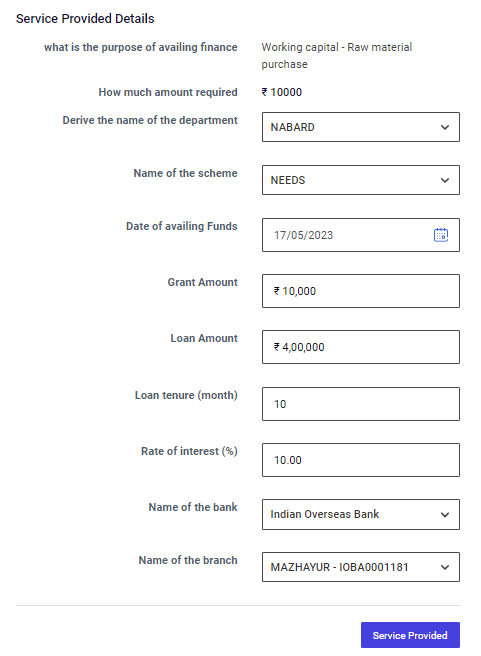
Step 6 : Once the application has created by the EDO, the EDO has to update the each service provided details under the service tracker tab
Step 7 : Is this service provided by the OSF? : Click ‘Yes’ if the service is provided by the OSF or choose ‘No’. If ‘Yes’ enter the applying date, reference number and the amount paid to the department
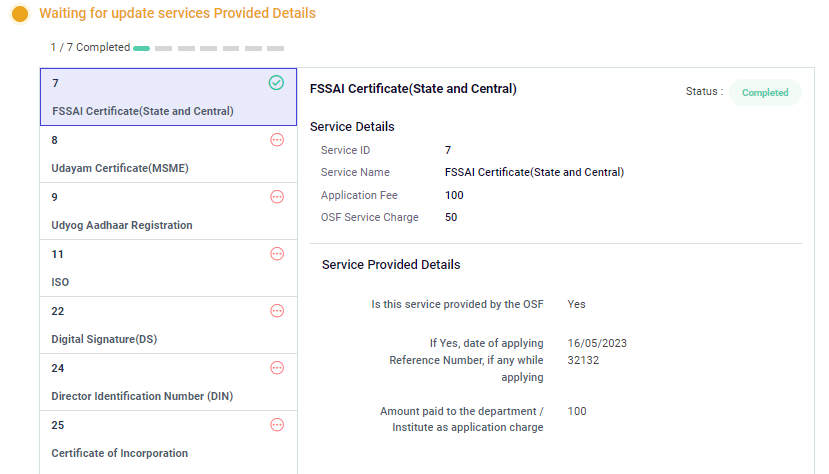
Step 8 : Once the details has entered click ‘Service Provided’ and the status of the service has changed from ‘Pending’ to ‘Completed’
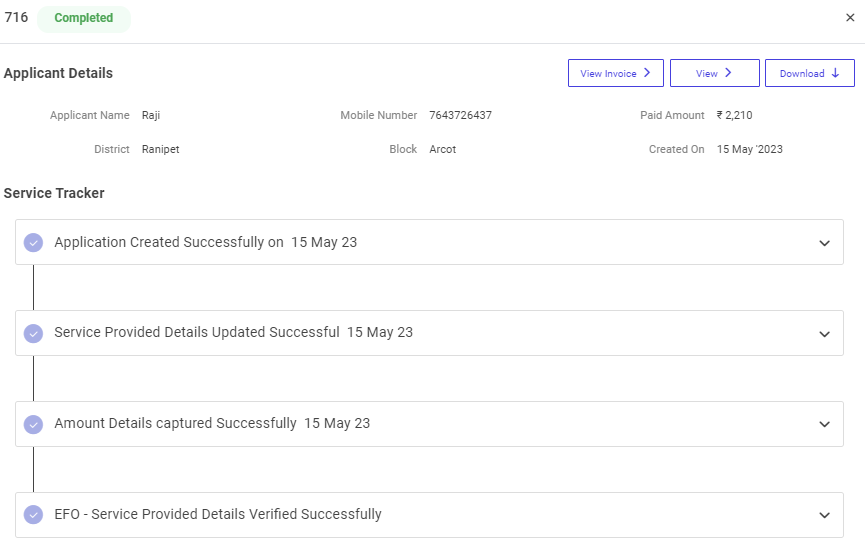
13. How to View the Updated the Service Provided Details:

Step 1 : Log in with their respective EDO username and password and click ‘Login’

Step 2 : After logging in to the VKP staff portal, select the OSF module under the business plan financing component
Step 3 : After selecting the OSF module, the user will be redirected to the respective home page

Step 4 : When logged in, click on the ‘Application’ on the left side menu
Step 5 : Select the application and it will get redirected to the application detail page.
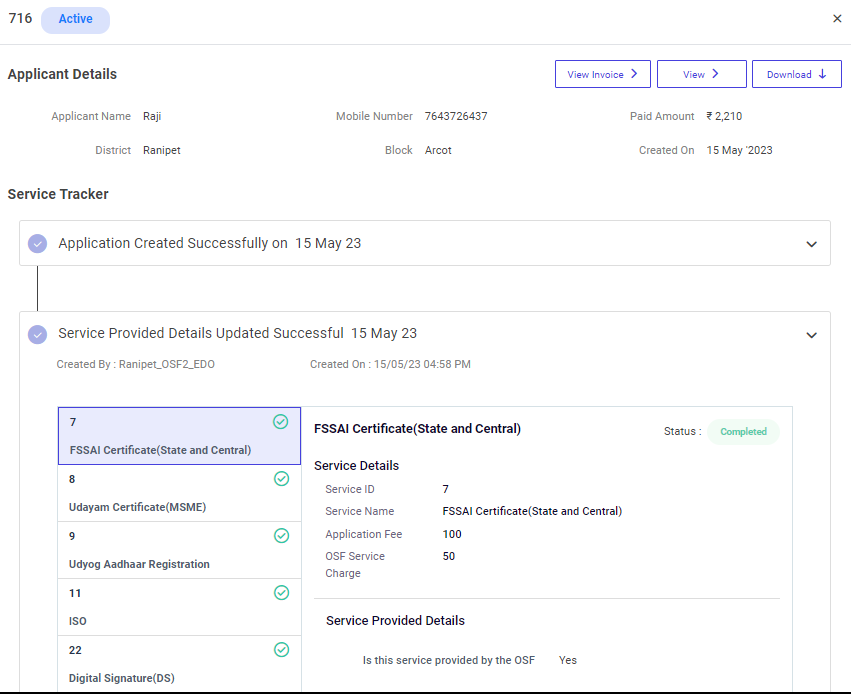
Step 6 : The EDO can view the applicant details, Service tracker details in more
Step 7 : View Invoice : The view the invoice of the application click ‘View Invoice’
Step 8 : Download : The download the applicant details as PDF, of the application click ‘Download’
14. How to Update the Amount Details:

Step 1 : Log in with their respective EDO username and password and click ‘Login’

Step 2 : After logging in to the VKP staff portal, select the OSF module under the business plan financing component
Step 3 : After selecting the OSF module, the user will be redirected to the respective home page

Step 4 : When logged in, click on the ‘Application’ on the left side menu
Step 5 : Select the application and it will get redirected to the application detail page.
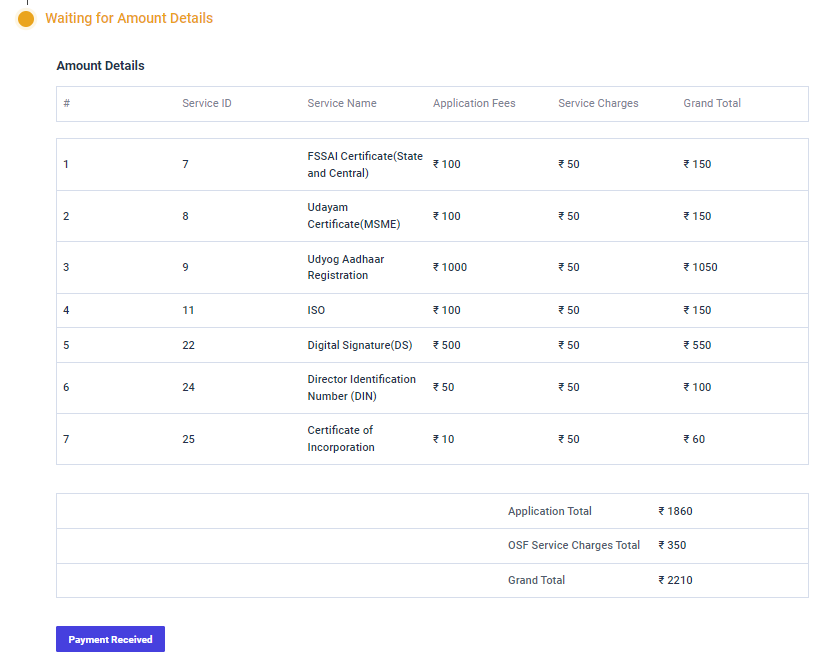
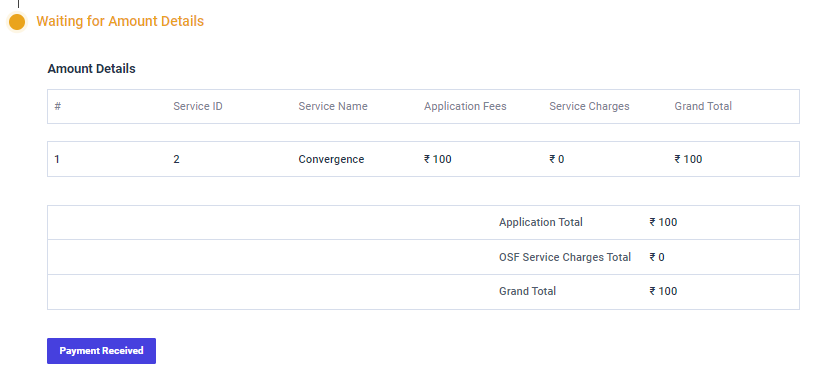
Step 6 : Once the application has created by the EDO, the EDO has to update the amount details under the service tracker tab
Step 7 : Click ‘Payment Received’ and the amount details captured successfully

Step 7 : Once the EDO submitted the payment, the status of the application has changed from ‘Active’ to ‘EDO Service Provided’
15. How to View the Closed Services:

Step 1 : Log in with their respective EDO username and password and click ‘Login’

Step 2 : After logging in to the VKP staff portal, select the OSF module under the business plan financing component
Step 3 : After selecting the OSF module, the user will be redirected to the respective home page
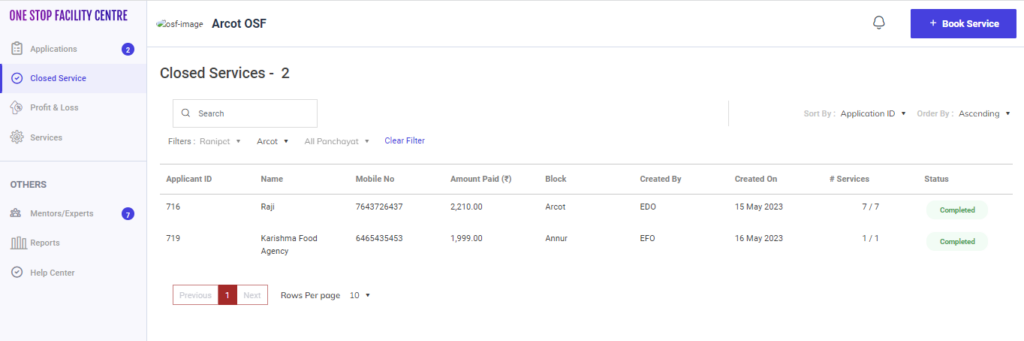
Step 4 : When logged in, click on the ‘Closed Services’ on the left side menu
Step 5 : Select the application to view the application details more
Step 6 : View : The view the details of the application click ‘View’
Step 7 : View Invoice : The view the invoice of the application click ‘View Invoice’
Step 8 : Download : The download the applicant details as PDF, of the application click ‘Download’
16. How to Rework the Service Provided Details:

Step 1 : Log in with their respective EDO username and password and click ‘Login’

Step 2 : After logging in to the VKP staff portal, select the OSF module under the business plan financing component
Step 3 : After selecting the OSF module, the user will be redirected to the respective home page
Step 4 : When logged in, click on the ‘Application’ on the left side menu
Step 5 : Once the EFO sent rework for the application the status of the application displayed as ‘Rework’
Step 6 : Select the application and it will get redirected to the application detail page.

Step 7 : To rework the application, Update the service provided details and click ‘Service Provided’
Step 8 : Once the application has reworked by the EDO, the EDO has to update the amount details under the service tracker tab
Step 9 : Click ‘Payment Received’ and the amount details captured successfully
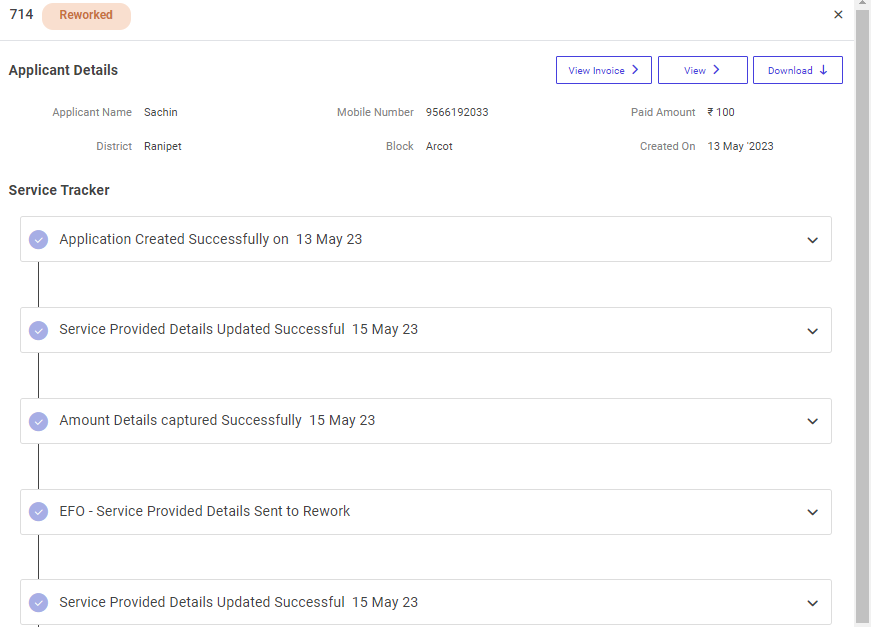
Step 10 : Once the EDO submitted the payment, the status of the application has changed from ‘Rework’ to ‘Reworked’
17. How to Delete the Application from the Draft:

Step 1 : Log in with their respective EDO username and password and click ‘Login’

Step 2 : After logging in to the VKP staff portal, select the OSF module under the business plan financing component
Step 3 : After selecting the OSF module, the user will be redirected to the respective home page
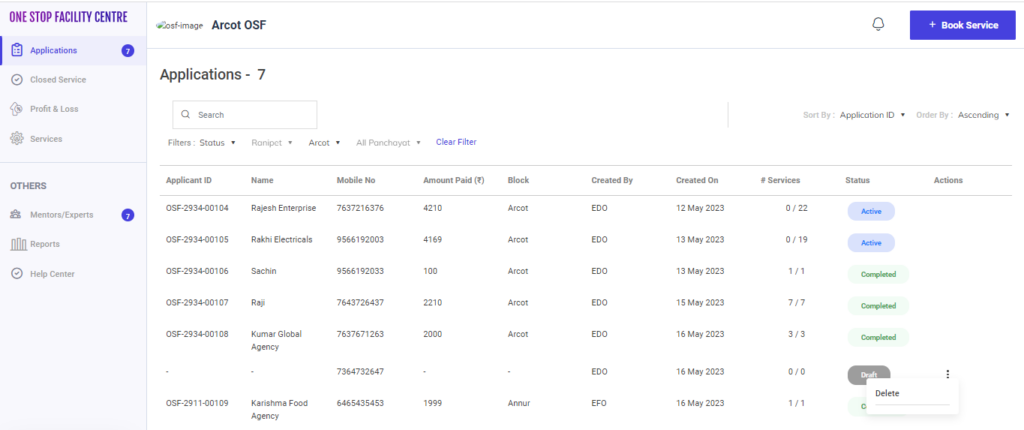
Step 4 : When logged in, click on the ‘Applications’ on the left side menu to view the list of applications
Step 5 : To delete the draft application Click the Actions tab and click ‘Delete’

Step 6 : If the EDO delete the applicant details click ‘Yes Delete’ or click ‘No Cancel’
Step 7 : Once the EDO click ‘Yes Delete’ the pop up appears like ‘Success’
18. How to InActive the Mentor/Functional Experts Details:

Step 1 : Log in with their respective EDO username and password and click ‘Login’

Step 2 : After logging in to the VKP staff portal, select the OSF module under the business plan financing component
Step 3 : After selecting the OSF module, the user will be redirected to the respective home page
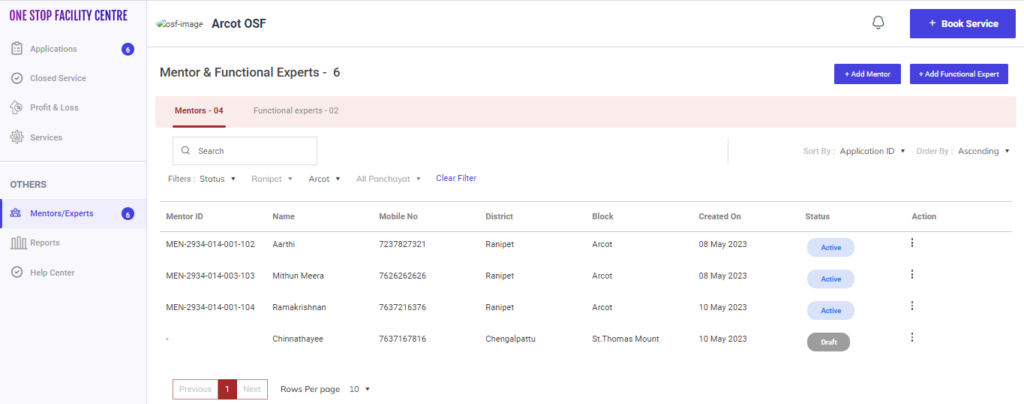
Step 4 : When logged in, click on the ‘Mentors/Experts’ on the left side menu under the ‘Others’ section
Step 5 : Under the ‘Mentors’ tab the EDO can view the list of applications in detail.
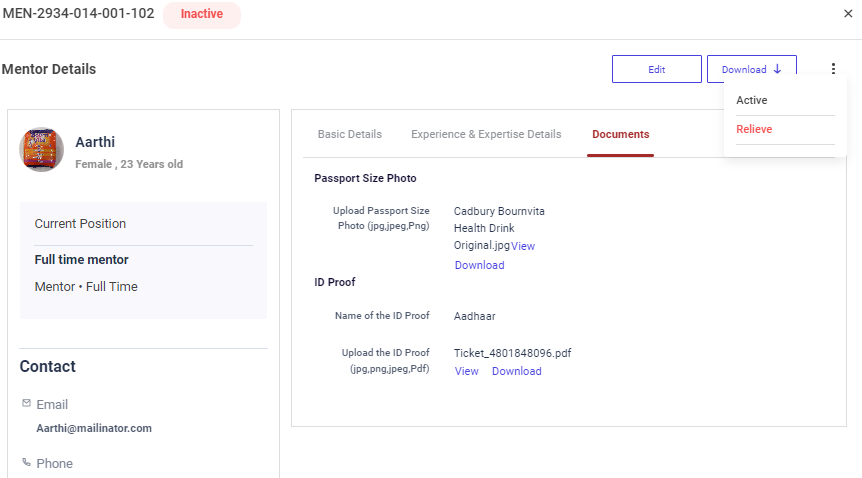
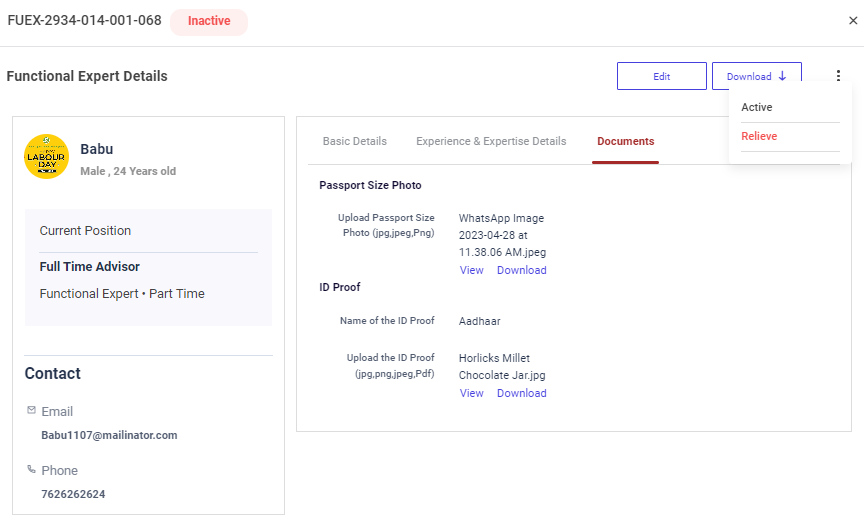
Step 6 : Select the application to view the application details more
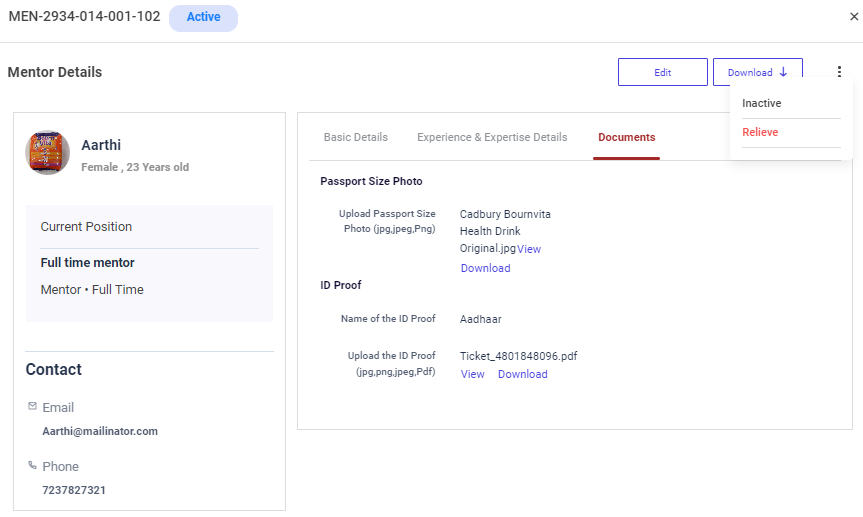
Step 7 : To inactive the mentors, click the dropdown and click ‘Inactive’
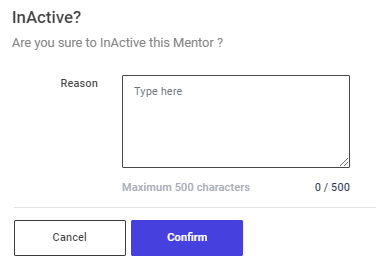
Step 8 : An confirmation popup will appear, If the EDO has inactive this mentor enter the reason in the reason tab and click ‘Confirm’ or choose ‘Cancel’ and the toast message like ‘Success’


Step 9 : Once the EDO mark as inactive the status of the mentor has changed from ‘Active’ to ‘Inactive’

Step 10 : Under the ‘Functional Experts’ tab the EDO can view the list of applications in detail.
Step 11 : Select the application to view the application details more
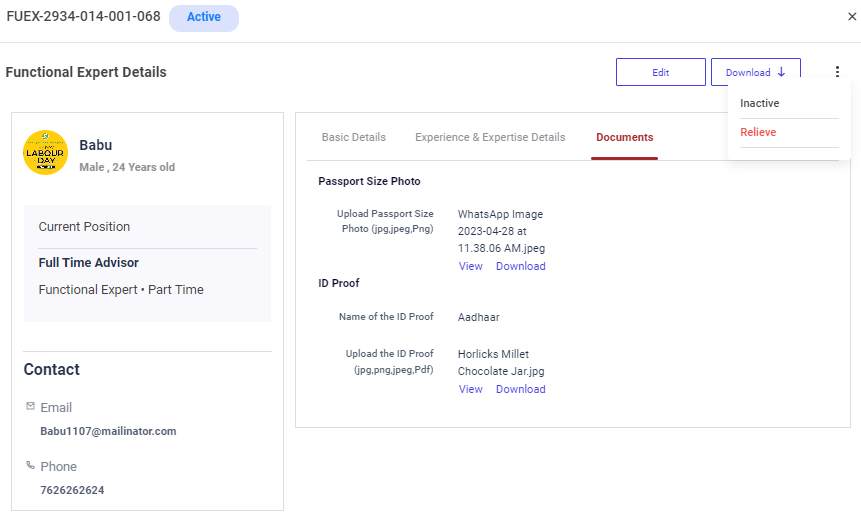
Step 12 : To inactive the Functional Experts, click the dropdown and click ‘Inactive’
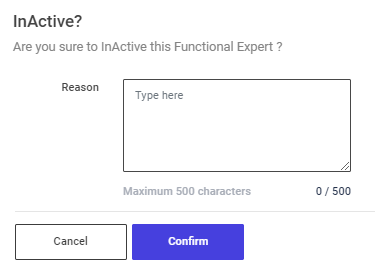
Step 13 : An confirmation popup will appear, If the EDO has inactive this mentor enter the reason in the reason tab and click ‘Confirm’ or choose ‘Cancel’ and the toast message like ‘Success’


Step 14 : Once the EDO mark as inactive the status of the mentor has changed from ‘Active’ to ‘Inactive’
19. How to Active the Inactivated Mentor/Functional Experts Details:

Step 1 : Log in with their respective EDO username and password and click ‘Login’
Step 2 : After logging in to the VKP staff portal, select the OSF module under the business plan financing component
Step 3 : After selecting the OSF module, the user will be redirected to the respective home page
Step 4 : When logged in, click on the ‘Mentors/Experts’ on the left side menu under the ‘Others’ section
Step 5 : Under the ‘Mentors’ tab the EDO can view the list of applications in detail.
Step 6 : To activate the inactivated mentor click the mentor details it will redirected to the mentor detail page
Step 7 : To activate the mentors, click the dropdown and click ‘Active’

Step 8 : An confirmation popup will appear, If the EDO has to active this mentor enter the reason in the reason tab and click ‘Confirm’ or choose ‘Cancel’ and the toast message like ‘Success’

Step 9 : Once the EDO mark as Active the status of the mentor has changed from ‘Inactive’ to ‘Active’
Step 10 : Under the ‘Functional Experts’ tab the EDO can view the list of applications in detail.
Step 11 : To activate the inactivated functional experts click the functional experts details it will redirected to the functional detail page
Step 12 : To active the Functional Experts, click the dropdown and click ‘Active’
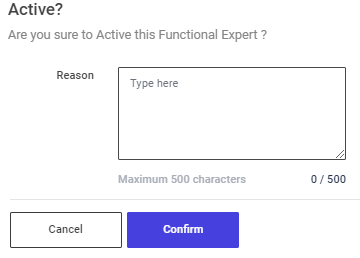
Step 13 : An confirmation popup will appear, If the EDO has active this functional expert enter the reason in the reason tab and click ‘Confirm’ or choose ‘Cancel’ and the toast message like ‘Success’


Step 14 : Once the EDO mark as inactive the status of the mentor has changed from ‘Inactive’ to ‘Active’
20. How to Relieve the Mentor/Functional Experts Details:

Step 1 : Log in with their respective EDO username and password and click ‘Login’

Step 2 : After logging in to the VKP staff portal, select the OSF module under the business plan financing component
Step 3 : After selecting the OSF module, the user will be redirected to the respective home page

Step 4 : When logged in, click on the ‘Mentors/Experts’ on the left side menu under the ‘Others’ section
Step 5 : Under the ‘Mentors’ tab the EDO can view the list of applications in detail.
Step 6 : To relieve the mentor click the mentor details it will redirected to the mentor detail page

Step 7 : To relieve the mentors, click the dropdown and click ‘Relieve’
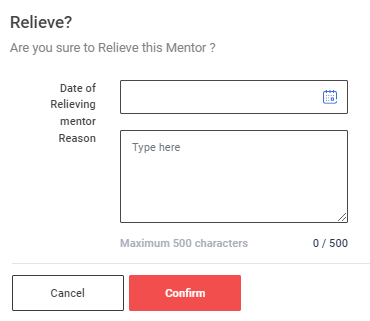
Step 8 : An confirmation popup will appear, If the EDO has relieve this mentor enter the relieving date and reason in the reason tab and click ‘Confirm’ or choose ‘Cancel’ and the toast message like ‘Success’
Step 9 : Once the EDO mark as relieve the status of the mentor has changed from ‘Active’ to ‘Inactive’
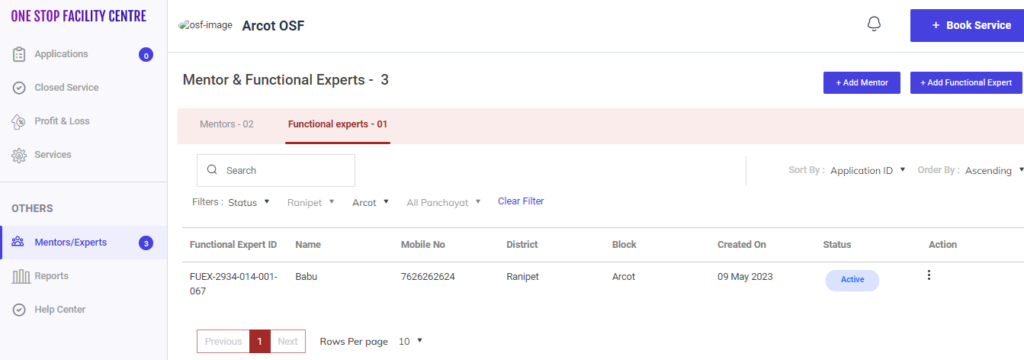
Step 10 : Under the ‘Functional Experts’ tab the EDO can view the list of applications in detail.
Step 11 : To relieve the functional experts click the functional experts details it will redirected to the functional experts detail page

Step 12 : To relive the Functional Experts, click the dropdown and click ‘Relieve’
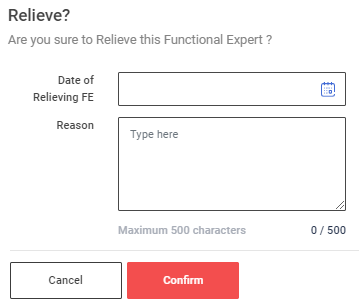
Step 13 : An confirmation popup will appear, If the EDO has relieve this functional expert enter the relieving date and reason in the reason tab and click ‘Confirm’ or choose ‘Cancel’ and the toast message like ‘Success’

Step 14 : Once the EDO mark as inactive the status of the mentor has changed from ‘Active’ to ‘Inactive’