1.How to Login into the Application:

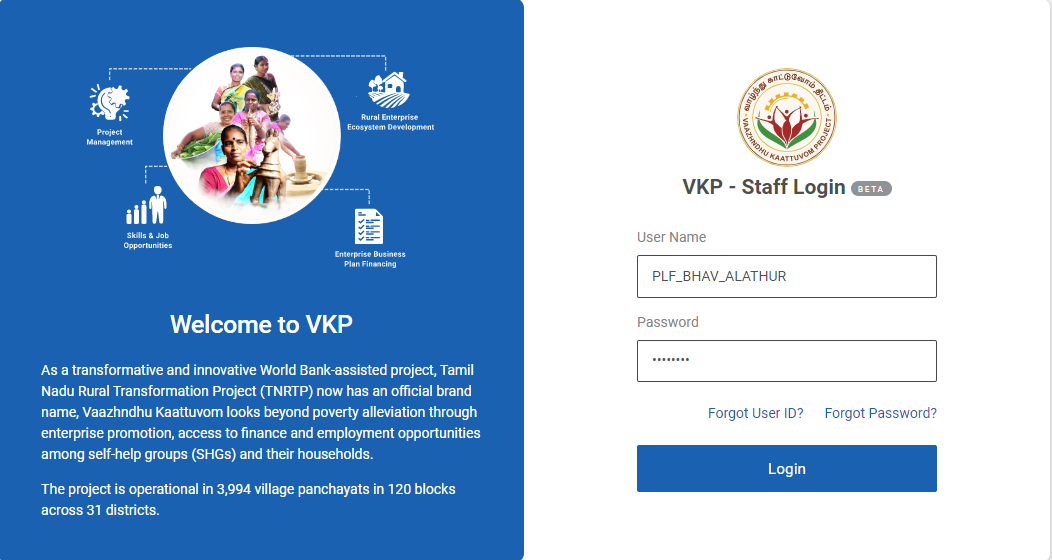
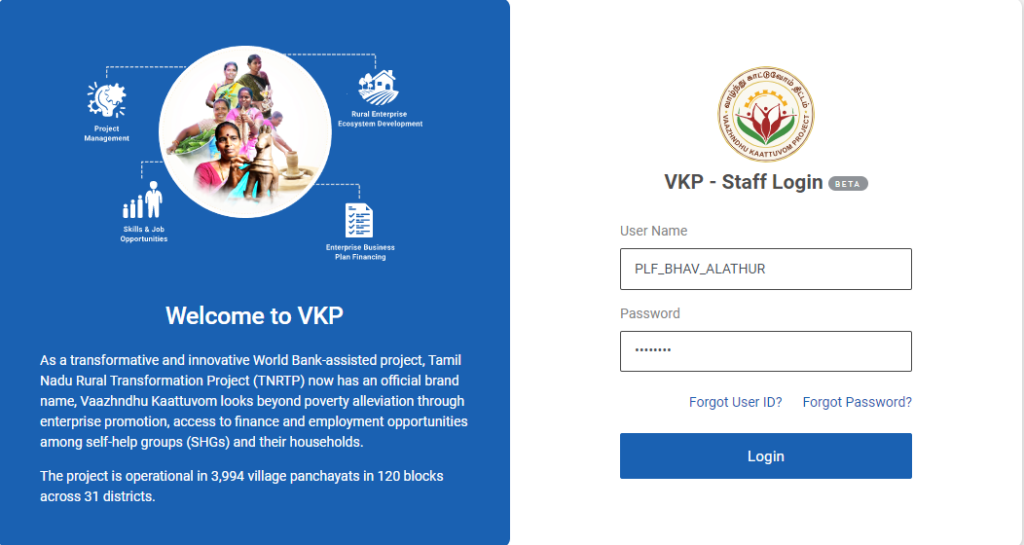
Step 1 : Log in with their respective PLF username and password and click ‘Login’

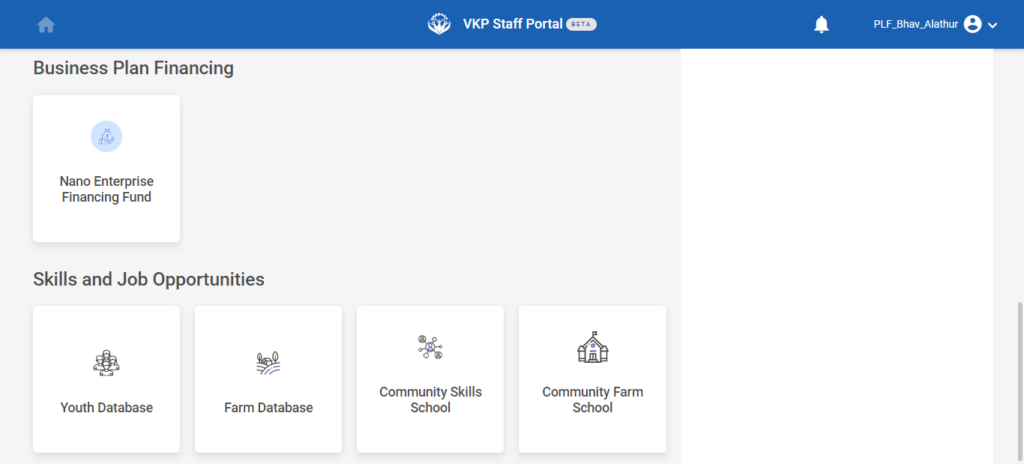
Step 2 : After logging in to the VKP staff portal, select the module name
Step 3 : After selecting the Nano Enterprise Financing Fund, the user will be redirected to the respective home page
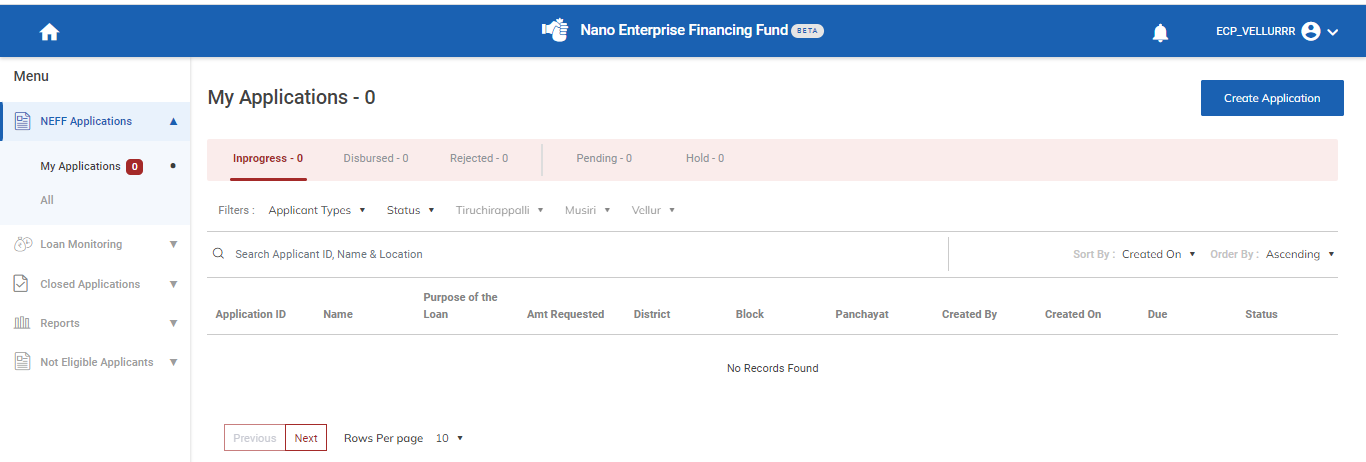
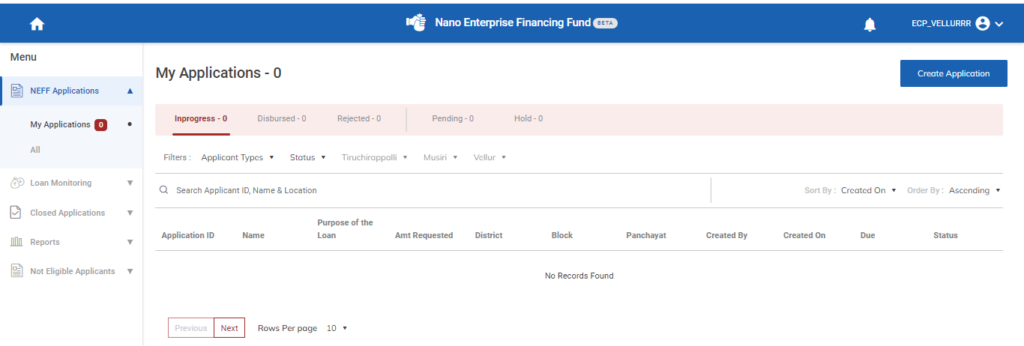
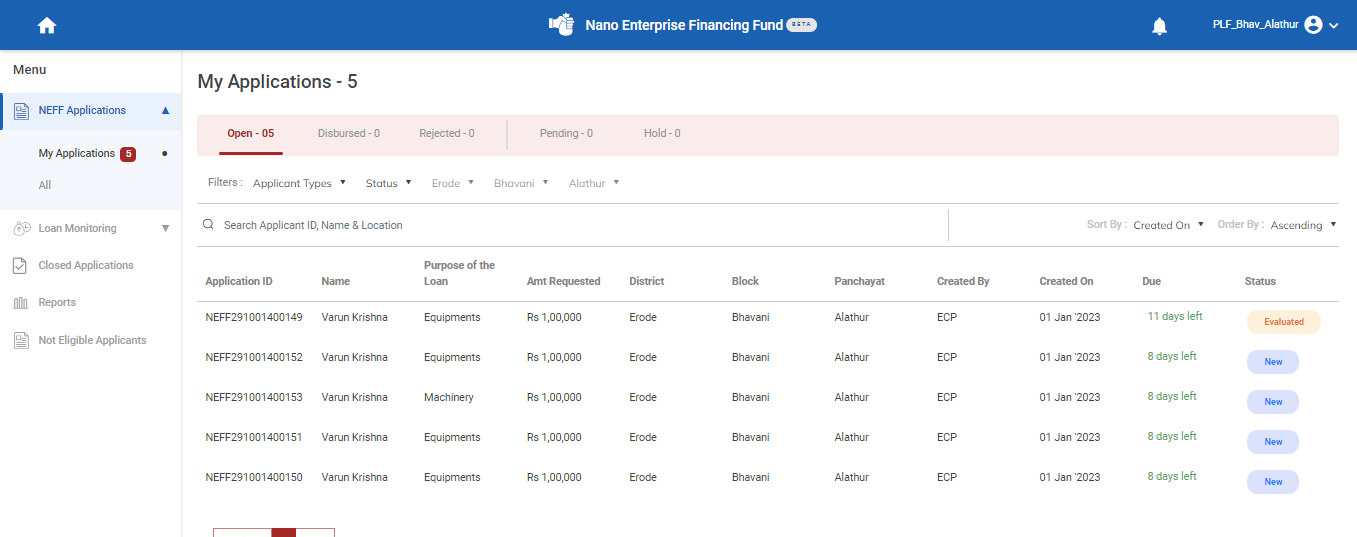
Step 4 : When logged in, click on the ‘NEFF Applications’ tab on the left side menu
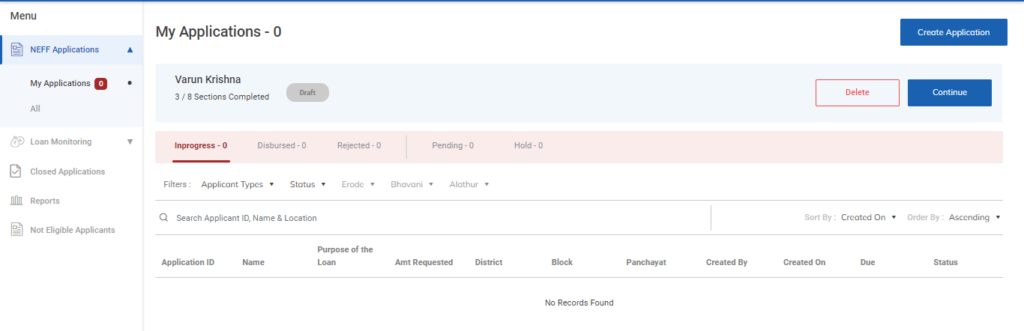
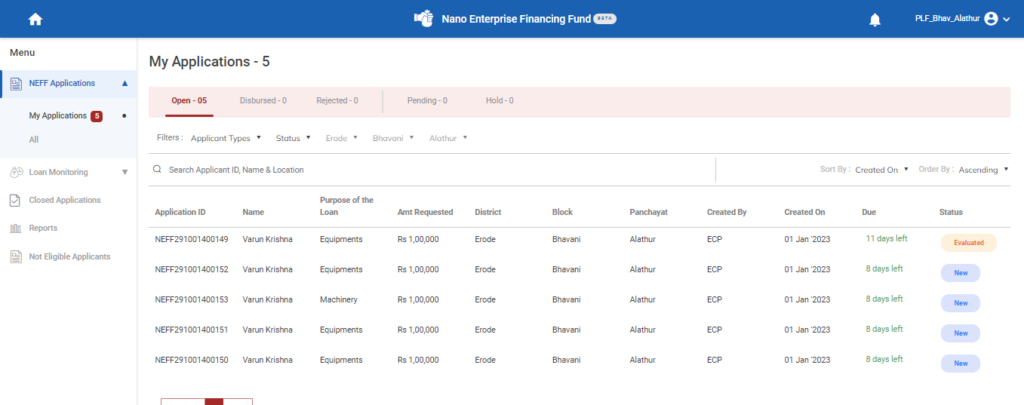
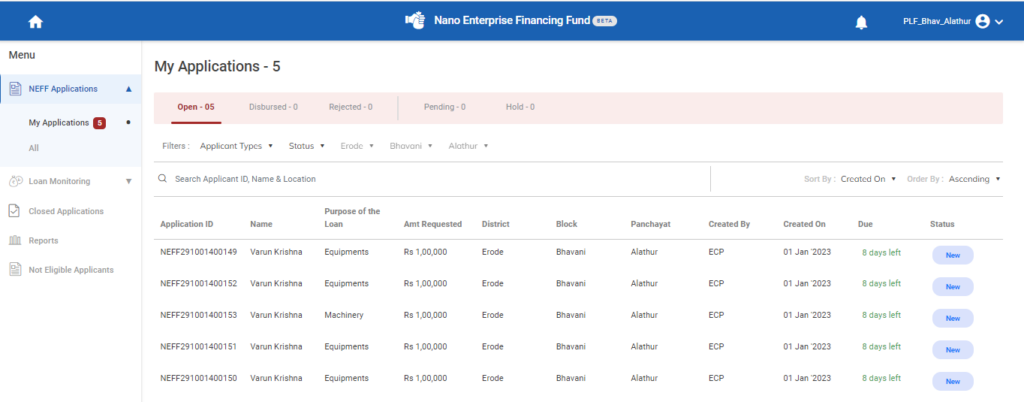
Step 5 : Click ‘My Applications’ to view the list of applications that has been created by the ECPs.
Step 6 : If none of the application has been created by the ECPs it will shows the message like ‘No Records Found’
2.How to Create the Application:
Step 1 : Log in with their respective PLF username and password and click ‘Login’
Step 2 : After logging in to the VKP staff portal, select the module name
Step 3 : After selecting the Nano Enterprise Financing Fund, the user will be redirected to the respective home page
Step 4 : When logged in, click on the ‘NEFF Applications’ tab on the left side menu
Step 5 : Click ‘My Applications’ to view the list of applications that has been created by the ECPs.
Step 6 : To create the new application click ‘Create Application’ menu it will redirect to the eligibility criteria tab
2.1 How to Check the Eligibility Criteria of the Application:
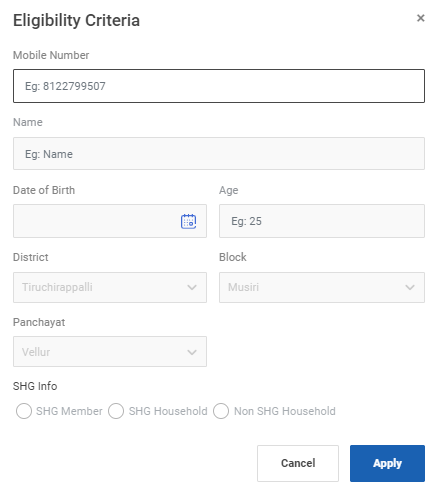
Step 1 : Once the PLF staff click ‘Create Application’ it will redirect to the eligibility criteria tab
Step 2 : Mobile Number : Enter the mobile number of the applicant
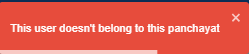
Step 3 : Once the PLF entered the mobile number it will check the database and if the user does not belong this panchayat it throws the error message like ‘This User doesn’t belong to this panchayat’

Step 4 : Once the PLF entered the mobile number it will check the database and if the user does not exist it throws the error message like ‘The User does not exist ’
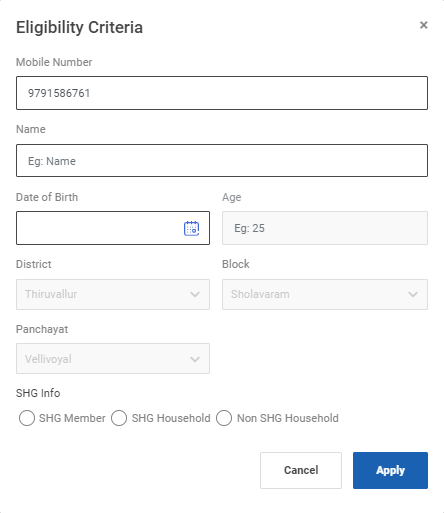
Step 5 : Name : Enter the name of the applicant
Step 6 : Date of Birth : By clicking the calendar to choose the date of birth of the applicant
Step 7 : Age : The age will get auto calculated based on the data entered in the date of birth and the min age limit should be 18
Step 8 : District : The district details will get auto populated based on the login
Step 9 : Block : The block details will get auto populated based on the login
Step 10 : Panchayat : The panchayat details will get auto populated based on the login
Step 11 : SHG Info : Choose the type of the SHG info for the applicant, Whether the applicant is belongs to SHG Member, SHG Household
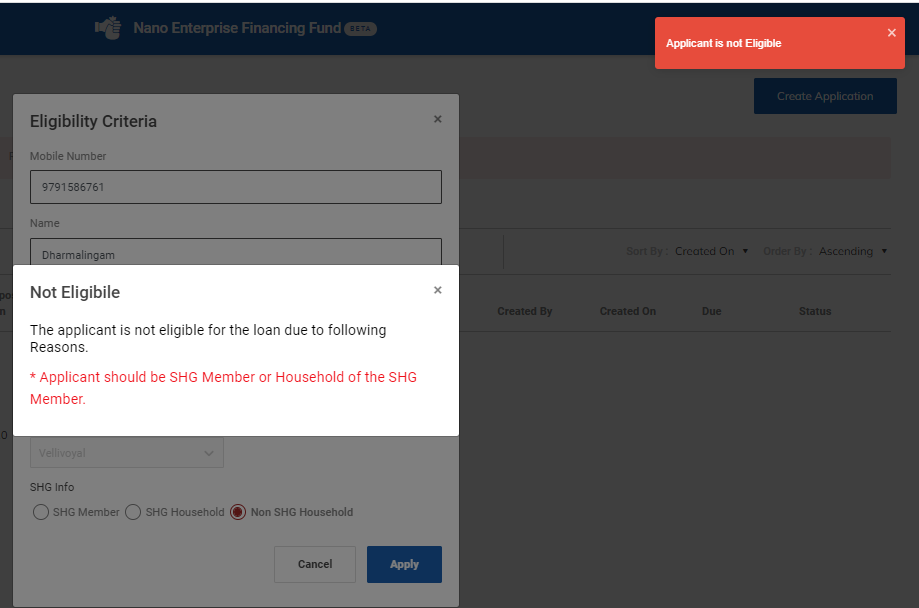
Step 12 : SHG Info : If the applicant belongs to Non SHG Household the popup appears the not eligible message along with the toast message like ‘Application is Not Eligible’
Step 12 : Once entered the data of the applicant click ‘Apply’
Step 13 : If the application matches the eligibility criteria, it will display the message like ‘Success’ and it will be redirected to the IE application annexure page.
2.2 How to Create the Basic Details of the Application:

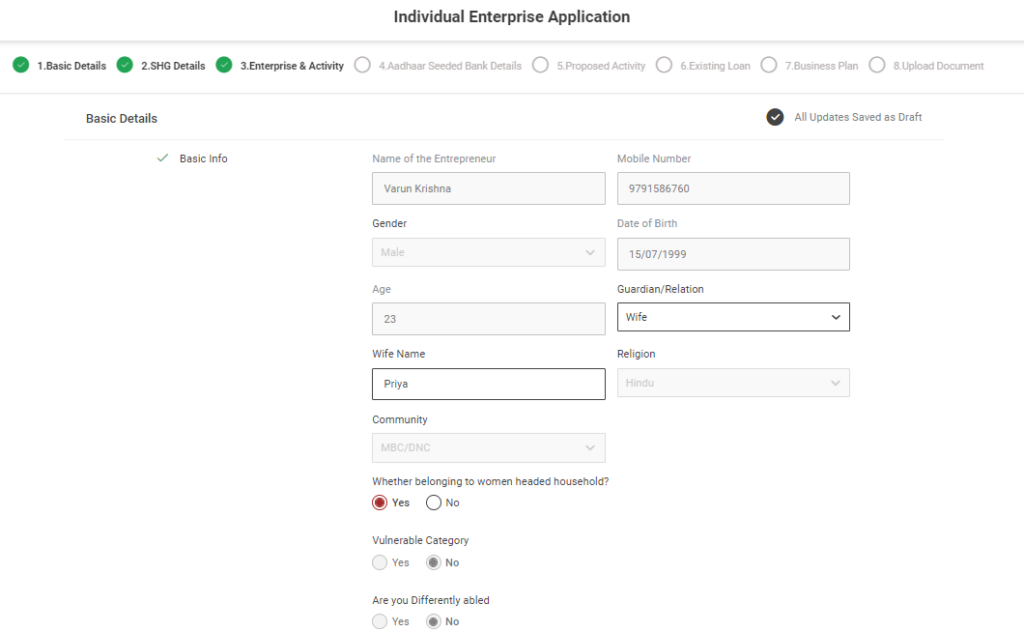
Step 1 : Complete the ‘Basic Details’ section of the IE application
Step 2 : Basic Info
Step 2.1 Name of the Entrepreneur : Enter the name of the entrepreneur
Step 2.2 Mobile Number : Enter the mobile number
Step 2.3 Date of Birth : The date of birth details will get auto populated based on the previous data
Step 2.4 Age : The age will get auto populated based on the data entered in the date of birth
Step 2.5 Gender : By clicking the dropdown to choose the gender
Step 2.6 Community : By clicking the dropdown to choose the community details
Step 2.7 Guardian/Relationship : By clicking the dropdown to choose the guardian/relationship type
Step 2.8 Name : Based on the guardian type, enter the guardian name of the guardian
Step 2.9 Religion : By clicking the dropdown to choose the type of religion
Step 2.10 Whether Belonging to Women Headed Household : If the applicant is belonging to women headed household choose ‘Yes’ or choose ‘No’
Step 2.11 Vulnerable Category : If the applicant is belonging to vulnerable category choose ‘Yes’ Once you click by clicking the dropdown to choose the vulnerable category or choose ‘No’
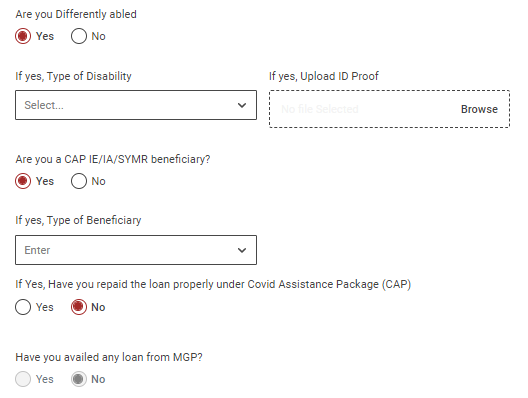
Step 2.12 Differently Abled : If the applicant is belonging to differently abled choose ‘Yes’ Once you click by clicking the dropdown to choose the differently abled and click ‘Browse’ upload the document or choose ‘No’
Step 2.13 Are you a CAP IE/IA/SYMR beneficiary? : If ‘Yes’ Click the dropdown to choose the beneficiary type
Step 2.13.2 If Yes, Have you repaid the loan properly under Covid Assistance Package (CAP) : If the applicant is repaid the loan properly under the covid assistance package choose ‘Yes’ or choose ‘No’
Step 2.14 Have you availed any loan from MGP? : The data will get auto populated based on the data
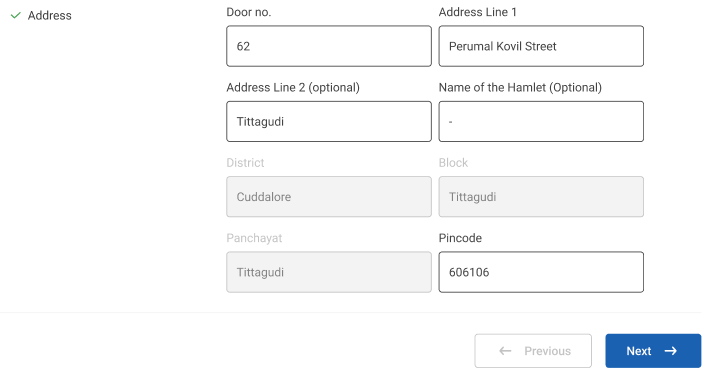
Step 3 : Address :
Step 3.1 Door No :Enter the door number
Step 3.2 Address Line 1 : Enter the address line 1 details
Step 3.3 Address Line 2 : Enter the address line 2 details
Step 3.4 Name of the Hamlet : Enter the hamlet details
Step 3.5 District, Block, Panchayat : The district, block and panchayat details will get auto populated based on the login
Step 3.6 Pincode : Enter the Pincode details
Step 4 : Once the information is entered, click on the ‘Next’ option. The information will be saved as a draft
2.3 How to Create the SHG Details of the Application:
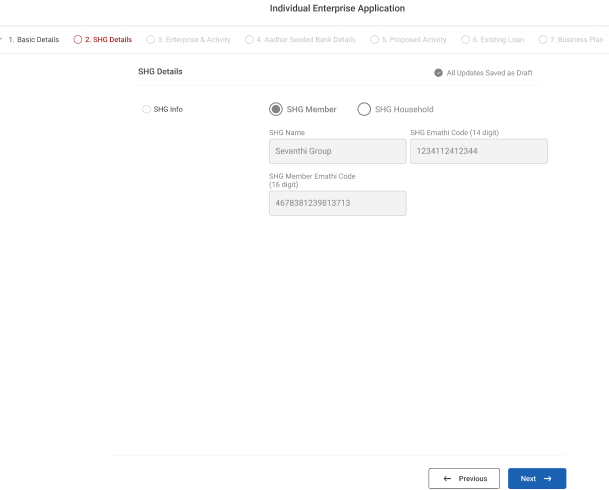
Step 1 : Complete the ‘SHG Info’ section of the IE application
Step 2 : SHG Info
Step 2.1 SHG Member: SHG Member Name, SHG Member code and E-Mathi code details will get auto populated based on the login
Step 2.2 SHG Household: The SHG Name, SHG household Member name,Relationship with SHG, SHG code and E-mathi code details will get auto populated based on the login
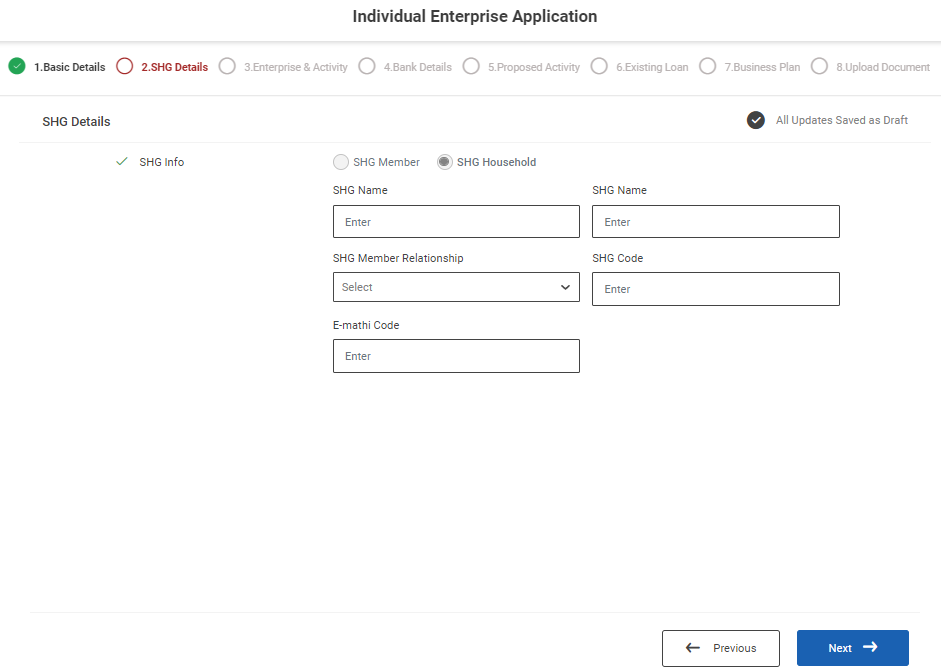
Step 3 : SHG Info
Step 3.1 SHG Info : Based on chosen the eligibility criteria the SHG info details will get auto populated based on the data
Step 3.2 SHG Member: SHG Member Name, SHG Member code and E-Mathi code details
Step 3.3 SHG Household: The SHG Name, SHG household Member name,Relationship with SHG, SHG code and E-mathi code details
Step 4 : Once the information is entered, click on the ‘Next’ option. The information will be saved as a draft
2.4 How to Create the Enterprise & Activity Details of the Application:
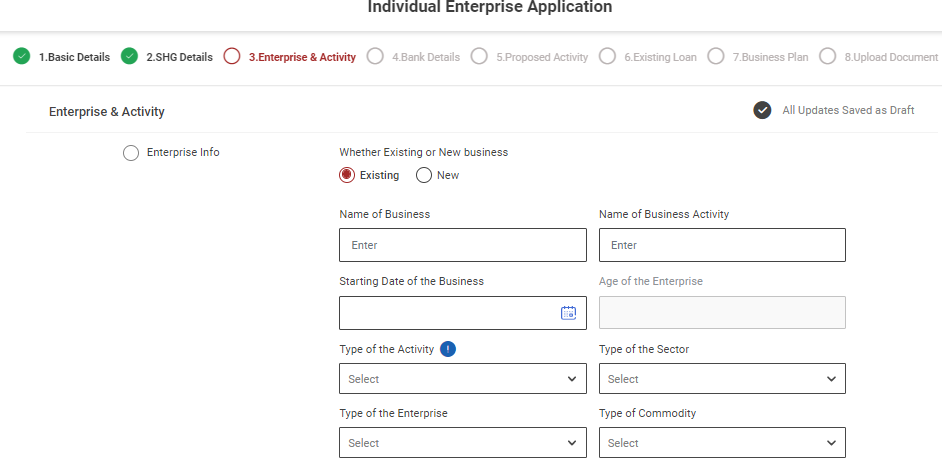
Step 1 : Complete the ‘Enterprise & Activity’ section of the IE application
Step 2 : Enterprise Info
Step 2.1 Whether Existing or New Business : Choose whether the applicant has new or existing business type
Step 2.2 Name of the Enterprise: Enter the name of the enterprise
Step 2.3 Name of the Activity: Enter the name of the activity
Step 2.4 Starting Date of the Activity (Existing) : By clicking the calendar, to choose the starting date of the activity
Step 2.5 New Proposed Date of the business (New) : By clicking the calendar, to choose the starting date of the business
Step 2.6 Age: The age will get auto populated based on the starting date of the activity
Step 2.7 Type of the Activity: By clicking the dropdown, the type of the activity
Step 2.8 Type of the Sector: By clicking the dropdown, the type of the sector
Step 2.9 Type of the Enterprise: By clicking the dropdown, the type of the enterprise
Step 2.10 Type of Commodity: By clicking the dropdown, the type of the commodity
Step 2.11 Whether Registered : Choose ‘Yes’ whether registered or choose ‘No’
Step 2.11.1 If ‘Yes’ Registered Under? : Click the dropdown to choose the registered under type
Step 2.11.2 Registered Number : Enter the registered no
Step 2.11.3 Date of Registration : By clicking the calendar to choose the date of registration
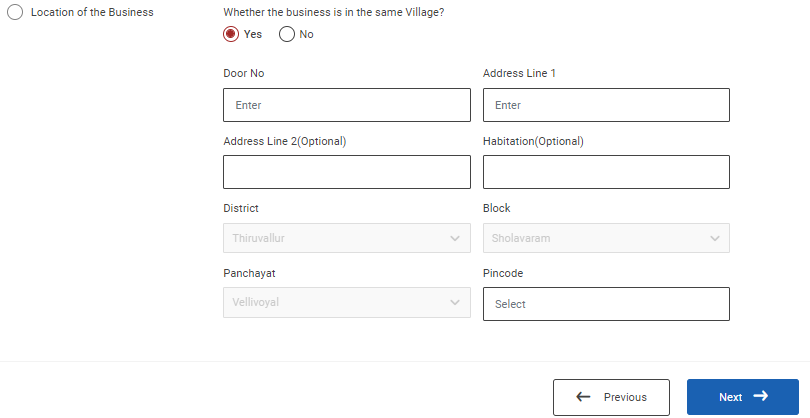
Step 2.2 Location of the Business:
Step 2.2.1 : Whether the business is in the same village? : Choose ‘Yes’ if the business is in the same village and enter the door no, address line 1 and the district, block, panchayat details will get auto populated based on the data and enter the pincode details
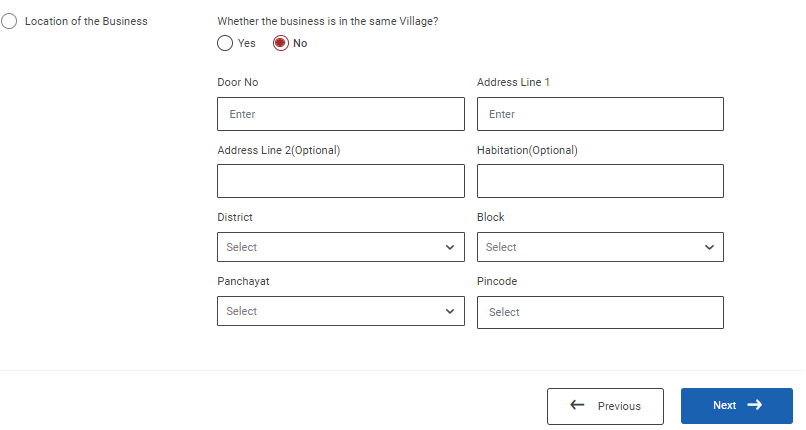
Step 2.2.2 : Whether the business is in the same village? : Choose ‘No’ if the business is in the same village and enter the door no, address line 1 and click the dropdown to choose the district, block and panchayat details and enter the pincode details
Step 3 : Once the information is entered, click on the ‘Next’ option. The information will be saved as a draft
2.5 How to Create the Bank Details of the Application:
Step 1 : Complete the ‘Bank Details’ section of the IE application
Step 2 : Bank Info
Step 2.1 Do you have personal account : Choose ‘Yes’ if the applicant has personal account or choose ‘No’
Step 2.2 Personal Account Number : Enter the applicant account number
Step 2.3 Confirm Account Number : Enter the applicant account number
Step 2.4 Account Holder Name : Enter the applicant account holder name
Step 2.5 Name of the Bank : By clicking the dropdown to choose the name of the bank
Step 2.6 Name of the Branch : By clicking the dropdown to choose the name of branch
Step 2.7 IFSC Code : Based on the bank and branch details the IFSC code will get auto populated
Step 2.8 Type of Account : By clicking the dropdown to choose the type of account
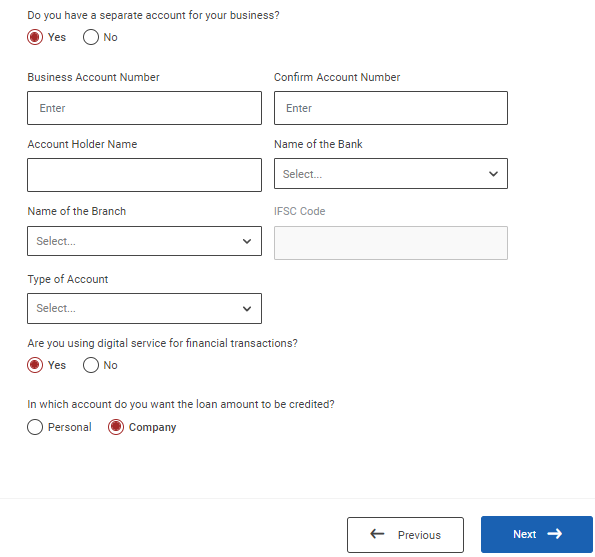
Step 3.1 Do you have a separate account for your business? : Choose ‘Yes’ if the applicant has separate account for business or choose ‘No’
Step 3.2 Business Account Number : Enter the applicant account number
Step 3.3 Confirm Account Number : Enter the applicant account number
Step 3.4 Account Holder Name : Enter the applicant account holder name
Step 3.5 Name of the Bank : By clicking the dropdown to choose the name of the bank
Step 3.6 Name of the Branch : By clicking the dropdown to choose the name of branch
Step 3.7 IFSC Code : Based on the bank and branch details the IFSC code will get auto populated
Step 3.8 Type of Account : By clicking the dropdown to choose the type of account
Step 3.9 Are you using digital service for financial transactions? : If the applicant using digital service for financial transactions choose ‘Yes’ or choose ‘No’
Step 3.10 In which account do you want the loan amount to be credited? : Choose to which account you want the loan amount to be credited click ‘Personal’ or ‘Company’
Step 3 : Once the information is entered, click on the ‘Next’ option. The information will be saved in the draft
2.6 How to Create the Proposed Activity of the Application:
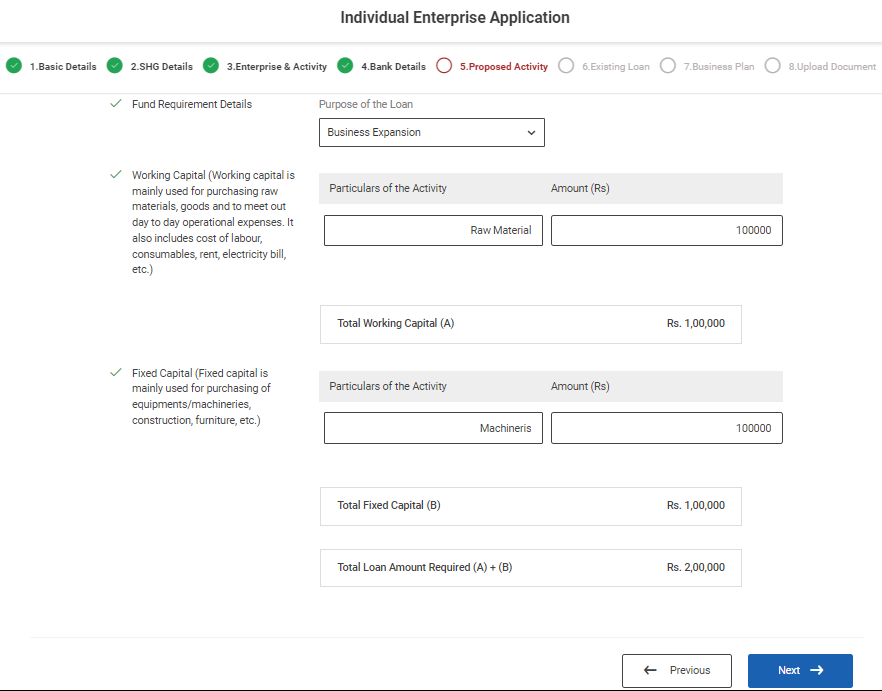
Step 1 : Complete the ‘Proposed Activity’ section of the IE application
Step 2 : Proposed Activity and Fund Requirement Details
Step 2.1 Fund Requirement Details : By clicking the dropdown to choose the purpose of the loan
Step 2.2 Working Capital : Particulars of the Activity : Enter the name of the particulars of the activity
Step 2.3 Amount : Enter the amount and Click ‘Add’ to add the more activity
Step 2.4 Total Working Capital : The total amount will get auto calculated based on the total amount
Step 2.5 Fixed Capital : Particulars of the Activity : Enter the name of the particulars of the activity
Step 2.6 Amount : Enter the amount and Click ‘Add’ to add the more activity
Step 2.7 Total Fixed Capital : The total amount will get auto calculated based on the total amount
Step 2.8 Total Loan Amount Required : The total loan amount will get auto calculated based on the adding the working and fixed capital
Step 3 : Once the information is entered, click on the ‘Next’ option. The information will be saved as a draft
2.7 How to Create the Existing Loan of the Application:
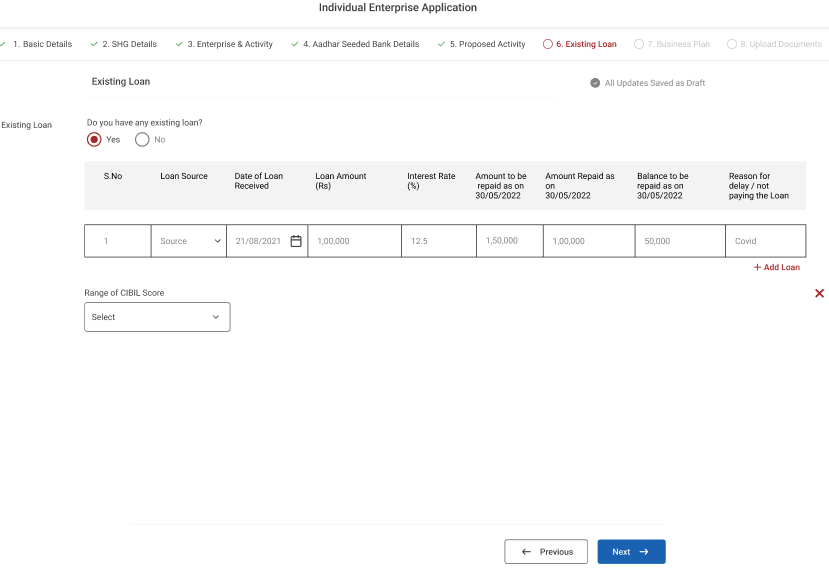
Step 1 : Complete the ‘Existing Loan’ section of the IE application
Step 2 : Existing Loan : Do you have existing loan choose ‘Yes’ or Choose ‘No’
Step 2.1 : Loan Source : By clicking the dropdown to choose the source of the loan
Step 2.2 : Date of Loan Received : By clicking the calendar to choose the date of the loan received
Step 2.3 : Loan Amount : Enter the amount of the loan
Step 2.4 : Interest Rate : Enter the interest rate of the loan
Step 2.5 : Amount to be repaid as on 03/01/2023 : Enter the amount to be repaid as on 03/01/2023
Step 2.6 : Amount Repaid as on 03/01/2023 : Enter the amount to be repaid as on 03/01/2023
Step 2.7 : Balance to be Repaid as on 03/01/2023 : Enter the balance amount to be repaid as on 03/01/2023
Step 2.8 : Overdue Details as on 03/01/2023 : Enter the overdue details as on 03/01/2023
Step 2.9 : Reason Delay/ Not Paying the loan : Enter the delay reason or not paying the loan
Step 2.9 : Click ‘Add Loan’ to add the more existing loan activity in detail
Step 3 : Once the information is entered, click on the ‘Next’ option. The information will be saved as a draft
2.8 How to Create the Business Plan of the Application:
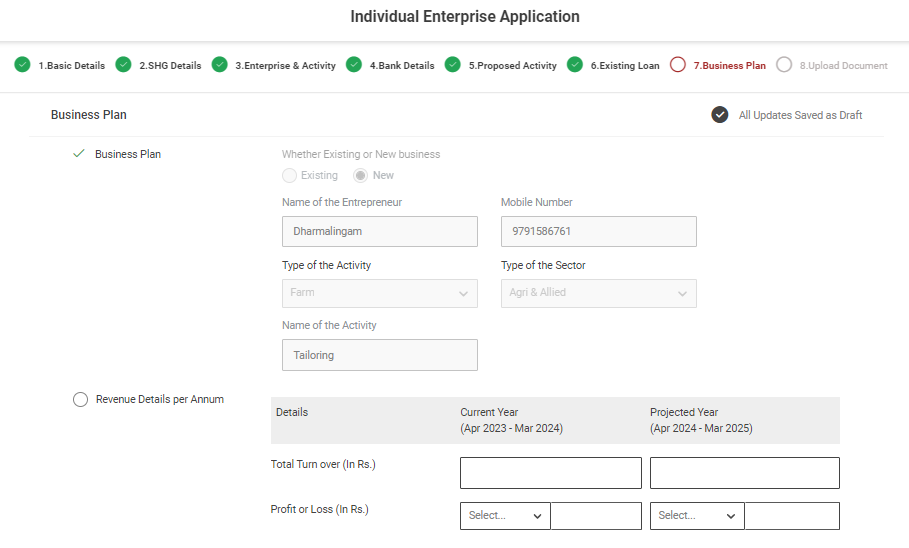
Step 1 : Complete the ‘Business Plan’ section of the IE application
Step 2 : Business Plan : (New)
Step 2.1 : Whether Existing or New Business : The business type will get auto populated based on the previous data
Step 2.2 : Name of the Entrepreneur : The name of the entrepreneur will get auto populated based on the previous data
Step 2.3 : Mobile Number : The mobile number will get auto populated based on the previous data
Step 2.4 : Type of the Activity : The type of the activity will get auto populated based on the previous data
Step 2.5 : Type of the Sector : The type of the sector will get auto populated based on the previous data
Step 2.6 : Name of the Activity : The name of the activity will get auto populated based on the previous data
Step 3 : Revenue Details Per Annum :
Step 3.1 Total Turn Over : Enter the previous year, current year and projection year total turn over per annum
Step 3.2 Profit or Loss : Enter the previous year, current year and projection year profit or loss
Step 3.3 Profit or Loss : Choose the dropdown to choose previous year, current year and projection year profit or loss

Step 7 : Possible Sources for Establishing the Enterprise:
Step 7.1 Margin : Enter the margin value
Step 7.2 Loan Amount Required : The loan amount will get auto populated based on the previous data
Step 7.4 Total Means : The total means will get auto calculated based on the margin, loan amount sanctioned under NEFF and others
Step 11 : Once the information is entered, click on the ‘Next’ option. The information will be saved as a draft
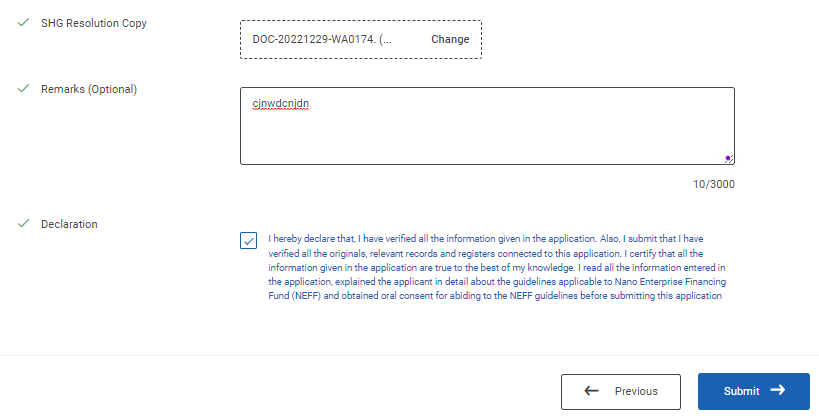
2.9 How to Create the Upload the Document in the Application:

Step 1 : Complete the ‘Upload Documents’ section of the IE application
Step 2 : Upload Document :
Step 2.1 : Photograph of the Entrepreneur : Click ‘Browse’ to upload the photograph of the entrepreneur
Step 2.2 : Aadhar Card : Enter the aadhar card number and Click ‘Browse’ to upload the aadhar card
Step 2.3 :Signature : Click ‘Browse’ to upload the signature
Step 2.4 : Bank Passbook Front Page : Click ‘Browse’ to upload the bank passbook front page
Step 2.5 : Photo ID Proof : Click ‘Browse’ to upload the photo of the ID proof
Step 2.6 : SHG Resolution Copy : Click ‘Browse’ to upload the SHG Resolution Copy
Step 2.7 : Remarks : Enter the remarks in the remarks section
Step 2.8 : Declaration : Click the dropbox to accept the declaration
Step 3 : Once the information is entered, click on the ‘Submit’ option. The information will be saved as a draft
3.How to Review and Submit the Application:

Step 1 : Log in with their respective PLF username and password and click ‘Login’

Step 2 : After logging in to the VKP staff portal, select the module name
Step 3 : After selecting the Nano Enterprise Financing Fund, the user will be redirected to the respective home page
Step 4 : When logged in, click on the ‘NEFF Applications’ tab on the left side menu
Step 5 : Click ‘My Applications’ to view the list of applications that has been created by the ECPs.

Step 6 : The loan application info can be downloaded as PDF click ‘Download’ option
Step 7 : The loan application info can be view by click ‘View’ option
Step 8 : By click the ‘Submit’ option to submit the loan application by ECP
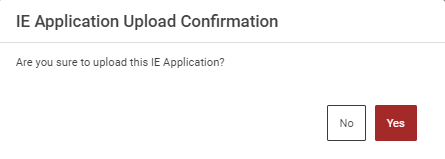
Step 9 : Once the loan application has been completed, Click ‘Yes’ to upload confirmation or click ‘No’
Step 10 : Once we click ‘Yes’ the toast message like ‘Success’ and the application is created in the home page and the status of the application has shown as ‘New’
4.How to Continue the Application from the Draft:

Step 1 : Log in with their respective PLF username and password and click ‘Login’

Step 2 : After logging in to the VKP staff portal, select the module name
Step 3 : After selecting the Nano Enterprise Financing Fund, the user will be redirected to the respective home page
Step 4 : When logged in, click on the ‘NEFF Applications’ tab on the left side menu
Step 5 : Click ‘My Applications’ to view the list of applications that has been created by the ECPs.
Step 6 : To continue the application from the draft click ‘Continue’ The application will redirect to the respective annexure page.
5.How to Delete the Application from the Draft:

Step 1 : Log in with their respective PLF username and password and click ‘Login’

Step 2 : After logging in to the VKP staff portal, select the module name
Step 3 : After selecting the Nano Enterprise Financing Fund, the user will be redirected to the respective home page
Step 4 : When logged in, click on the ‘NEFF Applications’ tab on the left side menu
Step 5 : Click ‘My Applications’ to view the list of applications that has been created by the ECPs.
Step 6 : To delete the application from the draft click ‘Delete’ and the application will be deleted successfully.

6.How to View the Loan Application :

Step 1 : Log in with their respective PLF username and password and click ‘Login’

Step 2 : After logging in to the VKP staff portal, select the module name
Step 3 : After selecting the Nano Enterprise Financing Fund, the user will be redirected to the respective home page
Step 4 : When logged in, click on the ‘NEFF Applications’ tab on the left side menu
Step 5 : Click ‘My Applications’ to view the list of applications that has been created by both ECP as well the PLF.
Step 6 : Select the application under the ‘Open’ tab to view the loan application

Step 7 : The staff can view the application details
Step 8 : The PLF staff can be viewed by clicking on ‘View’ and downloaded by clicking on ‘Download’
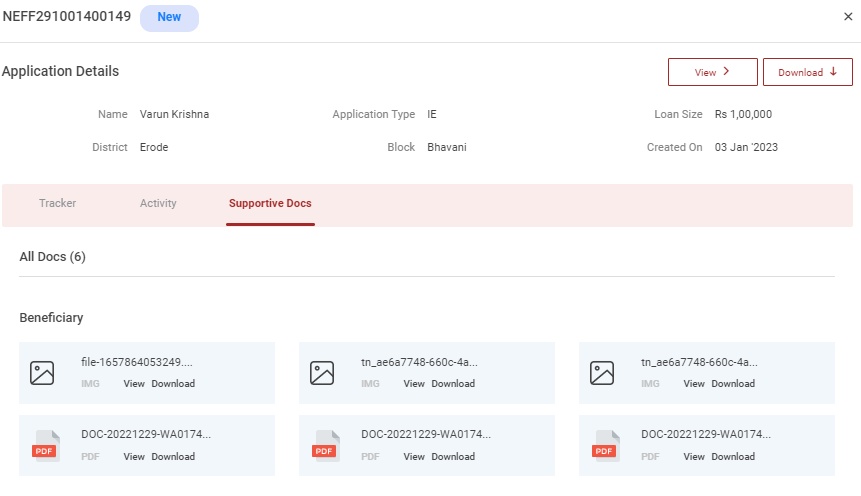
Step 9 : Supportive Docs : The PLF staff can view the documents by clicking the supportive documents
Step 10 : Activity : The PLF staff can view the workflow activity by clicking the activity tab
7.How to Evaluate the Application Assessment:

Step 1 : Log in with their respective PLF username and password and click ‘Login’

Step 2 : After logging in to the VKP staff portal, select the module name
Step 3 : After selecting the Nano Enterprise Financing Fund, the user will be redirected to the respective home page

Step 4 : When logged in, click on the ‘NEFF Applications’ tab on the left side menu
Step 5 : Click ‘My Applications’ to view the list of applications that has been created by the ECPs as well PLF.
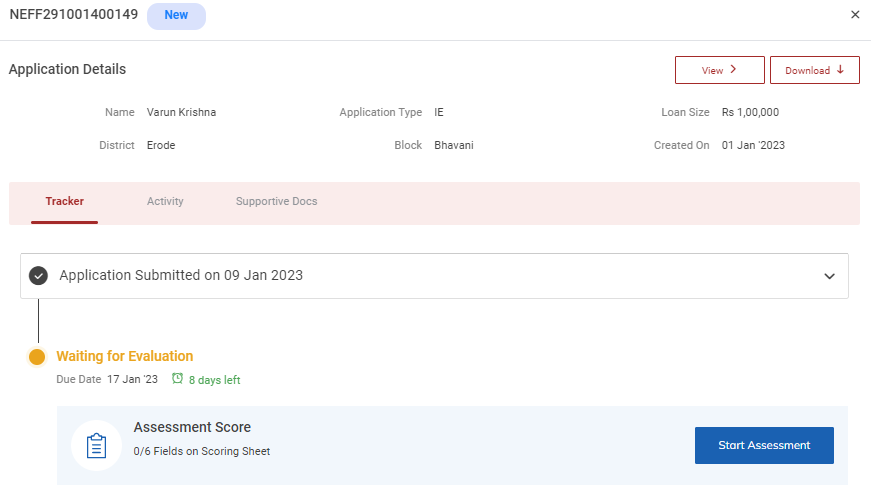
Step 6 : Select the application to view the applicant details more and evaluate the assessment score of the applicant
Step 7 : Click ‘Start Assessment’ to evaluate the scoring sheet of the each applicant
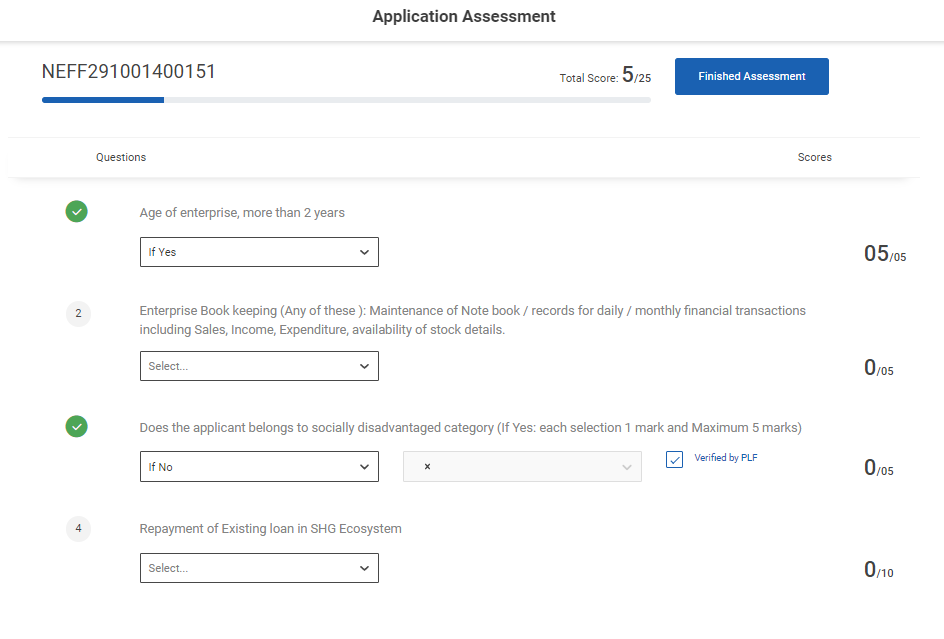
Step 8 : Once the PLF staff click the start assessment it will redirect to the application assessment scoring annexure sheet
Step 9 : Age of the Enterprise More than 2 Years (Existing) : By clicking the dropdown to choose the age of the enterprise more than 2 years based on the data the score will updated automatically
Step 10 : Enterprise Book keeping (Any of these ): Maintenance of Note book / records for daily / monthly financial transactions including Sales, Income, Expenditure, availability of stock details (Existing) : Select the dropdown to choose the enterprise book keeping details based on the data the score will updated automatically
Step 11 : Does the applicant belongs to socially disadvantaged category (eg : Widow/Transgender) Existing : Select the dropdown to choose whether the applicant belongs to socially disadvantaged category if ‘Yes’ choose the category or choose ‘No’. Based on the data the score will updated automatically
Step 12 : Repayment of Existing Loan in SHG Ecosystem (Existing) : Select the dropdown to choose whether the applicant repayment of existing loan in SHG Ecosystem based on the data the score will updated automatically
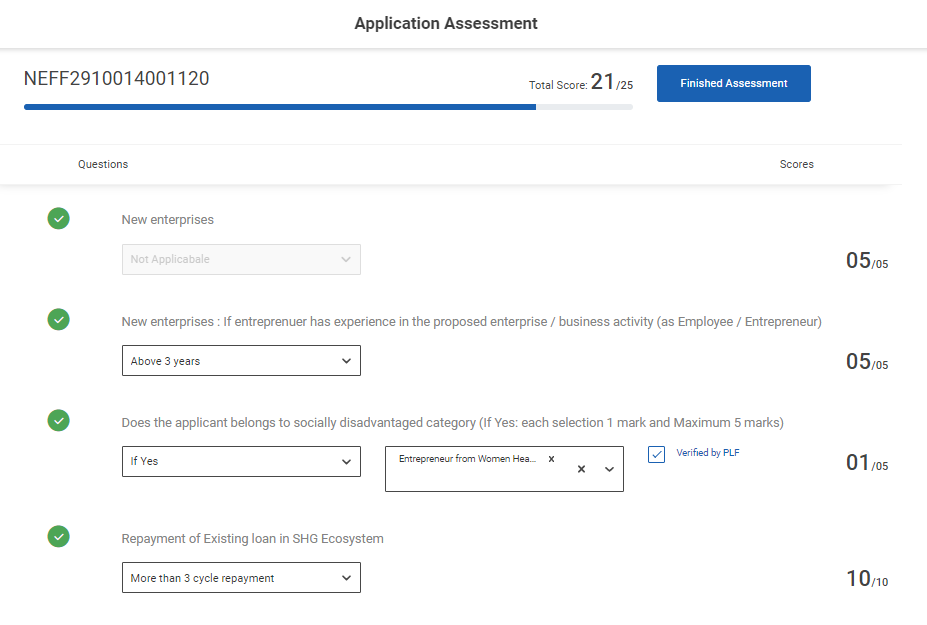
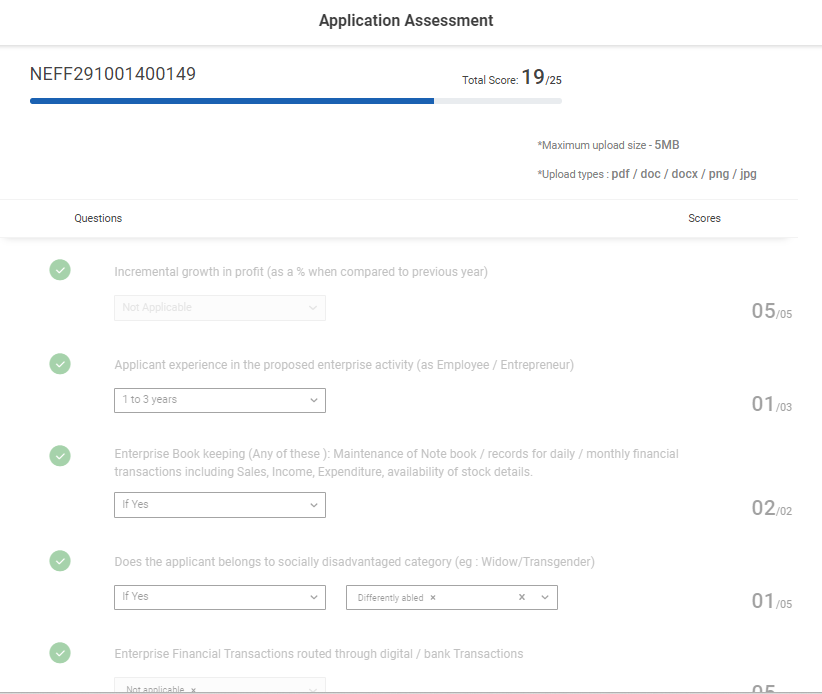
Step 13 : New Enterprise (New) : The new enterprise data will get auto populated based on the previous data
Step 14 : New enterprises : If entreprenuer has experience in the proposed enterprise / business activity (as Employee / Entrepreneur) : Select the dropdown to choose the new enterprise based on the data the score will updated automatically
Step 15 : Does the applicant belongs to socially disadvantaged category (eg : Widow/Transgender) : Select the dropdown to choose whether the applicant belongs to socially disadvantaged category if ‘Yes’ choose the category or choose ‘No’. Based on the data the score will updated automatically
Step 16 : Repayment of Existing Loan in SHG Ecosystem: Select the dropdown to choose whether the applicant repayment of existing loan in SHG Ecosystem based on the data the score will updated automatically
Step 17 : Once the PLF completed the assessment click ‘Finished Assessment’

Step 17 : Once we click ‘Finished Assessment’ the toast message will appear like ‘Application Submitted Successfully’ and the status of the application will be changed from ‘New’ to ‘Evaluated’
8.How to Continue & Delete the Draft from Evaluating the Application Assessment:

Step 1 : Log in with their respective PLF username and password and click ‘Login’

Step 2 : After logging in to the VKP staff portal, select the module name
Step 3 : After selecting the Nano Enterprise Financing Fund, the user will be redirected to the respective home page
Step 4 : When logged in, click on the ‘NEFF Applications’ tab on the left side menu
Step 5 : Click ‘My Applications’ to view the list of applications that has been created by the ECP as well PLFs.
Step 6 : Select the application to view the applicant details more and evaluate the assessment score of the applicant
Step 7 : Click ‘Continue’ to continue to evaluate the scoring sheet of the each applicant from the draft
Step 8 : Click ‘Delete’ to delete to evaluate the scoring sheet of the each applicant from the draft and the toast message like ‘Application Deleted Successfully’

9.How to View the Application Assessment Score:

Step 1 : Log in with their respective PLF username and password and click ‘Login’

Step 2 : After logging in to the VKP staff portal, select the module name
Step 3 : After selecting the Nano Enterprise Financing Fund, the user will be redirected to the respective home page
Step 4 : When logged in, click on the ‘NEFF Applications’ tab on the left side menu
Step 5 : Click ‘My Applications’ to view the list of applications that has been created by the ECP & PLF.
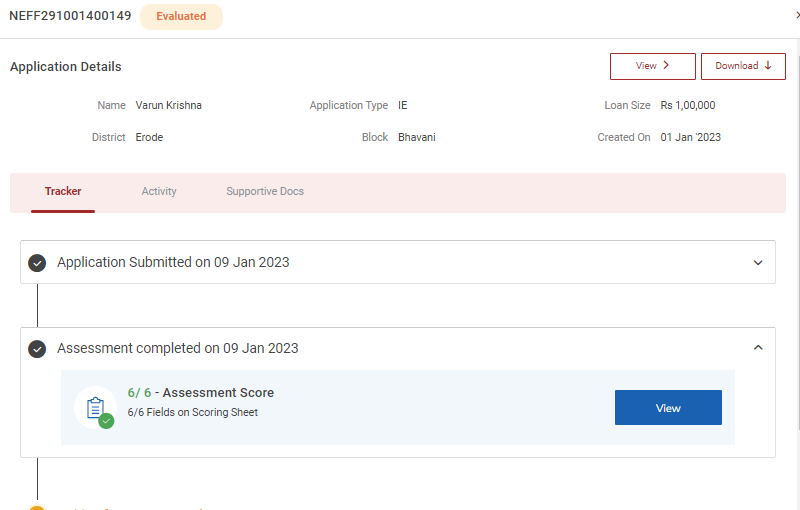
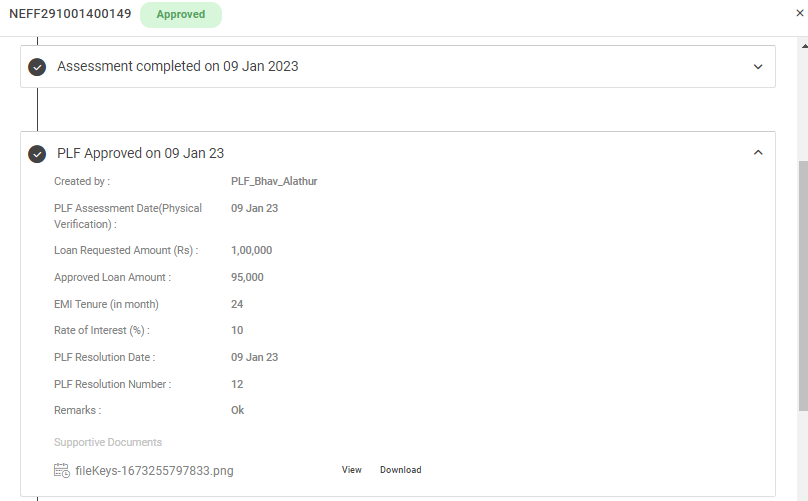
Step 6 : Select the application to view the applicant details more and assessment completed details
Step 7 : Click ‘View’ to view the scoring sheet of the each applicant
10.How to Approve the Loan Application:

Step 1 : Log in with their respective PLF username and password and click ‘Login’

Step 2 : After logging in to the VKP staff portal, select the module name
Step 3 : After selecting the Nano Enterprise Financing Fund, the user will be redirected to the respective home page
Step 4 : When logged in, click on the ‘NEFF Applications’ tab on the left side menu
Step 5 : Click ‘My Applications’ to view the list of applications that has been created by the ECP & PLF.
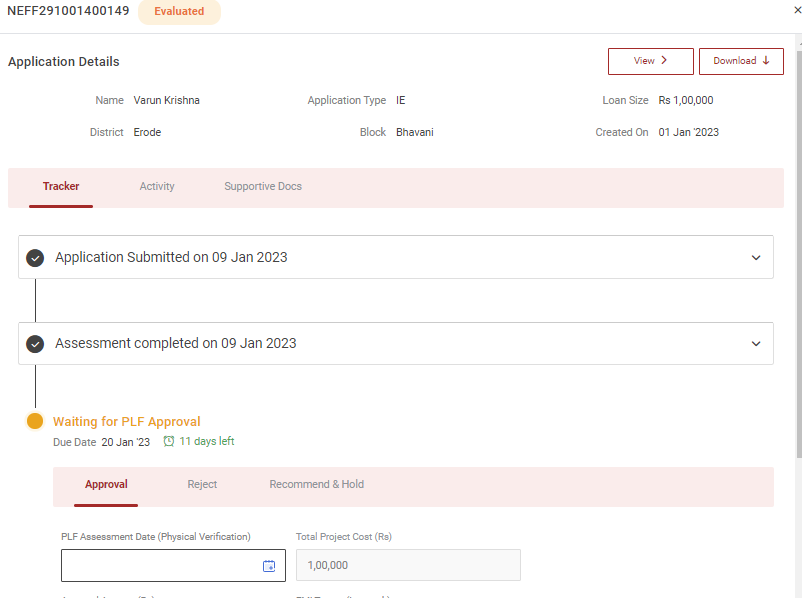
Step 6 : Select the application to view the applicant details, application submitted details and Assessment completed details in more.
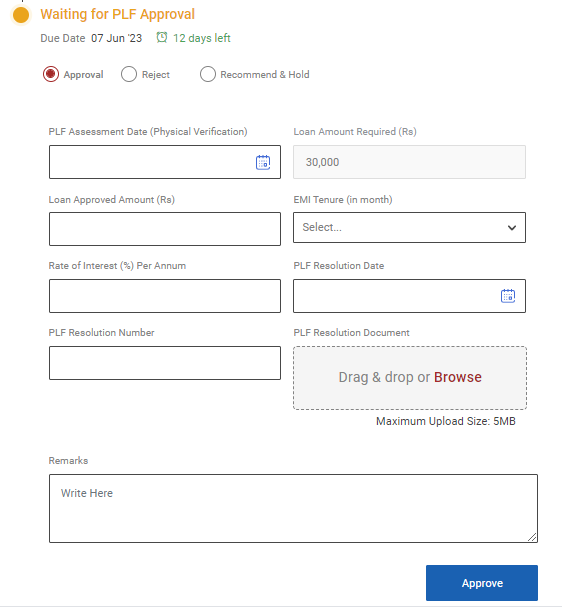
Step 7 : PLF Assessment Date (Physical Verification) : By clicking the calendar to choose the PLF assessment date.
Step 8 : Loan Amount Required : The required loan amount will be auto populated based on the loan amount
Step 9 : Loan Approved Amount: Enter the approved loan amount in the approved amount section
Step 10 : EMI Tenure: Enter the EMI tenure in months
Step 11 : Rate of Interest (%) Per Annum : Enter the rate of interest percentage in per annum.
Step 12 : PLF Resolution Date : By clicking the calendar to choose the PLF resolution date.
Step 13 : PLF Resolution Number: Enter the PLF resolution number
Step 14 : PLF Resolution Document: Click ‘Browse’ to upload the PLF resolution document
Step 15 : Remarks: Enter the remarks in the remarks section and click ‘Apply’
Step 16 : Once clicked the toast message like ‘Application Approved Successfully’ and the status of the application has been changed from ‘Evaluated’ to ‘Approved’
11.How to View the Approved Loan Application:

Step 1 : Log in with their respective PLF username and password and click ‘Login’
Step 2 : After logging in to the VKP staff portal, select the module name
Step 3 : After selecting the Nano Enterprise Financing Fund, the user will be redirected to the respective home page
Step 4 : When logged in, click on the ‘NEFF Applications’ tab on the left side menu
Step 5 : Click ‘My Applications’ to view the list of applications that has been created by the ECPs.
Step 6 : Select the application to view the applicant details more
12.How to Disburse the Approved Loan Application:
Step 1 : Log in with their respective PLF username and password and click ‘Login’
Step 2 : After logging in to the VKP staff portal, select the module name
Step 3 : After selecting the Nano Enterprise Financing Fund, the user will be redirected to the respective home page

Step 4 : When logged in, click on the ‘NEFF Applications’ tab on the left side menu
Step 5 : Click ‘My Applications’ to view the list of applications.
Step 6 : Select the application to view the applicant details more and assessment completed & PLF approved details
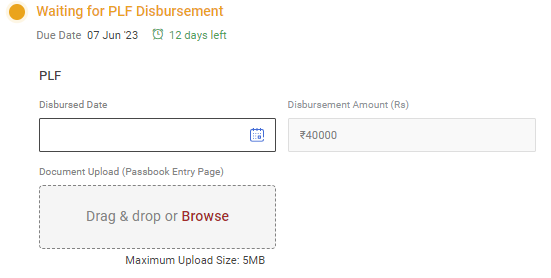
Step 7 : PLF
Step 7.1 : Disbursed Date : By Clicking the calendar, to choose the disbursed date of the applicant
Step 7.2 : Disbursed Amount : The disbursement amount will get auto populated based on the approved amount.
Step 7.3 : Document Upload : Click ‘Browse’ to upload the document of the passbook entry page and the maximum file upload size is less than 5 MB
Step 8 : SHG
Step 8.1 : Disbursed Date : By Clicking the calendar, to choose the disbursed date of the applicant
Step 8.2 : Moratorium Period : By Clicking the dropdown to choose the moratorium period of the applicant
Step 8.3 : EMI Start Date : By Clicking the calendar to choose the starting date of the EMI.
Step 8.4 : Disbursed Amount : The disbursement amount will get auto populated based on the approved amount.
Step 8.5 : Document Upload : Click ‘Browse’ to upload the document of the passbook entry page and the maximum file upload size is less than 5 MB
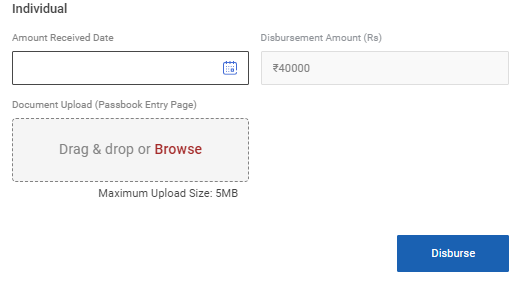
Step 9 : Individual
Step 9.1 : Amount Received Date : By Clicking the calendar, to choose the amount received date of the applicant
Step 9.2 : Disbursed Amount : The disbursement amount will get auto populated based on the approved amount.
Step 9.3 : Document Upload : Click ‘Browse’ to upload the document of the passbook entry page and the maximum file upload size is less than 5 MB
Step 10 : Click ‘Disburse’ to disburse the loan application and the toast message received like ‘Application Disbursed Successfully’

Step 11 : Once the application has been disbursed, the status of the application has been moved from ‘Open’ to ‘Disbursed’ tab and the application status has changed from ‘Approved’ to ‘Disbursed’
13.How to View the Disbursed Loan & Activity Details of the Application:
Step 1 : Log in with their respective PLF username and password and click ‘Login’

Step 2 : After logging in to the VKP staff portal, select the module name
Step 3 : After selecting the Nano Enterprise Financing Fund, the user will be redirected to the respective home page
Step 4 : When logged in, click on the ‘NEFF Applications’ tab on the left side menu
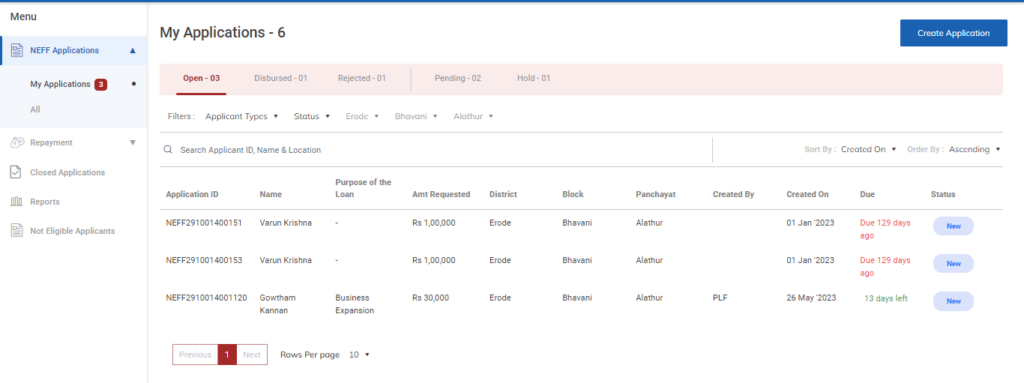
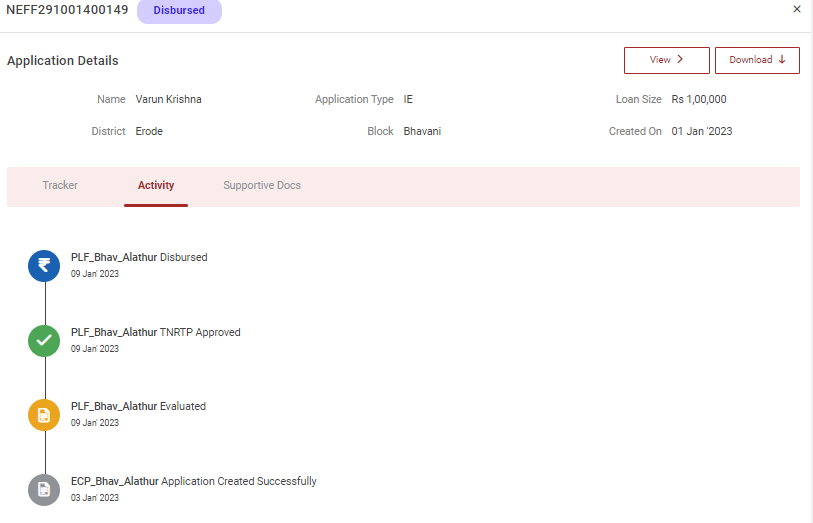
Step 5 : Click ‘Disbursed’ to view the list of the application disbursed loan by the PLF.
Step 6 : The PLF can view the application ID, Name, Purpose of the loan, Requested amount, District, Block, Panchayat, Created by, Created On, Due and the status of the applicant.
Step 7 : Select the application to view the applicant disbursed loan amount in detail under the tracker section.
14.How to Recommended & Hold the Loan Application:

Step 1 : Log in with their respective PLF username and password and click ‘Login’

Step 2 : After logging in to the VKP staff portal, select the module name
Step 3 : After selecting the Nano Enterprise Financing Fund, the user will be redirected to the respective home page

Step 4 : When logged in, click on the ‘NEFF Applications’ tab on the left side menu
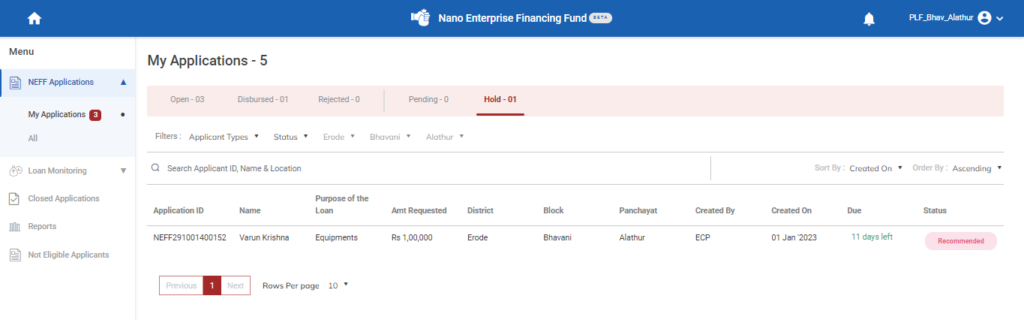
Step 5 : Click ‘My Applications’ to view the list of applications that has been created by the ECPs.
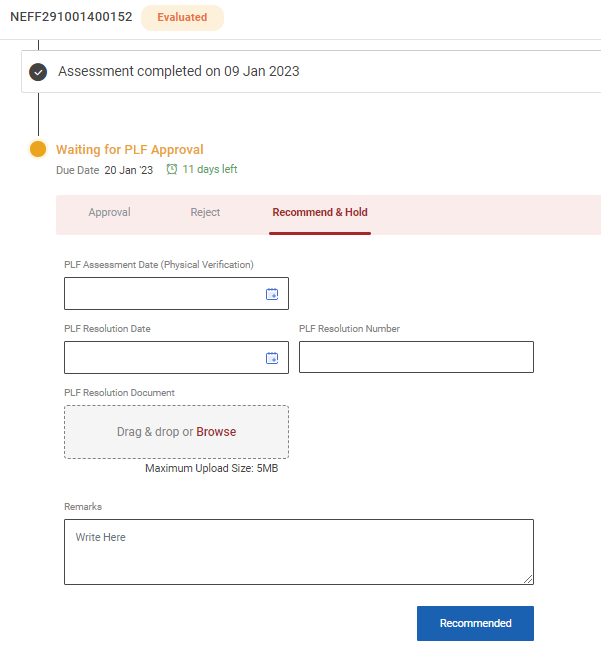
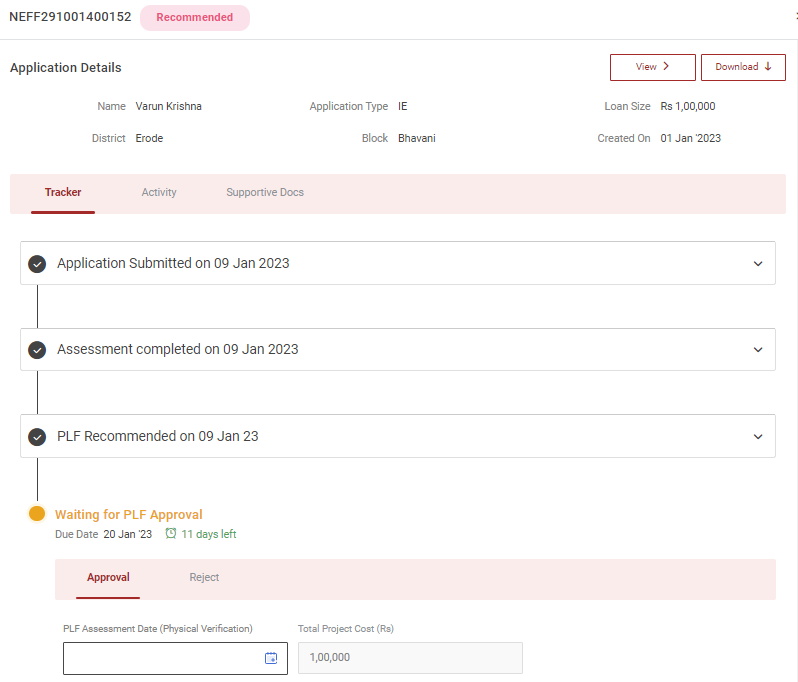
Step 6 : Click ‘Recommended & Hold’ to hold the application.
Step 6.1 : PLF Assessment Date : By clicking the calendar, to choose the PLF Assessment date.
Step 6.2 : PLF Resolution Date : By clicking the calendar to choose the PLF resolution date.
Step 6.3 : PLF Resolution Number: Enter the PLF resolution number
Step 6.4 : PLF Resolution Document: Click ‘Browse’ to upload the PLF resolution document and the maximum file upload size is 5 MB
Step 6.5 : Remarks: Enter the remarks in the remarks section and click ‘Recommended’
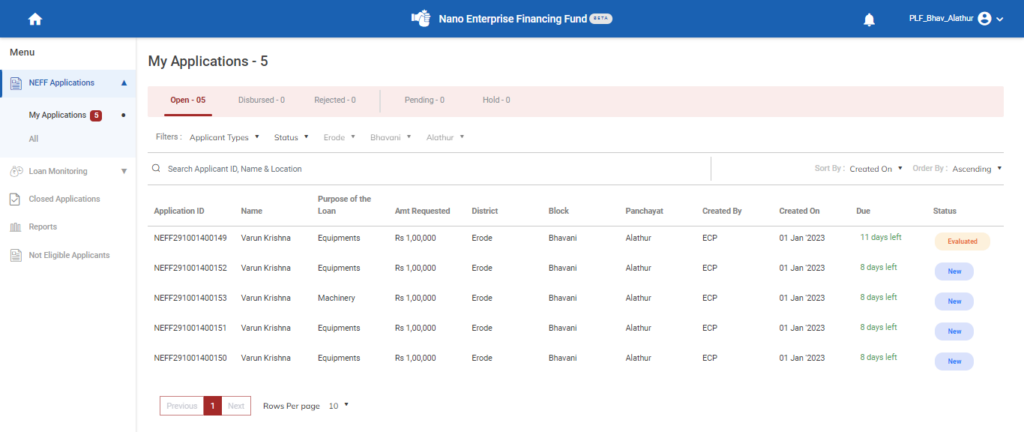
Step 7 : Once the PLF submitted the Recommendation the toast message will appear like ‘Application Pending’
Step 8 : The application will be moved from ‘Open’ to ‘Hold’ tab
15.How to View the Hold Loan & Activity Details of the Application:
Step 1 : Log in with their respective PLF username and password and click ‘Login’

Step 2 : After logging in to the VKP staff portal, select the module name
Step 3 : After selecting the Nano Enterprise Financing Fund, the user will be redirected to the respective home page
Step 4 : When logged in, click on the ‘NEFF Applications’ tab on the left side menu
Step 5 : Click ‘Hold’ to view the list of the hold application loan by the PLF.
Step 6 : The PLF can view the application ID, Name, Purpose of the loan, Requested amount, District, Block, Panchayat, Created by, Created On, Due and the status of the applicant.
Step 7 : Select the application to view the hold application loan in detail under the tracker section.
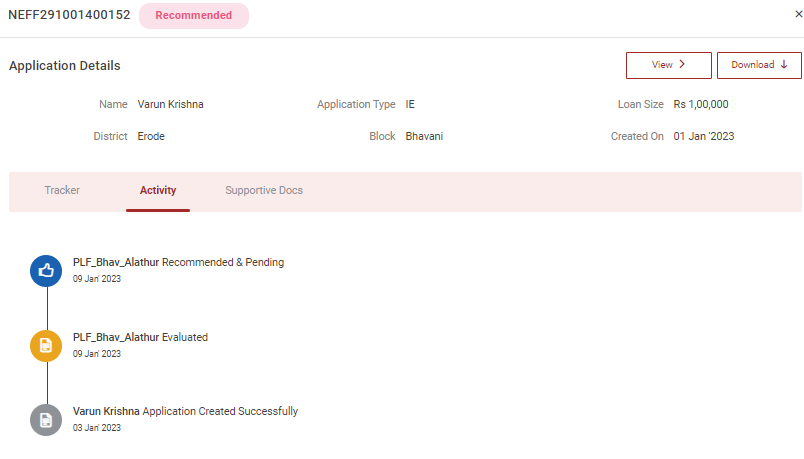
Step 8 : To view the activity tracker of the application click ‘Activity’ tab to view the application activity tracker details
16.How to Reject the Loan Application:
Step 1 : Log in with their respective PLF username and password and click ‘Login’

Step 2 : After logging in to the VKP staff portal, select the module name
Step 3 : After selecting the Nano Enterprise Financing Fund, the user will be redirected to the respective home page
Step 4 : When logged in, click on the ‘NEFF Applications’ tab on the left side menu
Step 5 : Click ‘My Applications’ to view the list of applications that has been created by the ECPs.
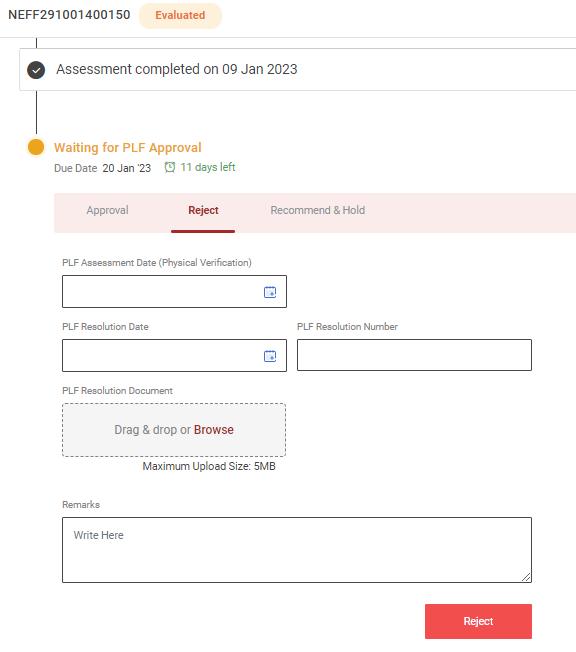
Step 6 : Click ‘Reject’ to reject the application
Step 6.1 : PLF Assessment Date : By clicking the calendar, to choose the PLF Assessment date.
Step 6.2 : PLF Resolution Date : By clicking the calendar to choose the PLF resolution date.
Step 6.3 : PLF Resolution Number: Enter the PLF resolution number
Step 6.4 : PLF Resolution Document: Click ‘Browse’ to upload the PLF resolution document and the maximum file upload size is 5 MB
Step 6.5 : Remarks: Enter the remarks in the remarks section and click ‘Reject’

Step 7 : Once the PLF rejected the application the toast message will appear like ‘Application Rejected Successfully’
Step 8 : The application will be moved from ‘Open’ to ‘Rejected’ section
17. How to View the Rejected & Activity Details of the Loan Application:

Step 1 : Log in with their respective PLF username and password and click ‘Login’

Step 2 : After logging in to the VKP staff portal, select the module name
Step 3 : After selecting the Nano Enterprise Financing Fund, the user will be redirected to the respective home page
Step 4 : When logged in, click on the ‘NEFF Applications’ tab on the left side menu
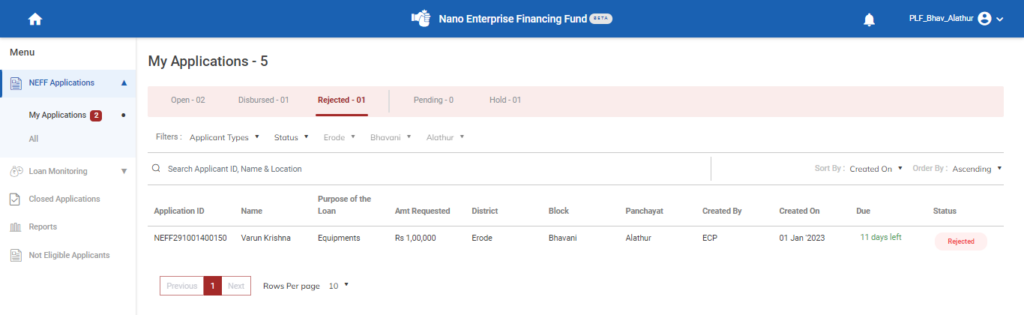
Step 5 : Click ‘Rejected’ to view the list of the rejected application loan by the PLF.
Step 6 : The PLF can view the application ID, Name, Purpose of the loan, Requested amount, District, Block, Panchayat, Created by, Created On, Due and the status of the applicant.
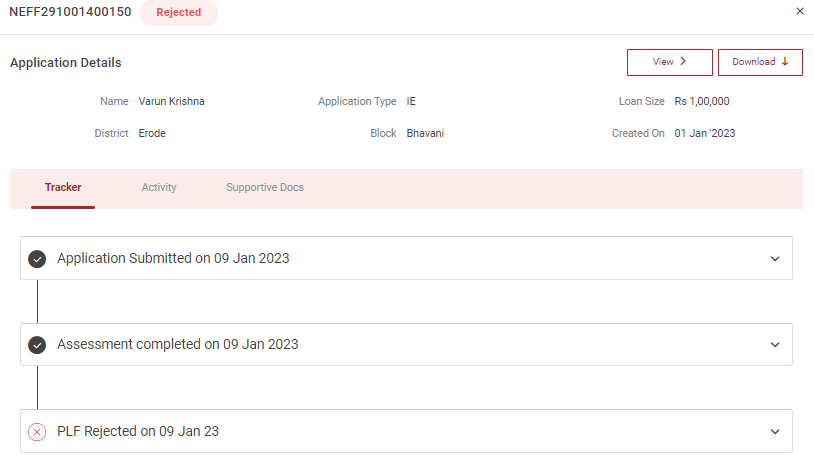
Step 8 : Select the application to view the rejected application loan in detail under the tracker section.
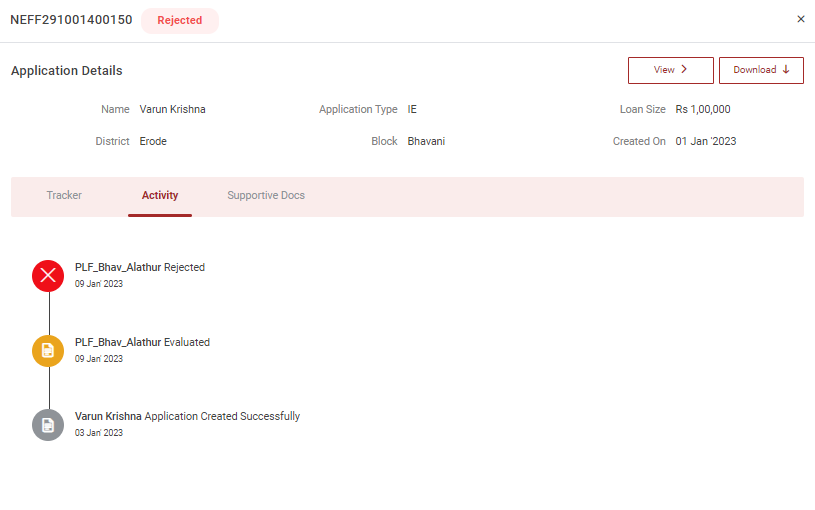
Step 9 : To view the activity tracker of the application click ‘Activity’ tab to view the application activity tracker details
18.How to Check the Not Eligible Loan Application:

Step 1 : Log in with their respective PLF username and password and click ‘Login’
Step 2 : After logging in to the VKP staff portal, select the module name
Step 3 : After selecting the Nano Enterprise Financing Fund, the user will be redirected to the respective home page

Step 4 : When logged in, click on the ‘Not Eligible Applicants’ tab on the left side menu
Step 5 : The list of not eligible applicants will be displayed on the page
Step 6 : Download as XLS : To download the report as excel click download as XLS
Step 7 : Download as PDF : To download the report as pdf click download as PDF
19.How to Update the Repayment in the Loan Application:

Step 1 : Log in with their respective PLF username and password and click ‘Login’

Step 2 : After logging in to the VKP staff portal, select the module name
Step 3 : After selecting the Nano Enterprise Financing Fund, the user will be redirected to the respective home page
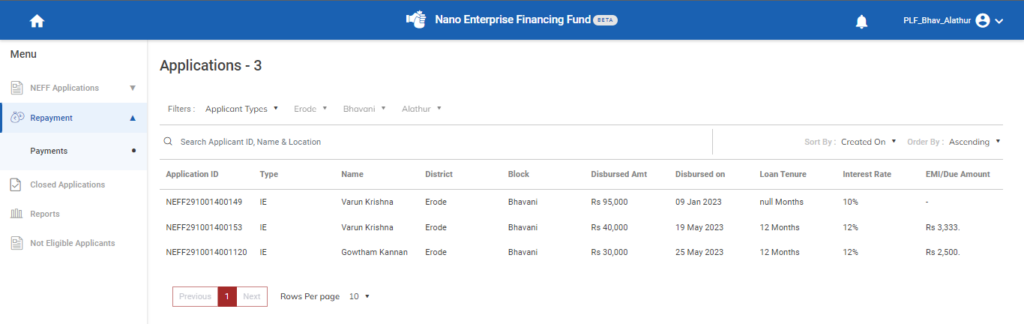
Step 4 : When logged in, click on the ‘Repayment’ tab on the left side menu under the repayment tab click ‘Payment’
Step 5 : Once the loan has been disbursed by the PLF, the list of applications will be displayed under the tab. The PLF can view the application ID, type, Name, District, Block, Disbursed Date, EMI Tenure,Interest rate and EMI/Due amount in details
Step 6 : Select the application it will redirect to the application detail page
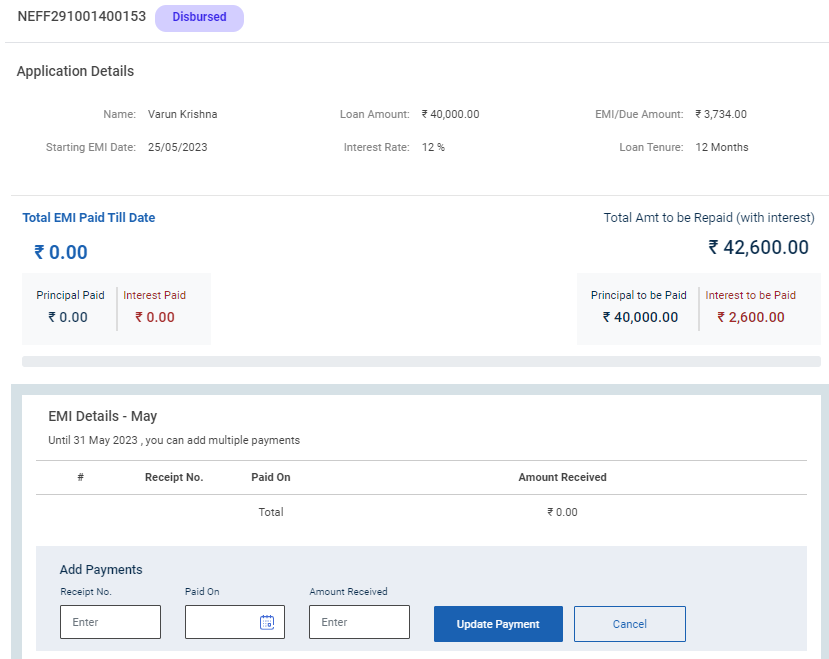
Step 7 : To Add Payments : To update the monthly EMI amount enter the receipt number, Paid on date and amount received number and click ‘Update Payment’ Once the PLF click update payment we received the toast message like ‘Success’
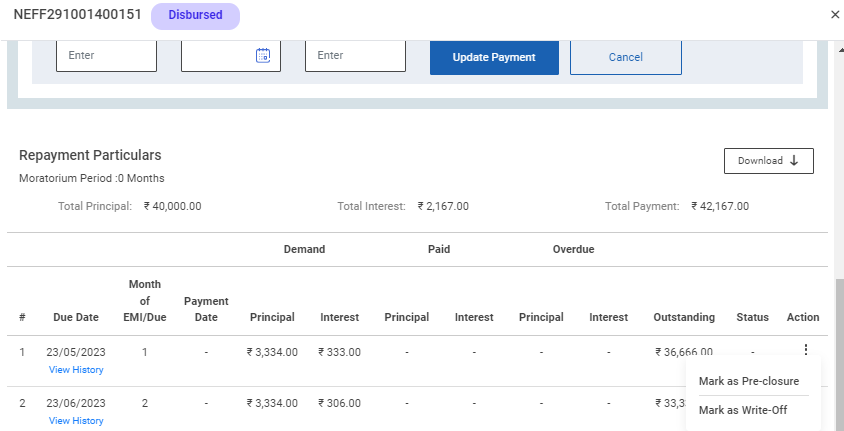
Step 8 : Once the PLF staff updated the payment the details will be reflected in the repayment tab. Click ‘View History’ to view the repayment details history
Step 9 : To mark the loan as Preclosure click the action tab and select ‘Mark as Preclosure’
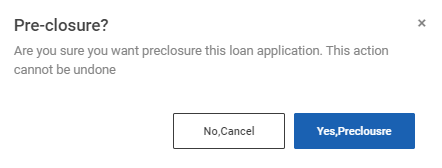
Step 10: A Preclosure confirmation will appear choose the type of writeoff and enter the reason click ‘Yes Preclosure’ or choose ‘No Cancel’

Step 11: Once the PLF staff click ‘Yes Preclosure’ the staff received the toast message like ‘Loan Pre-Closed Successfully’
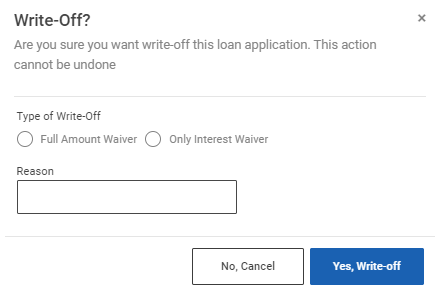
Step 12 : To mark the loan as writeoff click the action tab and select ‘Mark as Writeoff’
Step 13: A writeoff confirmation will appear choose the type of writeoff and enter the reason click ‘Yes Write-off’ or choose ‘No Cancel’

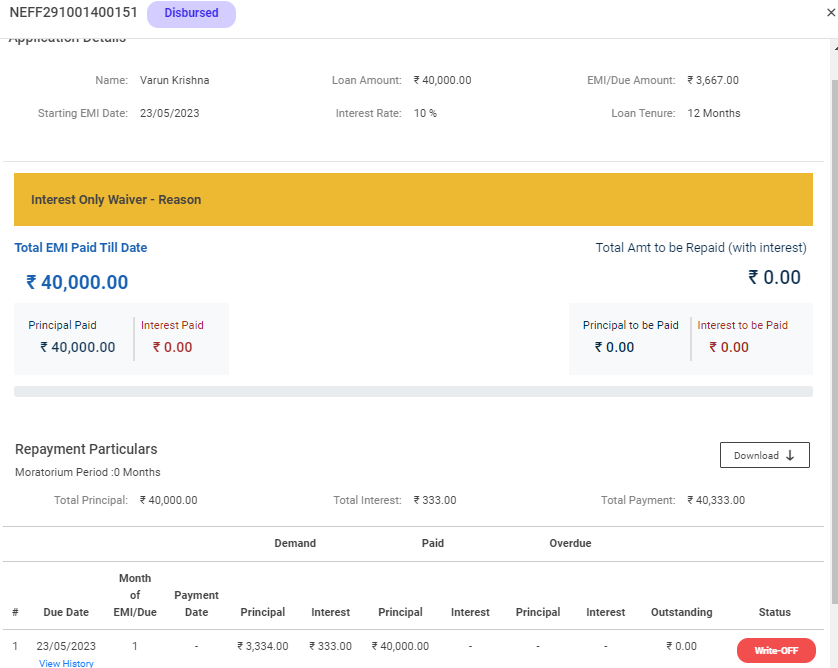
Step 14: Once the PLF staff click ‘Yes Write-off’ the staff received the toast message like ‘Loan Closed Successfully’
20.How to Check the Closed Application:

Step 1 : Log in with their respective PLF username and password and click ‘Login’
Step 2 : After logging in to the VKP staff portal, select the module name
Step 3 : After selecting the Nano Enterprise Financing Fund, the user will be redirected to the respective home page
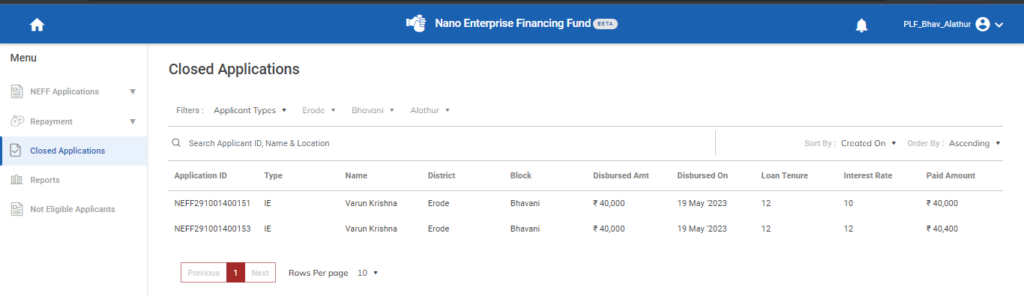
Step 4 : When logged in, click on the ‘Closed Application’ tab on the left side menu
Step 5 : Once the loan has been closed by the PLF, the list of applications will be displayed under the tab. The PLF can view the application ID, type, Name, District, Block, Disbursed amount, Disbursed on,Interest rate loan tenure and paid amount in details
Step 6 : Select the application it will redirect to the application detail page
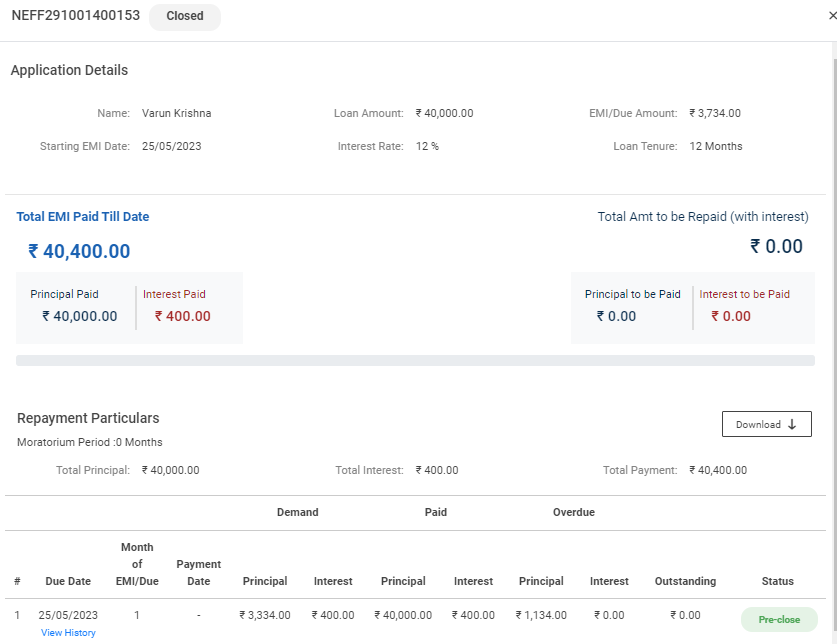
Step 7 : To view the application details more